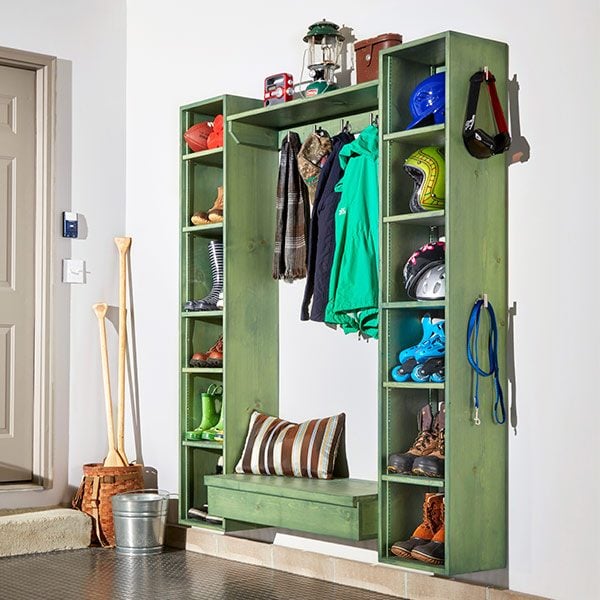

A hinged lid provides easy access to the compartment under the seat. It"s a perfect place to store hats, gloves and all kinds of other small stuff.
All of the parts for this project are cut from standard pine boards, so you don"t need to haul big sheets of plywood home or worry about finishing exposed plywood edges. You do need to choose your lumber carefully, though. The wide pine planks tend to cup and warp, so look for boards that are flat


Cut the boards to length, following the Cutting List. Running your circular saw along a large square ensures straight, square cuts. Parts F, G and N also have to be ripped to width. You can do this with your circular saw or on a table saw.
Start by choosing the four straightest, best-looking 1x12s for the shelf sides. Cut these to 72 in. Then use the Cutting List to cut the remaining parts (Photo 1). If you"re lucky enough to own a sliding miter saw, you can use it to cut the parts to length. Otherwise a circular saw will work fine. The boards for three sides of the bench and one of the bench bottoms have to be ripped a little narrower. You can use a circular saw or table saw for this. After cutting the lumber, sand it with 100-grit sandpaper to remove any marks and smooth out any ripples left from the milling process. A random orbital sander works great for this, but you could hand-sand if you don"t own a power sander.


Clamp the lid and the back rail together as shown. Center the hinge on the two lid parts and attach it with four screws, two on each end. Then drill 5/64-in. pilot holes and drive in the remaining screws.
We joined the parts with 2-in. trimhead screws, recessing them slightly to make room for the wood filler. But you can substitute regular screws if you don"t mind the look of screw heads. Even though our screws had self-drilling tips, for extra insurance against splitting the wood we drilled 1/8-in. pilot holes for the screws.
Clamping the parts together before you drive in the screws makes it easier to keep the parts aligned. And if the wood is a little twisted or cupped, you can flatten it with clamps before driving the screws. We also added three cleats to the bottom of the seat board to hold it flat. Spread wood glue on these cleats and attach them with 1-1/4-in. screws.
We chose a continuous hinge for the lid. Cut the hinge to 35-5/8 in. with a hacksaw. Since you"ll also have to cut all the metal shelf standards to fit, buy a sharp, new 32-tooth blade. Photo 6 shows how to attach the hinge. Finish up the assembly by cutting and attaching the metal shelf standards (Photo 7).

Locate the wall studs with a stud finder and mark them with strips of masking tape. Install a 1x2 ledger with the top edge 7-1/2 in. above the floor to support the shelves and seat while you install them.
First, locate the wall studs. An electronic stud finder makes it easy. Mark the stud locations with strips of masking tape. Now choose a position for the project that will allow you to attach each of the 12-in.-wide shelf units to at least one stud. Next, screw the temporary 1x2 ledger to the studs, making sure it"s level and the top is located 7-1/2 in. from the floor (Photo 8). The ledger supports the shelf units and bench while you attach them to the wall. Photos 9 – 13 show the installation steps. Finish up by choosing the locations for the adjustable shelves and installing them with the shelf clips. We prefinished the project with Behr Semi-Transparent Waterproofing Wood Stain.
Original article and pictures take http://www.familyhandyman.com/storage-organization/diy-mudroom-storage-cubby-plans/view-all site
">
Комментариев нет:
Отправить комментарий