While wontons exists in China in multitude of variations, a typical American-Chinese wonton would be filled with pork or shrimp and boiled in a meat-based broth, or fried and served with a dipping sauce. I never tried to make wontons at home until now.
Little did I know how easy they are to make, and easier still to make them vegetarian or even vegan. While most wonton wrappers contain egg, it is possible to find egg-free wrappers, just read the label carefully.
Alternatively, you could make the wrappers yourself, which I have not tried yet, but is something that I will endeavour to do soon and report back. Update: I tried making wonton wrappers at home and they were super easy! Much easier than making regular pasta and you can be sure that they’re vegan. Check out the recipe and instructions here.
The trickiest part about making wontons is ensuring that no air remains trapped inside. The contrary results in ballooning wontons which float rather than sink and risk exploding before they have cooked properly.
I must admit that I had a couple of these on my first attempt. It’s important to run your finger over the filling and try to press out all the air when sealing the wonton.
As for the wrapping style, many shapes exist. Have a look around the internet and choose whichever you find the most aesthetically pleasing. The good thing about making wontons at home is that you can make a big batch and then freeze the leftovers to use later.
Just place them in a single layer on a sheet pan and place them in the freezer. Once frozen, gather them up and place them in a freezer bag. You can then simple drop the frozen wontons directly into your boiling soup base.
1 pkg vegan wonton wrappers (see note)
5 dried shiitake mushrooms
2 cups water
100 grams (3.5 oz) extra-firm tofu, pressed
2 garlic cloves, minced
1 teaspoon ginger, grated
1 tablespoon soy sauce
1/2 teaspoon sesame oil
1 green onion, chopped
1 garlic clove, minced
1 teaspoon ginger, grated
4 cups vegetable stock
2 cups mushroom soaking liquid
1 tablespoon rice vinegar
3 tablespoons soy sauce
2 cups cabbage, shredded
2 green onions, chopped
Bring 2 cups of water to a boil. Remove from heat and add the dried shiitake mushrooms. Allow to rehydrate for 30 minutes. Once re-hydrated, chop mushrooms into small pieces. Reserve mushroom soaking liquid.
Place tofu, ginger,
and garlic in a food processor and pulse until coarsely ground. Place tofu in a bowl and add the chopped mushrooms, soy sauce, sesame oil, and green onion.
Take one wonton wrapper and lay it out in a diamond shape in front of you. Place 1 teaspoon of the filling in the middle of the wrapper, dip your finger in a little water and moisten the top two edges of the wrapper. Fold the bottom corner up to meet the top corner, making a triangle. Gently press down on the filling to squeeze out the air, then press the edges together to seal. Take the left and right sides of the triangle and pull them down and towards each other, making a loop at the bottom of the wonton. Moisten the edges and press to seal.
Combine the vegetable stock and mushroom soaking liquid in a large pot and bring to a boil. Add the garlic and ginger. Add the wontons and reduce the heat to a simmer. Simmer until the wontons float, about 5 minutes. Remove from heat and stir in the rice vinegar, soy sauce, and cabbage. Serve in bowls garnished with green onion.
Note: If you can’t find vegan wonton wrappers in stores, follow this link for the recipe and instructions on how to make your own.
Original article and pictures take http://cilantroandcitronella.com/vegan-wonton-soup/ site
When we left off, we bought, cut, sanded and stained the wood and then constructed the base. It just needed the top. Well, there were some issues we ran into with the plan we got off Ana-White.com. It may have had something to do with the fact that we were making this an outdoor table (the original plan is for an indoor table) and we also were making it longer…thus dealing with wood that was more prone to have warping. So we had some tweaks to the original plan….let’s get into that first.
Original plan length of entire table – 96″ Our plan length of entire table – 122″ (would fit two 55″ benches on either side and leave 4″ between the benches and each other and the legs)
The 7 1×6 boards that go on the top add up to 38.5″ (7×5.5″) which is exactly how long the breadboard (the perpendicular wood at the head and foot of table) is cut. Well, our 1×6’s wouldn’t fit and the breadboard was too short. So we ripped an extra half inch off both 1×6’s that are on the outsides (closest to the edge of the table) so that we had a little wiggle room. That allowed for gaps between the table top planks which will allow water to drain faster!
The unstained supports underneath (visable above) needed extras….vs. 10, we cut 16 total (only two got stained) and we attached two extras closest to the foot and the head of the table
Varnish Patio Table
So now the table is constructed! Bring on the guacamole!
Varnish Patio Table
I love how the benches fit perfectly. I think eventually we may build a center support leg system because already we noticed that the center is starting to warp a little. I always say “the more legs the merrier”.
Varnish Patio Table
But today’s post isn’t really to show you anything interesting or fun, remember?! So wipe that image of lots of legs outta your mind. I know you were – you MagicMikeObsessors you.
Varnish Patio Table
Today’s journey is a little chronicle about finally giving in to the woo’s of varnish. This is my first time. Be gentle.
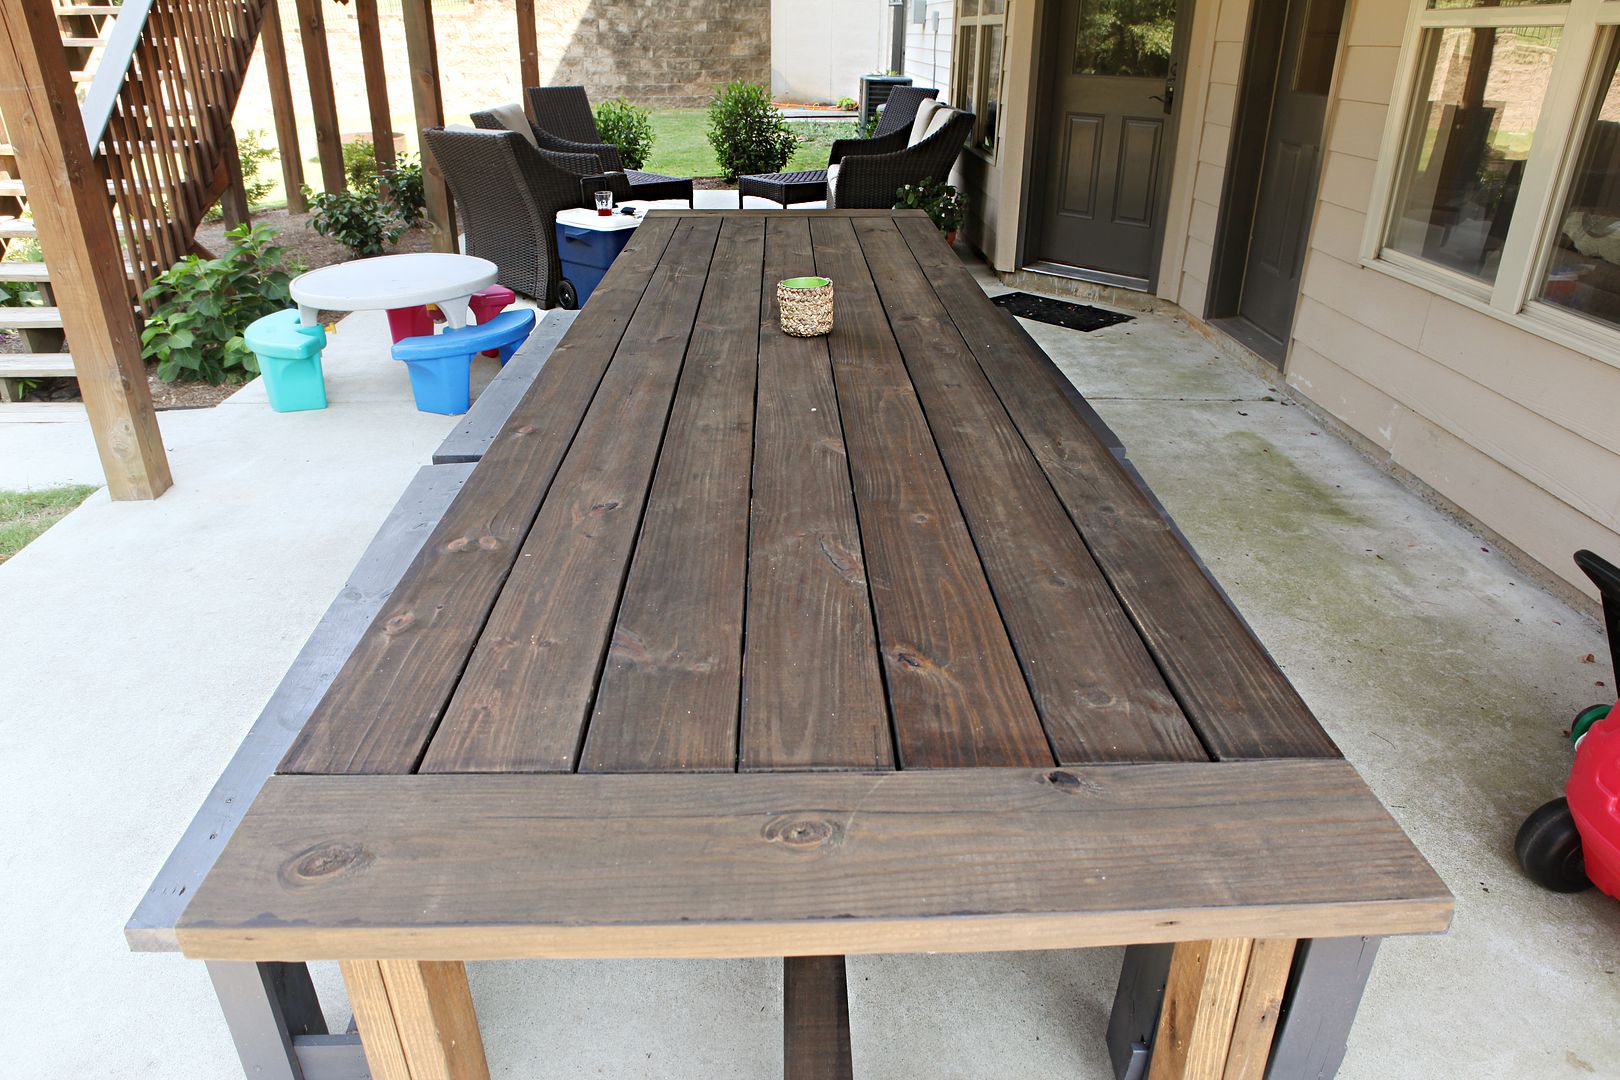
As you can see, the table was stained a rich dark finish. But it really wasn’t protected from the
elements (aka Will & the weather) and it didn’t really have any sheen…it looked, well, dry. And since this table weighs about ten thousand two hundred and thirty seven pounds, it’s not going anywhere…and needs a way to keep it clean, protect it from water and fading, and also give it a richer finish. Varnish Patio Table
I’ve heard the best way to go was to try out varnish. Special thanks to Lowe’s Creative Ideas Magazine for supplying the Spar Varnish. It actually boasts excellent UV protection, weather resistence and comes in a variety of finishes. I went with the semi-gloss because I knew that a heavy shine would look a little odd with such a rustic piece of furniture.
Varnish Patio Table
I used a foam brush to apply it and surprisingly – it is WAY easier than poly. First – it is kinda milky. and thin. and when you wipe it on, it does look weird – like whitish and wet…but it dries super clear (so don’t freak out like me). Also, it doesn’t drip as much as a poly…so you can do very thin shmears. Jer said that it reminded him of just painting with water.
Varnish Patio Table
After it dries, it looks really good. Not a huge huge difference – but definitely more moisturized. No gator skin here, people!
Varnish Patio Table
We actually did three coats (they took about thirty minutes each)….and I love the finish. I would definitely try this stuff again for outdoor furniture protection. So that is my varnish romance. Yup…see how unmiserable I am in the Instagram update photo? It must be true love…
Just to give you guys some warning – this is how our deck currently looks…
Varnish Patio Table
And this is how I want our deck to look this month (see how good I am at setting goals for Jeremy)….
Varnish Patio Table
So there you have it folks – my love story with varnish – do you have one? ever given the stuff a chance?
Also – I had the forethought to write down the cut list for this giant table….would anyone want me to post it at the end of this here post? I am lazy so I thought I’d ask first YOU ASKED FOR THE CUT LIST – HERE YOU GO….DON’T DIE SWEETIE PIE
Varnish Patio Table
p.s. I am completely addicted to Instagram….I’m officially hooked. I owe you one John & Sherry! And if you wanna follow me, I am “bowerpowerblog” and you get to see lots of photos of Will, me eating random stuff, and sneak peeks of projects
Original article and pictures take http://www.bowerpowerblog.com/2012/07/varnish-virgin/ site
Vanity Fair’s Celeb Whisperer on How Cover Stories Really Happen
Krista Smith is the reigning talent forecaster in media for a reason.
Very few people actually earn the right to say, ‘I knew them before they were famous.’ And unless you’re Kanye West, even fewer can think to utter the words ‘I helped make them famous’ without eliciting an eye roll. But when you’re single-handedly responsible for catapulting the careers of industry unknowns into superstars, we’ll give you a get-out-of-jail-free card.
No one deserves that exemption more than Krista Smith, Vanity Fair’s West Coast Executive Editor, aka Hollywood’s humble Fairy Godmother who’s not only behind the success stories of rising talent, but also rubbing elbows with every celeb on the planet. Smith won’t grant you three wishes, but she’ll definitely take a meeting, suss out whether you’ve got that ‘it’ quality, and then crown you as the magazine’s newest member of Vanities—the most exclusive who’s-who editorial club which has become the industry’s seal of approval and bible for directors, writers, bookers, casting agents….and on, and on.
Between helping produce VF’s annual Hollywood issue, contributing to the magazine’s New Establishment Summit, interviewing titans of the screen, running around at the Oscars, Sundance, TIFF, and beyond, Smith has become what we like to call a renaissance journalist who masters it all with her self-proclaimed “high pain tolerance.”
How she became a part of the Vanity Fair family:
“Five days after I graduated from Colorado College I was already in New York. I couldn’t wait to get there! I didn’t go to journalism school, I studied English. But for me, I always loved the medium—I also always enjoyed movies, the theater, and I constantly read magazines. I actually never thought I would work in magazines, and I didn’t even know at that point that it was possible. My dad was a scientist and my mom was a docent at an art museum.
“When I was first in New York I interned at the Wooster Group [an experimental theater company]. I always loved that world and thought maybe I would be a Broadway producer or something. It definitely spoke to me. I started as a fact checker for a minute at Vanity Fair on a freelance basis, but then I proved myself. I used to do all of the research for Annie Leibovitz and prepare these really intricate packages for her at the time when she really only photographed for Vanity Fair. She loved the research packets I did, so that kind of led me to Jane Sarkin, who worked in features and did the covers and all the Hollywood stuff. I became Jane"s assistant, and then later moved out to Los Angeles when there were regime changes and the person out here left. I was bi-coastal between N.Y. and L.A. for really a long time until I had kids.”
Graydon knows best:
“I’m dyslexic, so it’s deeply ironic and it continues to be deeply ironic that I work at a magazine and I actually write often for it. But I really credit Graydon Carter for that because he said to me at one point, ‘Just write like you talk and don’t worry about the rest of the stuff. You could learn that.’ He was the person who gave me that confidence.”
On writing and her first pinch-me moments:
“Reese Witherspoon was the first ever cover story I wrote, but Gena Rowlands was my first interview. When I was coming into really appreciating cinema, John Cassevetes landed on me very strongly. I would watch Faces, [A] Woman Under [the] Influence, and Husbands. These movies were so interesting and incredible and the actors, like Gena, were so dynamic. I just thought (and I still think!) she is one of the most glamorous actresses. That was the first time I’d ever written anything for the magazine. I went up to the house where they actually filmed a lot of the movies, in L.A., over here in [the] Laurel Canyon area and she was lovely. I was terrified.”
Vanities over van-ity:
“I think that early on I was good at talking to people and sensing who had the magic potion to actually make it in this business and have the stamina to go over time—that is really what it takes. And I love encouraging new talent. I kinda feel that [the] Vanities [section] is the second cover of the magazine, and there are only twelve a year. It’s very competitive, and once you’re chosen you become part of the Vanity Fair family. I feel that we invest that time in you and we want to help your career. It’s a really special place, and when you look at the track record it is kinda amazing.
“You land on talent when they are just starting out, but it’s definitely not
easy to stay relevant past a certain point. Your personality feeds into your success. Working in film and television, it’s hard, long hours—shooting nights, freezing cold weather—it’s grueling…a lot of it is very, very challenging. Are you someone the crew wants to work with all the time? This is one of the hardest businesses where you could put in so much energy and get no return for years and then suddenly you get it.”
The ABCs of good reporting:
“I love that there are so many more outlets, and so many more voices can be heard. I do think if you work hard, and you put in the time, effort and the hours, there are so many more opportunities for you than there were when I was coming up. I didn’t go to journalism school; it wasn’t a reality since I couldn’t afford it. But fact-checking really taught me so much. I fact-checked Maureen Orth and Christopher Hitchens and learned so much through these huge titans of journalism—reading what they read, and going through legal and listening to their tapes and going through it gave me a sense of how to tell a story, how to tell it correctly, and the importance of a narrative.
“I also think there’s this armchair journalism and this loosey-goosey fact-checking. I am kinda old-new new-old and I’ll ride my assistants very hard about it: ‘Okay, so you Googled it, now what? You couldn’t find it on Google, how else are you going to find it?’ I always try to stress maybe it’s not always there. The answer isn’t always on your computer, sometimes you have to pick up the phone and do some good old-fashioned gumshoe reporting. Whether I’m interviewing someone for three minutes or meeting someone in my office, I’ve done the background check. I really believe that you can’t be too prepared.”
It’s not always glamorous—but it’s always interesting:
“One of the things that’s most exciting and interesting about the job, is that my day is always fluctuating—seeing movies, going to meetings, the Hollywood parties and obviously the Oscars, and representing the magazine out here on the west Coast the best I can since I’m the only person out here. So much content is shot out in L.A. because of the weather and the talent, so there are a lot of processes. You have to come up with the idea. Who should we shoot and why? What is the concept? We work with the Style Director, the Creative Director, the photographer, and you have to work with the talent. What are they comfortable with? You have to know when to push them, when not to push them. When hair and makeup is going too long. When hair and makeup is not right, when it’s just right. When the photographer is spending too long on the shot. It’s not like one big champagne-and-caviar party, which I know people like to think it is. I have that one picture with Madonna from when I was an assistant and it was, like, 200 degrees when we were on Long Island. It was one of the shots for the cover, and I’m holding balloons. She was like, ‘Hold my gum.’ Madonna did not disappoint. There are moments when you see it all happening and you think, ‘Oh my god, this is huge, I cannot wait for people to see this!’’
How she snagged that Cher sign for her office space:
“Cher hadn’t really been in the public eye for a while and I drove all the way out to Malibu where she lived for the first interview around the time of Burlesque. I remember she sat down and I couldn’t believe it was Cher. She was dressed so casually, almost like a teenager in hoodie and jeans. First thing she said to me was, ‘How are we going to talk for two hours? What are we going to say? I haven’t done an interview in twenty years!’ I remember saying, ‘Well, let’s just start with thirty minutes and see how we do.’ I left there at, like, one in the morning! We got along really, really well, and she invited me to her show in Vegas, to fly on the plane with her, and then to come see her after the show and I of course was at her Vanity Fair photo shoot as I normally would be. It was with Norman Jean Roy and we had this Cher sign made for her. There was some talk about possibly being able to auction it off, but it was super fragile, so they had to move it out of the studio and they could only move it once. Otherwise it was going to have to be trashed. I said, ‘No, no, no. Move it into this office!’ It’s a great show piece. It’s a funny little thing to look at that is kind of ridiculous but also kind of fabulous at the same time.”
Nothing beats the journalistic rush:
“The most fun is the climb up the mountain, not sitting on top of the mountain. This ties into the millennial generation—I could do a stand-up routine on millennials—but I have some great millennials and truly believe in them. They are going to be taking care of me when I’m old [laughs]. But everyone wants everything right now, and you can’t blame them because it is a culture of instant gratification. I want to watch this show, I want to watch without commercials, I want this delivered to my door. With the swipe of a finger we forget that most of the fun and most of the learning and the stories that you get come from the struggle, they come from the climb up, from ‘How did we end up with this great picture?’ ‘Oh, this happened and we didn’t know what to do with that, with X, Y and Z.’ I always believe there is so much fun to be had in hard work, you know?
“Even in your everyday life, there are funny stories from when your car broke down and what you were going to do—what seemed horrible in the moment becomes the joy afterwards. This is just how I live my life. I really believe it. The fun is in the collaborative, in the struggle, that’s where I feel the stories and the magic happen. Like I always tell my assistants, ‘Don’t worry about sitting at the top, just enjoy the process.’”
Using Your Table Saw to Cut the Four Basic Rabbet Casework Joints
The author got ahold of a pre-production Delta Unisaw to show off the different kinds of rabbet joints you can cut in the shop, and it performed extremely well.
Whether you’re building boxes, drawers or casework, these four sturdy and self-aligning rabbet joints sure come in handy. You can make them all on a table saw.
1. Overlap Rabbet
Overlap rabbets are made from one large rabbets which is both simple to make and works well with many different types of projects.
One big rabbet serves many project applications in this overlapping joint.
Measure out the thickness of rabbet cuts using the thickness of the mating part, use that thickness to set the distance between the rip fence and the blade.
An overlap rabbet joint consists of one rabbet with a tongue that’s long enough to cover the thickness of the mating part. It’s a good choice for assembling drawers when economy is more important than brute strength or high style. Overlap rabbets are the preferred way to conceal back panels in cabinetry, and they offer more surface area for glue than butt joints when building boxes or carcasses of all sorts.
Raise the table saw blade to make the shoulder cut in one pass, pushing it across the rip fence and miter gauge scrap fence.
You can cut the rabbet in two passes with a standard blade, as shown here, or tackle it in a single swipe with a dado head. Be sure to reinforce this cross-grain glue joint with dowels or fasteners driven through the rabbet tongue.
Make your second cut to form the cheek and finish off the tongue, a shop made tenoning jig will make this cut easier and more stable.
2. Double Rabbet
Double rabbets combine two overlapping
rabbet joints for laying out and assembling furniture carcasses.
Twin rabbets combine to make carcass assembly easier.
Clamp a sacrificial front to your rip fence and bury a wider dado head inside it.
Double rabbet joints offer the same self-aligning benefits as overlap rabbets, only this time, both parts are rabbeted to fit together one over the other. If you don’t own a biscuit joiner or a pocket-screw jig, here’s a good alternative for bringing those cabinet or box carcasses together with fewer headaches.
Make a few test cuts in scrap wood to test the dado blade to establish the proportions you want to cut your rabbet.
The stepped design of the joint will keep big panels from shifting out of whack once glue is applied and you’re installing the clamps. Then, lock the parts with brads to strengthen the glue bond and form a mechanical connection.
Use a featherboard to keep the workpieces tight to the table while you"re cutting the rabbets, supporting with a miter gauge if need be.
The most efficient way to cut double rabbets, especially on larger workpieces, is facedown on the saw table with a dado blade. If you adjust the proportions of the rabbet carefully, so the tongue is exactly half the thickness of the workpiece, one setup takes care of both halves of the joint in short order.
Along with glue, reinforce your double-rabbet joints with pin nails or brads through the side of the joint that won"t be visible in the finished project.
3. Shelving Rabbet
Shelving rabbets are a simple rabbet and dado combination, perfect for making plywood shelving.
“Rightsize” undersized plywood with a rabbet and dado.
You can make any size dado cuts you"d like for the shelving as long as the blade is narrower than the plywood, a crosscut sled will aid in making straight, even cuts.
The day will probably never come again where plywood will be a true 3/4" thick, but that doesn’t mean you have to invest in those specialized, undersized plywood bits for your router in order to work with it.
Use the same blades for cutting the dadoes, shape tongue and shoulder for the rabbet using a featherboard and sacrificial fence to set the projection and height.
You don’t even have to shim a dado set to match the sheet thickness. Instead, turn to this simple shallow-shouldered rabbet joint and make that funky plywood thickness conform to your will. Start by cutting the dado side of the joint to the dado width you prefer.
The shelving rabbets will fit together nicely and tight, as good as, if not better than, similar joints cut out by undersized router bits.
As long as the blade’s cutting width is narrower than the plywood is thick, you’re all set — 1/2" or 5/8" works well. Then, clamp a sacrificial fence to the rip fence. Adjust the blade’s height and projection to cut the rabbet’s tongue so it matches the dado proportions.
These shelving rabbet and dadoes fit tightly enough to use naturally, but fastening them with nails or glue will lend extra strength to the joints.
In a couple of test cuts, sneak up on the precise fit. How’s that for taking the hassle out of matching those odd fractions? It’s a thrifty, problem-solving joint that works, no matter what plywood you’re using.
4. Blind Rabbet
Blind cut rabbets are easy to cut in quick succession with a table saw, but they are also impressively strong.
One table saw setting completes an interlocking corner joint.
Set your dado blade to cut the blind rabbet exactly half the width of your stock and adjust the rip fence to be the same distance from the blade.
Blind rabbet joints use the pairing of a rabbet and dado to the best advantage. Here, the rabbet’s tongue is cut to fit a dado on the mating part, so the pieces can lock together positively. It’s an ideal joint for building drawer boxes that are covered by a separate drawer face.
Before committing to the blind rabbet cuts, test it out on scrap with the dado side against a rip fence, being supported by the miter gauge and scrap fence.
Or use it to install the back panel on drawers with fancier front corner joinery. Since the dado completely surrounds the rabbet, there’s ample surface area for glue, so no need to add extra fasteners for reinforcement.
Finish off the blind rabbet by using a simple T-jig along the top of the fence, without changing the blade or fence.
Blind rabbets are as efficient to build as they are sturdy. You can bang them out “production style” with a single dado-blade setup if the thicknesses of the parts match. But be careful: your blade and fence settings must be spot on for these parts to slip together as they should. Even the slightest discrepancy in saw settings will produce a mismatched joint.
Original article and pictures take http://www.rockler.com/how-to/basic-rabbet-joints/ site