четверг, 31 августа 2017 г.

DIY Planked American Flag Maison de Pax

DIY Planked American Flag - Maison de Pax

DIY planked American flag at maisondepax.com #tutorial #patriotic #july4 #decor #whitewashed

Stunning, isn’t it? In case you forgot, the challenge was to make something patriotic but not red, white, and blue.


DIY planked American flag at maisondepax.com #tutorial #patriotic #july4 #decor #whitewashed

I had some cedar planks left over from our attic renovation (I am still obsessed with our whitewashed plank walls, I admit), so I decided to make a planked American flag using stain rather than paint.


DIY planked American flag at maisondepax.com #tutorial #patriotic #july4 #decor #whitewashed

It was so easy, and I think the result is just gorgeous. Here’s how you can make one, too:


DIY planked American flag at maisondepax.com #tutorial #patriotic #july4 #decor #whitewashed

  1. Determine your desired size (I wanted mine 26″ x 34″) and divide the height by 13 (26/13="" 2″).
  2. Trim cedar planks (or any planks – pallet wood would probably work, too!), making them whatever width you determined above – Mr. Pax cut me 13 strips that were 2″ wide and 34″ long.
  3. Cut two more strips the height of your flag – mine were 26″ long; these will secure your planks together.
  4. Stain 7 of the strips with a dark stain (I used Minwax dark walnut).
  5. Line up your planks with alternating colors, then put them all face down.
  6. Put a line of wood glue along your 26″ pieces and place them face down on the back of your flag.
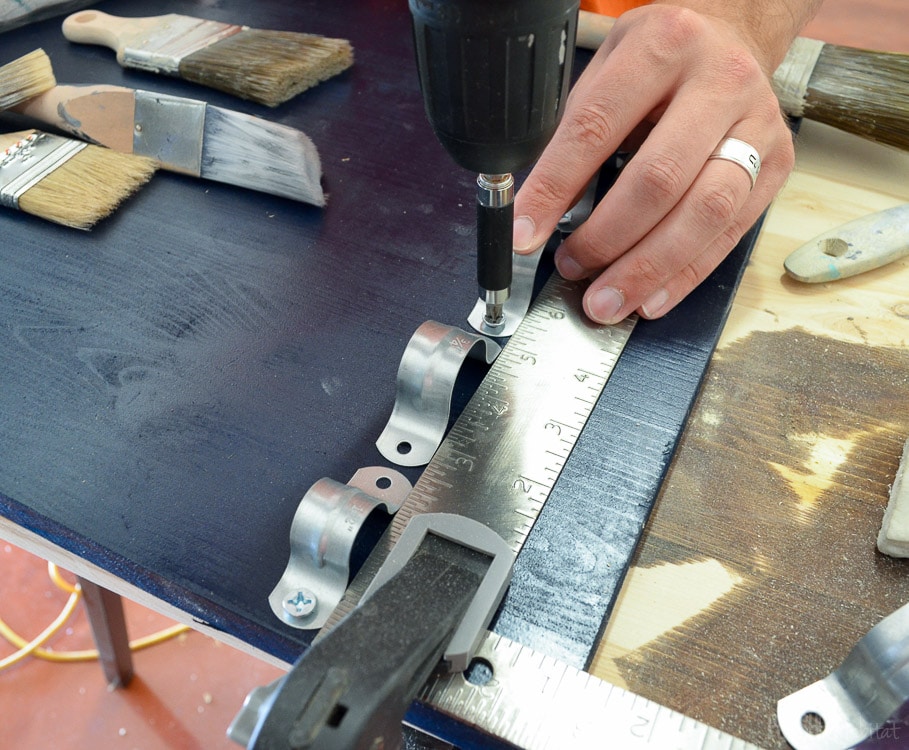
  7. If you’re impatient like me and don’t want to wait for your glue to dry, use screws to secure the braces into your planks (don’t forget to pre-drill to avoid splitting).
  8. Tape off your “blue” section (where the stars go).
  9. Stain all the boards in that section (be careful not to let your stain seep under the tape… I’ve found that painting it on about an inch away from the tape and then rubbing it into the wood with a paper towel means less seepage).
  10. Using a star-shaped sponge (I cut mine from an old sponge brush and hot glued it to a wine cork!), place your stars accordingly. I used a chalk-based paint (simplicity by Country Chic Paint) so that it would dry quickly. Again, ZERO patience on my part!
  11. Whitewash the entire sign to soften the difference between the colors. For tips on whitewashing, see this tutorial.

I love all the imperfections… The knots, the cracks, and the texture.


DIY planked American flag at maisondepax.com #tutorial #patriotic #july4 #decor #whitewashed

And I was a little surprised (because, honestly, I don’t usually go all out for patriotic decor), but I think I could even leave this up year-round if I wanted. I love how it complements the warmth of the bed but is still understated against the whitewashed walls.


DIY planked American flag at maisondepax.com #tutorial #patriotic #july4 #decor #whitewashed

I think it looks beautiful with my simple bedside

table, too.


DIY planked American flag at maisondepax.com #tutorial #patriotic #july4 #decor #whitewashed

I wasn’t originally planning to put it in the attic; I measured to put it above the mantel in my office… but it has definitely found its home…. for now, at least.


DIY planked American flag at maisondepax.com #tutorial #patriotic #july4 #decor #whitewashed

What do you think? Does it inspire a little creativity and patriotism in you, too? I hope so!


http://www.maisondepax.com/2014/04/diy-stairwell-bookcase-from-reclaimed-wood.html

Now, before you head out, be sure to check out the AMAZING projects that were shared last week AND be sure to enter for your chance to win a $310 Target Gift Card by using the Rafflecopter at the end of the post!


MUST PIN!  Amazing patriotic project ideas that DON'T use the traditional colors!  Very creative!

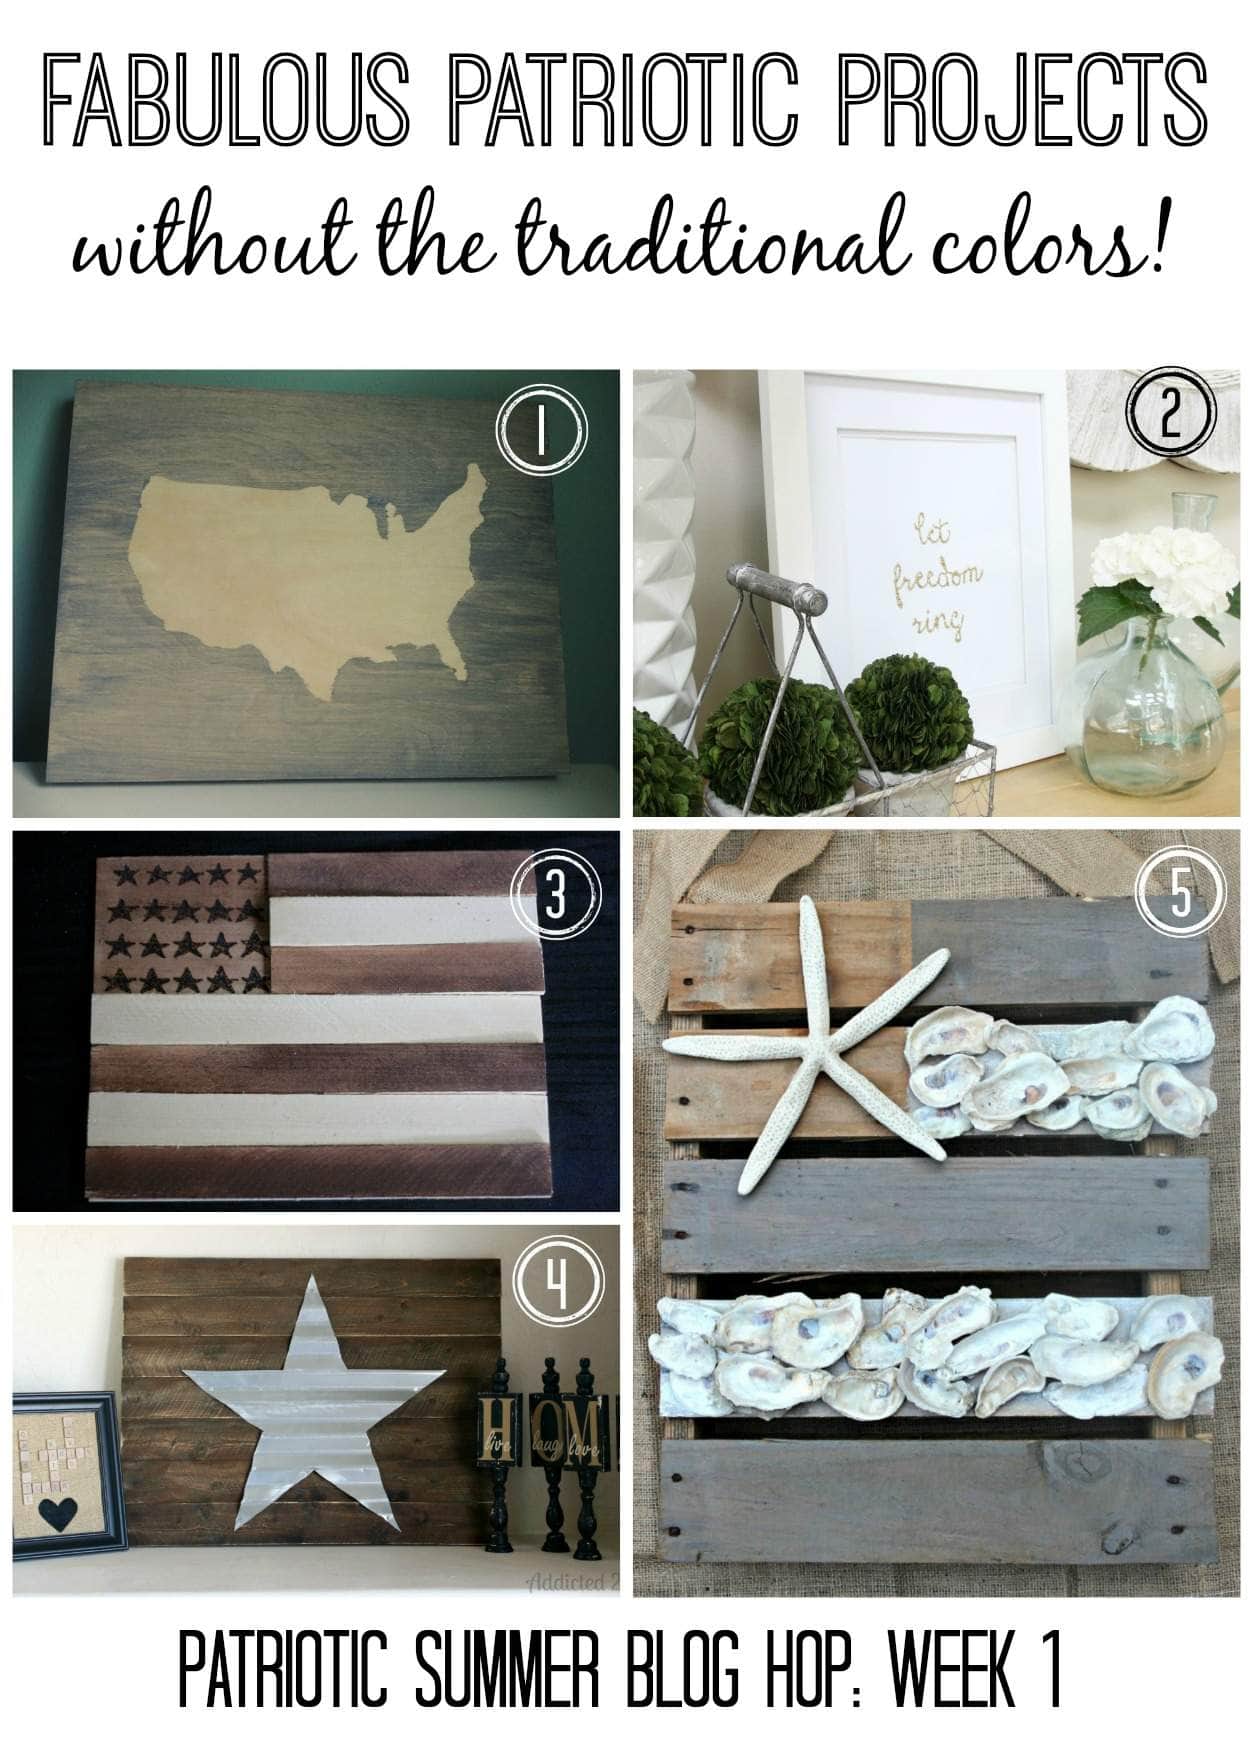
1. USA Map by Paper & Fox

2. Let Freedom Ring Gold Art by Life on Virginia Street

3. Wood Shim Flag by Designer Trapped in a Lawyer’s Body

4. Corrugated Metal Star Art by Addicted 2 DIY

5. Neutral Nautical Pallet Flag by Southern State of Mind


Disclaimer: As a part of the Country Chic Paint blogger squad, I do receive compensation in the form of goods and products from Country Chic Paint, but, as always, all opinions are 100% my own!


Did you enjoy that? Subscribe to Maison de Pax so you’ll never miss a post!

Follow along on Pinterest, Google+, Instagram, and Facebook for more fabulous ideas!


MORE PATRIOTIC PROJECTS:


Original article and pictures take http://www.maisondepax.com/2014/06/diy-planked-american-flag.html site


>

среда, 30 августа 2017 г.

DIY Pallet Table CURB TO REFURB

DIY Pallet Table - CURB TO REFURB

DIY pallet table

After trying to explain to the hubs just what I had in mind (and drawing a few pictures) He decided a trip to the Home Depot was needed. We found these “legs” for around $2 each. (Please ignore the nasty baseboard! Yikes!)


DIY pallet table legs

After we got home, Adam started pulling pallets apart. (His favorite pastime) Actually he hates it! And let me just tell you, he’s pulled many a pallet apart for me.


DIY pallet table

He then started putting all the pieces together. It was really easy once all the pallets were cut the right size.


DIY pallet table

After the top was attached, we then screwed on the bottom pieces to make a little shelf.


diy pallet table

I tested it out in its new home before I took it outside for some stain. Oh, and some sanding. Those pallets are very rough. (Please excuse the terrible, dark photo. This was the only picture

I had of the table built, before stain)


diy pallet table

After he was all sanded and I stained, I brought him in for the fun part. Decorating!!! (Yes, he’s a he. He’s much too rough and rustic to be a lady)


DIY pallet table

The whole space looks so much better! And now I have a nice organized command center. Complete with succulents and all! This little project ran us about $10 and a couple of hours from start to finish.


pallet table

I’ll be sharing more about how I built the command center and how I made the metal containers in a future post.


What could you build for your home using pallets???


*linked up to this awesome party here.


Original article and pictures take http://www.curbtorefurb.com/diy-pallet-table/ site


>

DIY Pallet Corner Closet or Cupboard

DIY Pallet Corner Closet or Cupboard

Pallet Closet or Cupboard

Here main attention has been given to construction details, so you can easily clone it at home by getting the required material in stock, pallets would be most important, we have also shared here a construction plan which guides you that how you can enlarge this closet to suit your storage needs!


no-cost wooden pallet cupboard or closet

It would just be the marvelous addition to your dressing room, all the style and fashion loving boys and girls would just love this pallet closet for sure!


recycled wooden pallet cupboard or closet

The cupboard storage portion or unit has been built separately and is having a tower like shape which offers smartly built-in storage compartments and drawers!


upcycled wooden pallet cupboard or closet idea

To one side of it facing the corner wall, custom mini wooden supports have been fixed for installation of cloth hanging section! Here two longer wooden beams have been made hanged between the storage tower and corner wall for beautiful cloth hanging racks!


repurposed wooden pallet corner cupboard or closet

Mini wooden supports have been screwed in the side wall of storage cupboard tower and comes with already made cuts that beautifully holds the cross wooden supports, got for cloth hanging!


no-cost wooden pallet corner closet or cupboard

A custom wooden slab has been made having length equal to top of storage tower to corner wall area, it hangs on wooden supports fixed tight along the corner wall area, this help the storage tower to get connected strongly to wall area! This wooden slab also results into a bigger shelves which can be targeted for larger types of storage!


rustic wooden pallet cupboard or closet

3 built in cupboard drawers have been made super easy to open by providing metal handles, fixed in place using cross headed screws! Would really be amazing to secure your fashion accessories you cherish a lot!


pallet corner cupboard or closet plan

Here is the plan which will guide you for all the tiny details while extending this corner cupboard

to a walk-in closet! You can also take a review here for the necessary dimensions!


Made by: Palette GraphiK


{ Get in touch on Facebook: @palettegraphik }


Website: www.palettegraphik.com


Original article and pictures take http://www.101palletideas.com/diy-pallet-corner-closet-or-cupboard/ site


>

вторник, 29 августа 2017 г.

DIY Paint Brush Holder {Garage Organization) Polished Habitat

DIY Paint Brush Holder {Garage Organization) - Polished Habitat

Post Contains Affiliate Links - You pay the same price, I get a small commission. High Five!

Last year, we organized the garage and took care of the major storage issues, but ran out of time when it came to figuring out the very best way to store smaller groups of items. All the painting supplies had been tossed together into a couple of bins, and it was time to come up with a better solution.


Make sure you stay tuned even if you don’t need a brush holder, because there is a giveaway at the end of the post!


Garage a mess? Get organized with this quick tutorial for an inexpensive paint brush holder!

This is a perfect beginner DIY project and didn’t require a ton of materials.


DIY Paint Brush Holder Tutorial - Garage Organization

We had a scrap piece of 16″ wide wood left over from the master closet project, along with some extra 1 x 4 boards that were also scraps from the closet. To hold the brushes, we needed plumbing strap tension clips in both 1/2″ and 3/4″ sizes to fit various paint brush handles, screws for the straps, and then some cup hooks to hold the paint roller handles. The U-shaped plumbing straps were really cheap at Lowes and I can’t wait to use them in more organizing projects!


To get started, we built the “pocket” that I’m using to store roller covers. We cut two pieces of the 1 x 4 to the width of the big board, which gave us the bottom and front of the pocket. Then we just needed to measure the space that would become the sides and cut pieces to fit. I’m sure you guys are thrilled I don’t do building projects all the time, because I’m not the best explain-er. Thankfully, I’ve got pictures so you can see what I mean!


DIY Paint Brush Holder Tutorial - Garage Organization

The next step was attaching all the pieces of the pocket together, which was done with wood glue and then a few brad nails to hold everything together while the glue dried. Inexpensive and our

We used the same process to attach the pocket to the larger board, and before I knew it, I could see that the plan was working. I’m always relieved at this point, because my ideas are often vague and I never know quite how things are going to

play out. It’s an adventure around here!


DIY Paint Brush Holder Tutorial - Garage Organization

Before attaching at the straps and hooks, I wanted to paint or stain the wood. I reminded myself that this project was going in the garage and not a museum, so I just did a light sanding and decided to use leftover blue spray paint from the workbench project.


Here’s where the giveaway comes in!


To paint the organizer, I just had to pop open my magic It takes like 5 seconds and then I’ve got a safe place to spray paint in the garage. I told my friends at HomeRight I was using it for this project, and they agreed to sponsor the post and provide a Small Spray Shelter for one of you. Woo Hoo! You’ll enter at the bottom of this tutorial.


DIY Paint Brush Holder Tutorial - Garage Organization

The fact that the entire tent, including the floor, is one solid piece is awesome because I don’t worry about any overspray sneaking out the back. I’m also loving that the floor extends out of the front of the tent to catch any drips when spraying. I was worried I wouldn’t be able to fold it up, but it’s 10 times easier than the photography tent I have.


If I had a list of must have items for people interested in DIYing some of their home decor, this would be at the top of it. So many things can be transformed with spray paint, and having somewhere you can spray paint whenever the mood strikes is a game changer!


DIY Paint Brush Holder Tutorial - Garage Organization

Once the blue paint was dry, we just had to screw in the straps. To make them level without making ourselves crazy, we clamped a straight edge to the board. Then we could flush the straps against it as we screwed them in. I’m all about hacks that mean I don’t have to make exact measurements.


DIY Paint Brush Holder Tutorial - Garage Organization

We also added some

The pocket in the front is working perfectly for paint sticks and roller covers. I love that there is room for our and a couple of traditional covers.


I think I’m most excited that I won’t have to dig around the garage to find my favorite paint brush ever again. And we can stop buying roller covers we don’t need, because we’ll be able to find the ones we already own.


What do you think? Could you use somewhere to store your painting supplies?


Here’s the Small Spray Shelter giveaway entry form!

","discussion":{"numPages":1,"confidence":0.31,"diffbotUri":"discussion|3|-1538395861","pageUrl":"http://www.polishedhabitat.com/2016/diy-paint-brush-holder-garage-organization/","numPosts":4,"type":"discussion","title":"DIY Paint Brush Holder {Garage Organization)","posts":[{"date":"Fri, 09 Sep 2016 07:58:00 GMT","humanLanguage":"en","author":"Patricia says","diffbotUri":"post|3|793420676","html":"

I have paint shelves to hold most of my supplies but adapting your brush holder to a single board with plumbing straps would solve my brush problem. Thanks!

","pageUrl":"http://www.polishedhabitat.com/2016/diy-paint-brush-holder-garage-organization/","id":0,"text":"I have paint shelves to hold most of my supplies but adapting your brush holder to a single board with plumbing straps would solve my brush problem. Thanks!","type":"post"},{"date":"Fri, 09 Sep 2016 08:01:00 GMT","humanLanguage":"en","author":"Melissa George says","diffbotUri":"post|3|1046247778","html":"

You’re welcome! It would work perfectly on just a piece of 2 X 4 and be so inexpensive!

","pageUrl":"http://www.polishedhabitat.com/2016/diy-paint-brush-holder-garage-organization/","id":1,"text":"You’re welcome! It would work perfectly on just a piece of 2 X 4 and be so inexpensive!","type":"post","parentId":0},{"date":"Fri, 09 Sep 2016 16:23:00 GMT","humanLanguage":"en","author":"Candy Walsh says","diffbotUri":"post|3|-1494518813","html":"

What an awesome little build! I’m just getting started into the woodworking part of DIY and this would be a great project for me to start with!

Thanks so much and also for the chance to win a paint shelter!!

","pageUrl":"http://www.polishedhabitat.com/2016/diy-paint-brush-holder-garage-organization/","id":2,"text":"What an awesome little build! I’m just getting started into the woodworking part of DIY and this would be a great project for me to start with!
Thanks so much and also for the chance to win a paint shelter!!","type":"post"},{"date":"Fri, 09 Sep 2016 20:41:00 GMT","humanLanguage":"en","author":"Melissa George says","diffbotUri":"post|3|524710176","html":"

Oh, good! It’s a perfect starter project! Good luck with the shelter giveaway, it’s an extremely handy thing to have!


Original article and pictures take http://www.polishedhabitat.com/2016/diy-paint-brush-holder-garage-organization/ site


понедельник, 28 августа 2017 г.

DIY Outdoor Dining Tables

DIY Outdoor Dining Tables

DIY outdoor dining tables-1

I don’t know about you, but given the choice, I would rather eat outside in my garden. It doesn’t matter if it’s a quiet breakfast with just me and the songbirds, or a big family get together, outside is better. But, I kinda hate my table. It’s glass, it’s not my style, and it doesn’t mesh with the outdoors well at all. So we found these DIY outdoor dining tables so that we can all find a way to eat al fresco just a little bit more, and still have a styling’ backyard. Sound good? Thought so! Let’s get to it so you can pick one and get started!


Our feature project above, is from Christine at ‘Pinspiration Mommy’. She built this DIY large outdoor dining table herself for her 40th B’day! Ok, I like this girl. Great tutorial and plans for this table.


Melissa (and her husband Randy!) at ‘The Happier Homemaker’ has this tutorial for their DIY Pottery Barn inspired dining table that only cost them $60 in lumber! Check out the post, her husband used simple plans from ‘Ana White’, another tutorial, and his own great ideas to come up with this. Amazing DIY!


DIY outdoor dining tables-2

Ashley at ‘Cherished Bliss’ not only has a great tutorial and photos for her DIY outdoor table, she has free plans you can download too! We love the X-frame base of this table.


DIY outdoor dining tables-3

This simple outdoor dining table was made with plans from ‘Ana White’ and submitted by one of her readers… This looks like an expensive teak table we saw at Room & Board last season.


DIY outdoor dining tables-4

Rebekah at ‘Charming Imperfections’ made this DIY pallet farmhouse table for her patio, and has step by step instructions for you, along with a couple of graphics that explain the process well. (And make it look simple!)


DIY outdoor dining tables-5

From Danielle (and Luke!) at ‘Finding Silver Pennies’, learn how to build an outdoor dining set. Lot’s of good directions here, and this set looks high end. Love it!


DIY outdoor dining tables-6

Make this DIY outdoor dining table from wood pallets with ‘A Mitten Full of Savings’. Oh, did we mention? Less than $100!


DIY outdoor dining tables-7

If you have a smaller patio, or just prefer a round table, make this octagonal picnic table with these free plans from ‘Bobs Plans’.


DIY Outdoor Dining Table 04

We LOVE this DIY concrete dining table we found on ‘Houzz’, but it didn’t come with a tutorial… So we went and found one for you! This tutorial from ‘DIY Pete‘ is almost identical.


DIY outdoor dining tables-8

Ok, last one for you is

just inspirational, ’cause it is so cool, we couldn’t leave it out! How amazing is this? From ‘Erin Martin Design‘. Wow!


DIY outdoor dinind tables-9

Image Credits: Pinspiration Mommy, Happier Homemaker, Cherished Bliss, Ana White, Charming Imperfections, Finding Silver Pennies, Mitten Full of Savings, Bobs Plans, Houzz, Erin Martin Design


Original article and pictures take http://www.thegardenglove.com/diy-outdoor-dining-tables/ site


>