I am SO excited to share this piece with you today… It definitely has made my Top 5 builds yet!
I have a love for coffee. LOVE. I have been a Keurig owner for about a year now, which took my coffee love to an even bigger level, you hear me? The only thing I don’t love about my Keurig is the amount of space it takes up on my countertop. I decided it was time to give it a new home. This is what I came up with! Check out my new DIY Farmhouse Coffee Cabinet!
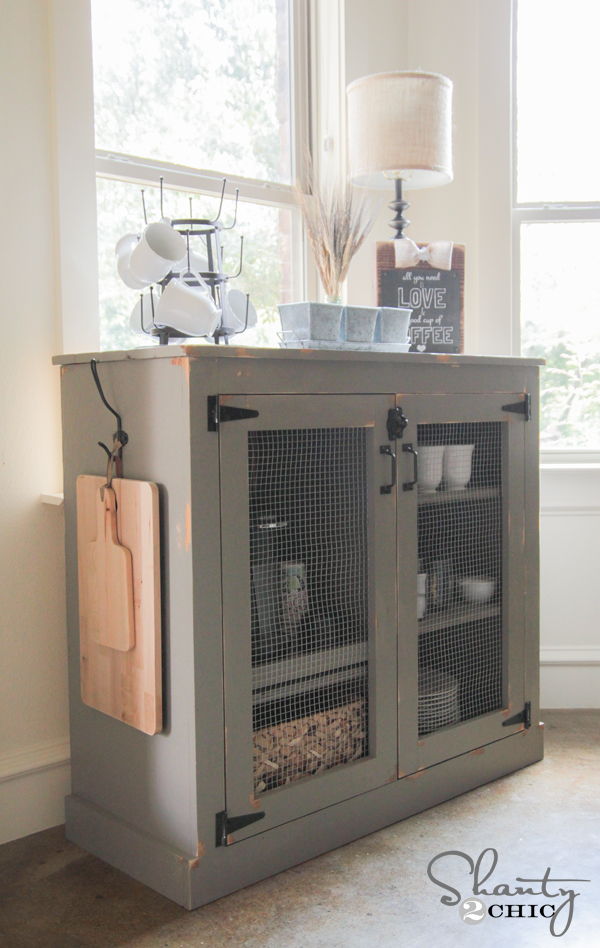
Ok, so although I am calling it a coffee cabinet, this baby can be used for just about anything! It’s a great size and

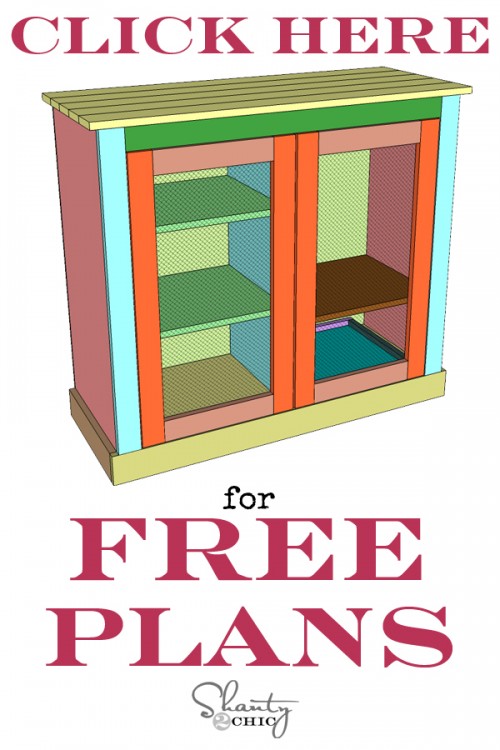
As always, you can download the FREE PRINTABLE PLANS for this cabinet HERE, or by clicking the button below. I will walk you through the whole build below as well! Thanks so much to our good friend Jay of Jay’s Custom Creations for putting all of our original ideas into printable plans for you guys! Y’all check his site out! The man knows his tools.
So, lets get started! Just a head’s up… I did assemble mine slightly differently than our plan calls for. I added an extra piece of wood at the top to create a box. It’s not necessary to do that, so we left it off the plans. Either way will work! Just let me know any questions.
The cabinet box and shelves are made with 3/4″ Purebond Plywood. This can be found at Home Depot in 4′ x 8′ sheets. For me, it’s impossible to get it home in the Suburban with the 5 kiddos, so I have the nice guys at Home Depot rip it down for me. For this cabinet, I had them rip two cuts at 15 3/4″ and one cut at 15″. You can see the diagram below to see what I mean…

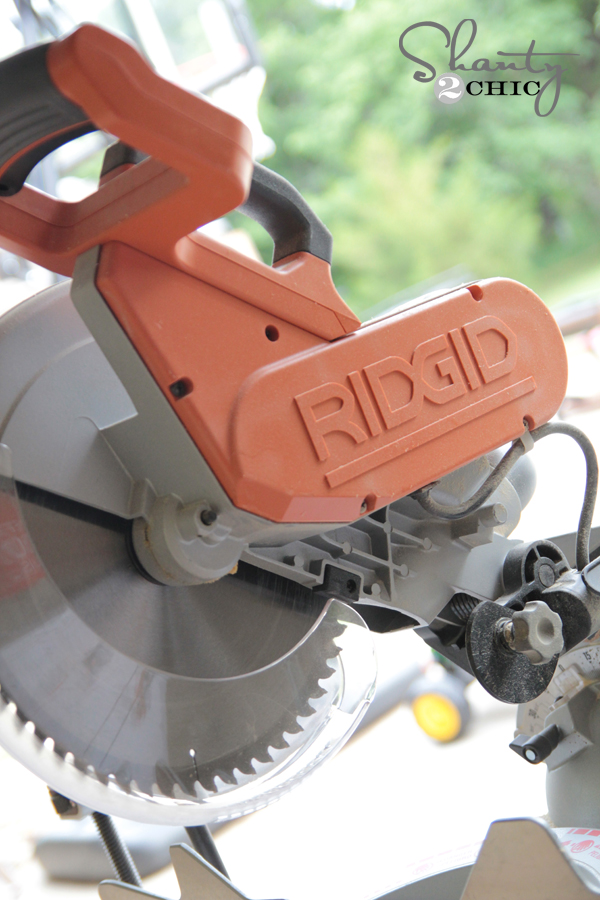
This gave me three boards that are MUCH easier to load in the car. When I got it home, I made all of the other cuts using my Ridgid Miter Saw, aka, my very best friend ever.
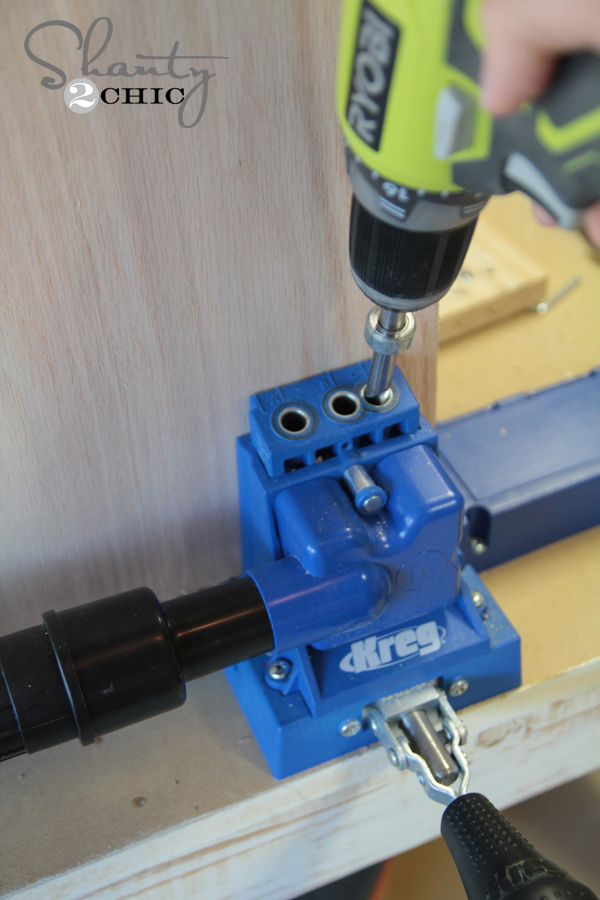
To connect all of my pieces, I used my K5 Kreg Jig! We get asked all the time which model of Kreg Jig we use. Ash and I both used the K4 model for years and love it. You can see that model HERE
. We both recently upgraded to the awesome K5 model, which has some cool upgrades and features making it even faster and easier to use. You can check out the K5 model HERE!
For this whole build, I used 3/4″ pocket holes and 1 1/4″ pocket hole screws.
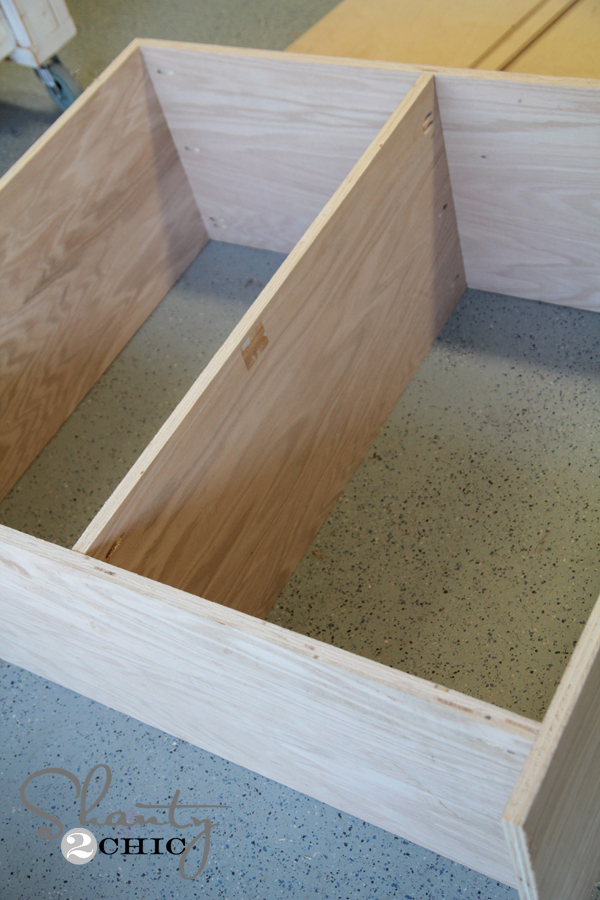
I put the box together like this below using 1 1/4″ pocket hole screws through all of the pocket holes I already made. On our cut lists in the printable plans, anywhere you see an arrow on a piece of wood, that indicates a pocket hole. Make sure to make all of your pocket holes before attaching anything!
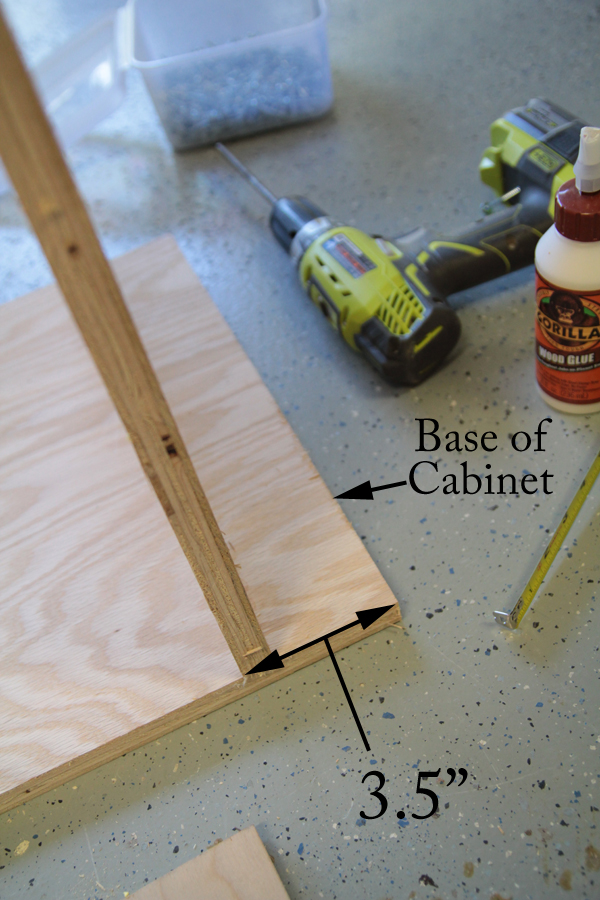
You can see I have lined up the bottom shelf of the piece at 3.5″ from the bottom of my side pieces.
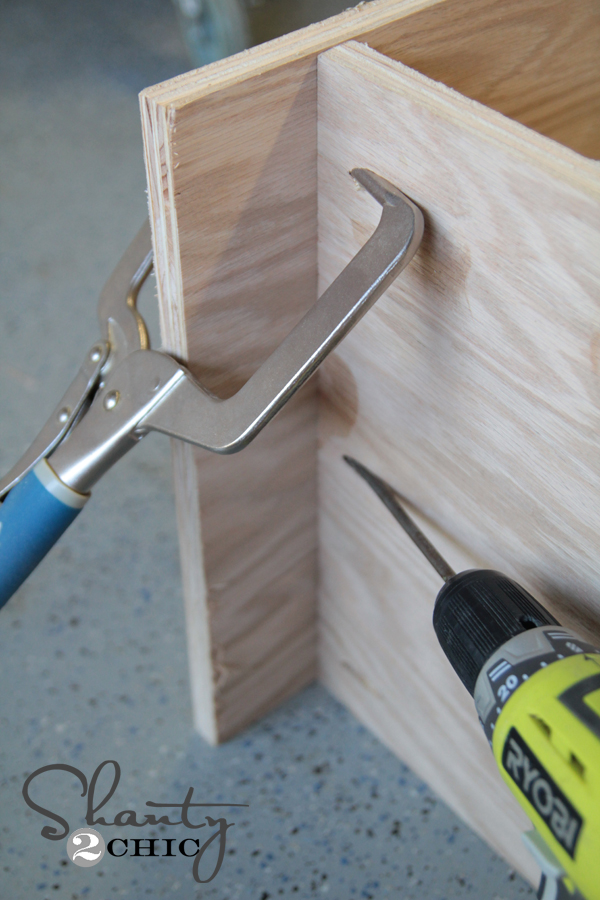
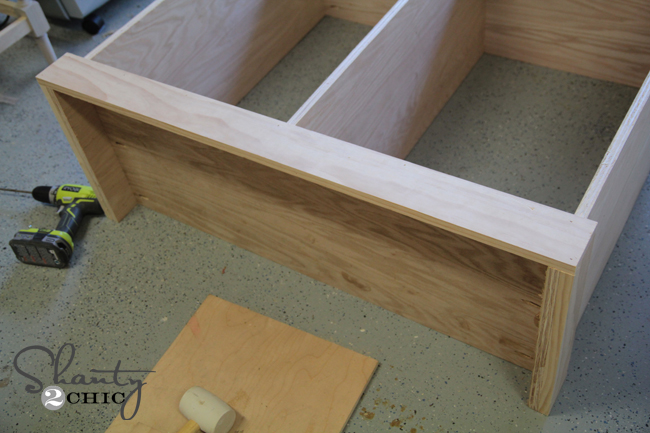
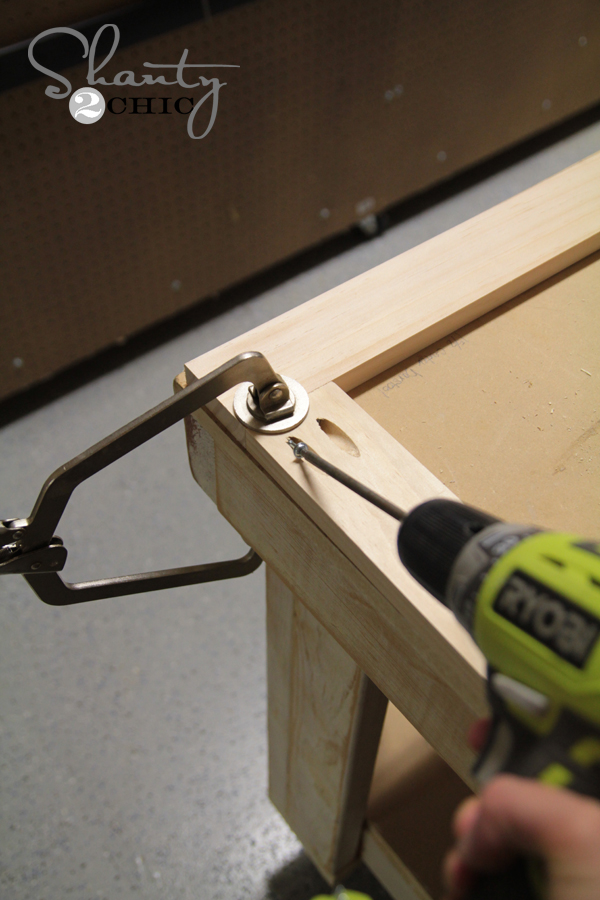
I used a line of Gorilla Wood Glue on each seem and held it all in place with my Kreg Right Angle Clamp. I used my Ryobi drill to drive the 1.25″ pocket hole screws through the pocket holes and into the side pieces.
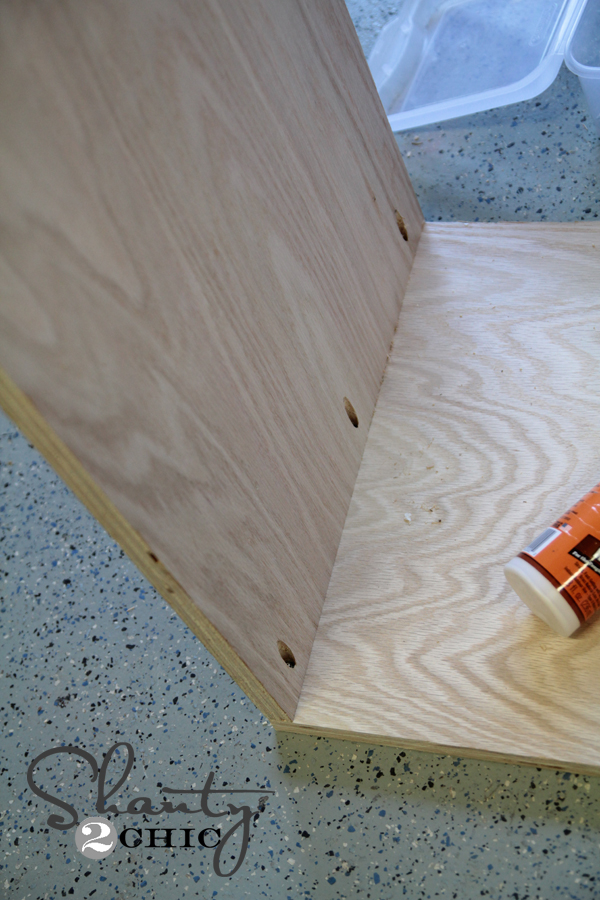
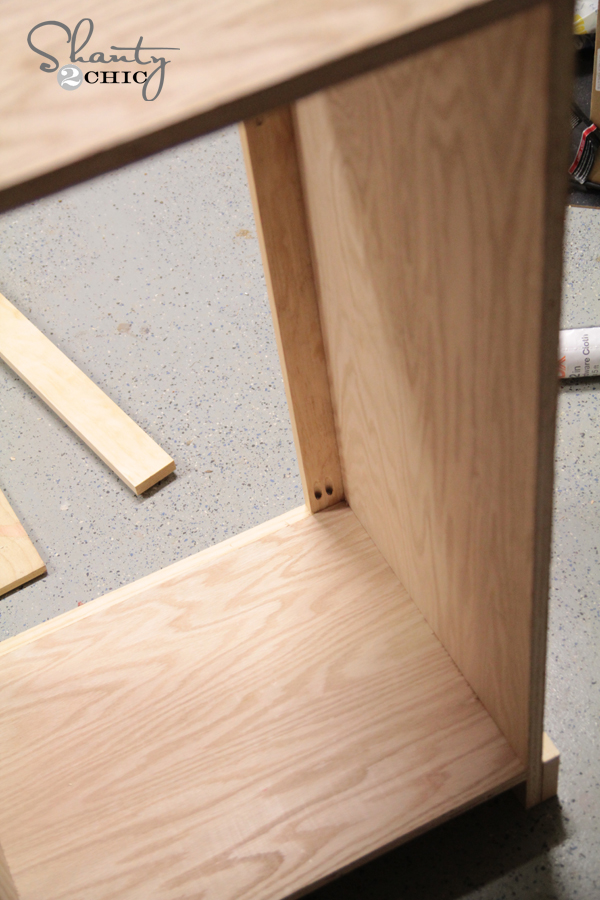
This is a picture of the top of the box. I have it turned upside-down on the ground. You can see the pocket holes I made here also attaching to the side pieces. The top of the cabinet will be flush with the top of the two side pieces.
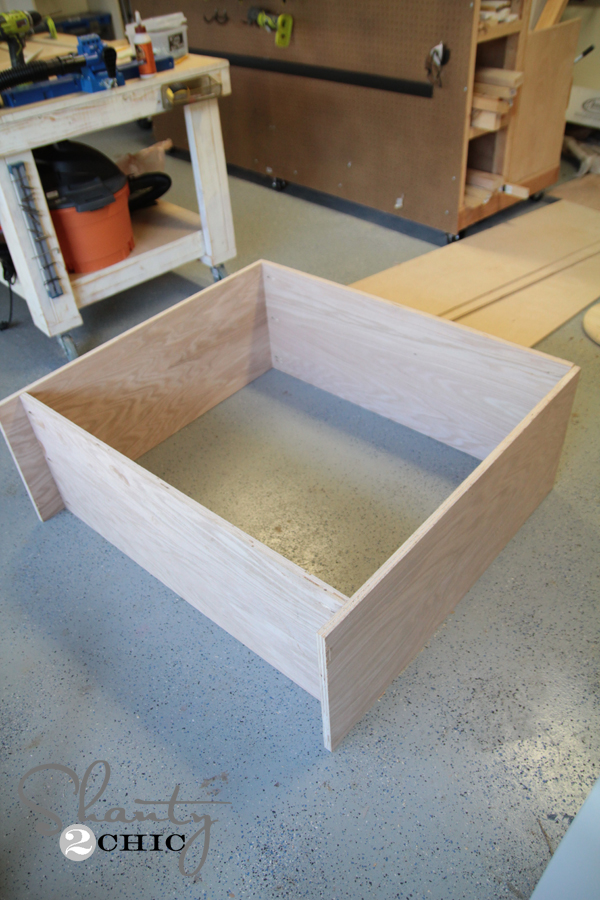
Now, add the middle shelf! Attach it with pocket hole screws through pocket holes and into the top and bottom of the box.
Next, I added my bottom trim pieces. I used a line of wood glue and my Ryobi AirStrike 18 gauge nail gun to attach the trim pieces.

Now to build that face frame! This is simple! Just a few quick straight cuts and some pocket hole screws. I am looking from the back of the cabinet and into the front where you can see the pocket holes on the bottom where this part attaches to the bottom trim piece.
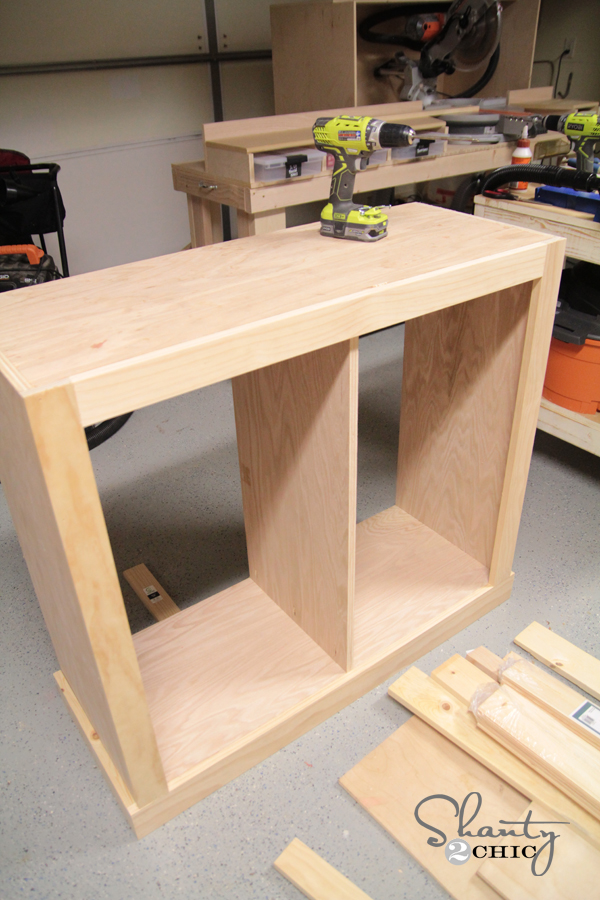
I added my shelves next! Each cabinet piece will be flush with the back of the cabinet and set back 3/4″ from the front.
You can set yours where you wish to fit your storage needs. On one side I chose to space two evenly, and on the other I set one a bit lower so I could have a space for the Keurig. Each shelf will need pocket holes on each 15″ long end to attach to the sides of the cabinet.

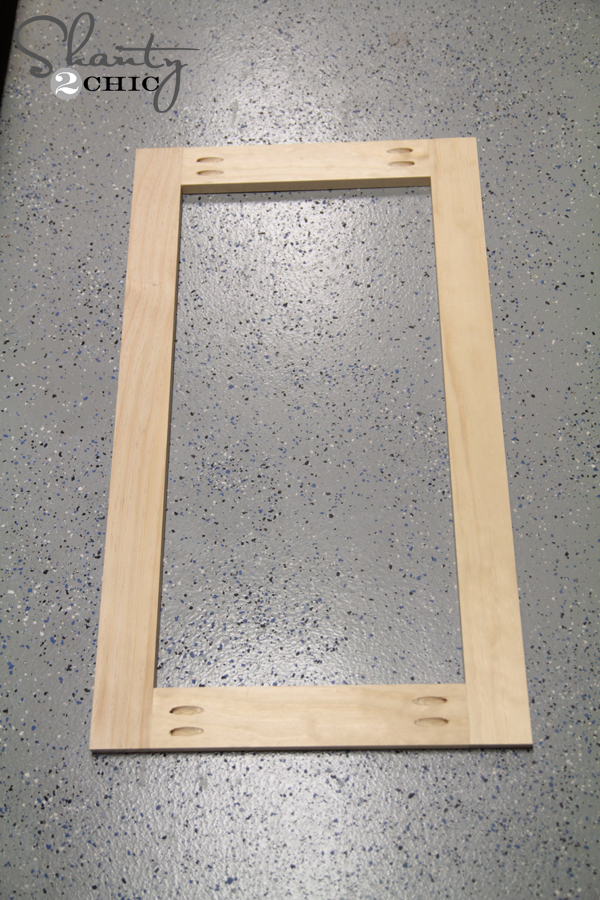
Although we give you guys the cuts for these doors, I always like to measure the opening before making the cuts to be sure on the size. I like to make the doors 1/8″ smaller all around, which would be 1/4″ smaller than the width and height of each opening. For the doors, you will have 4 longer pieces without pocket holes like this.

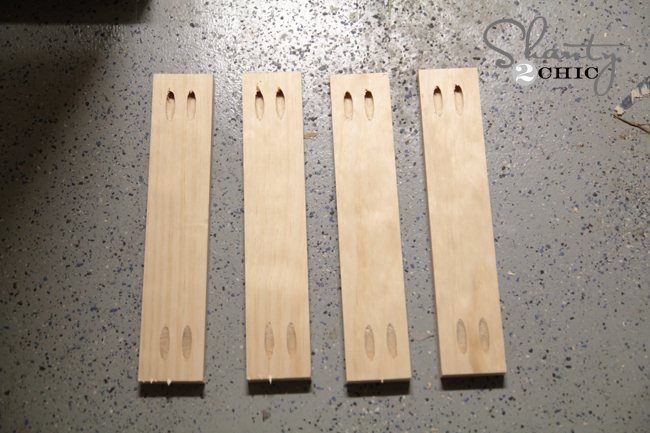
I attached these pieces using wood glue and 1.25″ pocket holes screws to create rectangles.
Once the doors were finished I attached my back. You can have Home Depot cut this for you as well, and use staples to hold the back in place since the material is only 1/4″ thick.
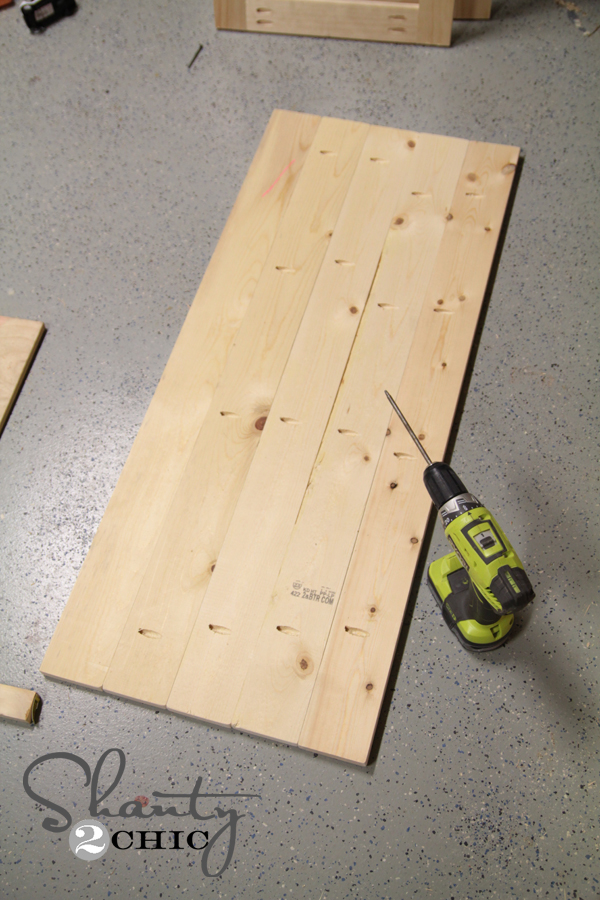
The top is planked boards. I used my Kreg Jig to attach those as well before nailing them down to the cabinet.
I decided to make a little pullout drawer for the coffee maker to sit on. I thought this would make the water easier to change out, and it was just plain cool. This is SO simple.
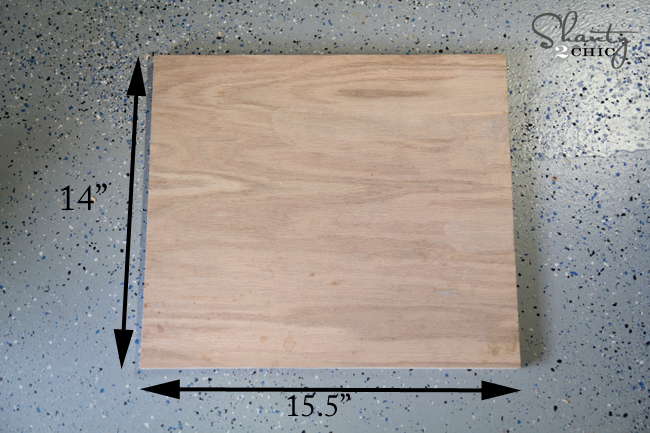
I started by cutting a piece of 3/4″ plywood at 14″ x 15.5″.
I trimmed this out with 1×2. Just cut two pieces at 14″ and attach them with your nail gun.
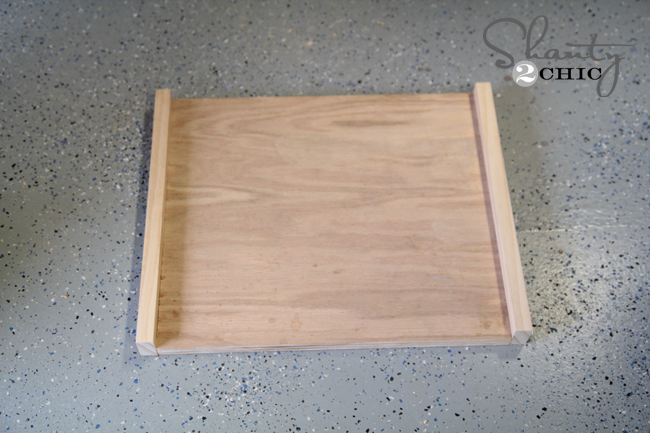
Your next two cuts will be 17″ and will be attached to the other sides. I used the nail gun and glue to attach these pieces as well.
Now for the slides! To make this easy I used some side mount slides but attached them to the bottom of the drawer. I started by pulling them open and attaching them first to the bottom of the drawer.
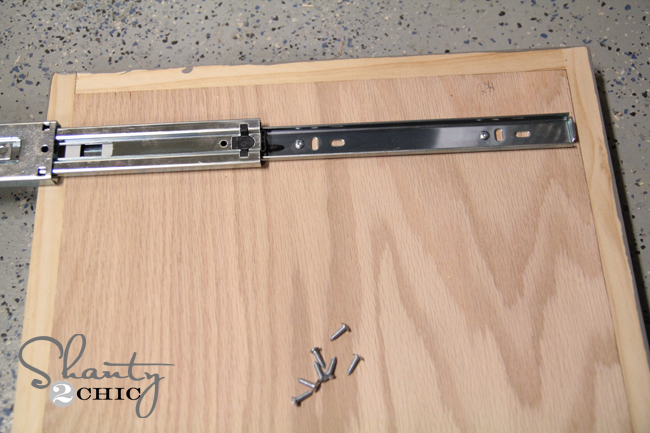
Then, I pushed the pull back into place and set it inside the cabinet on that one shelf. I slowly pulled it out which opened up the slide again. Then, I just attached the pull to the inside of the shelf. Easy!!
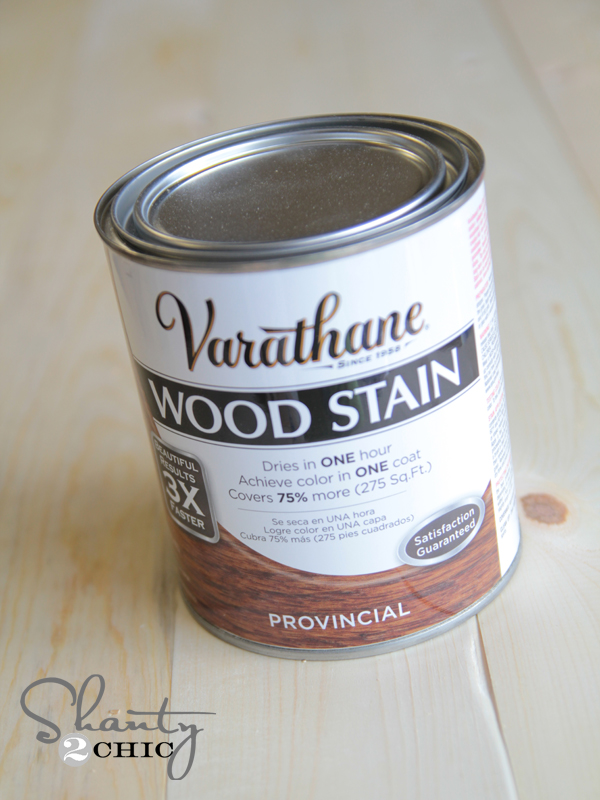
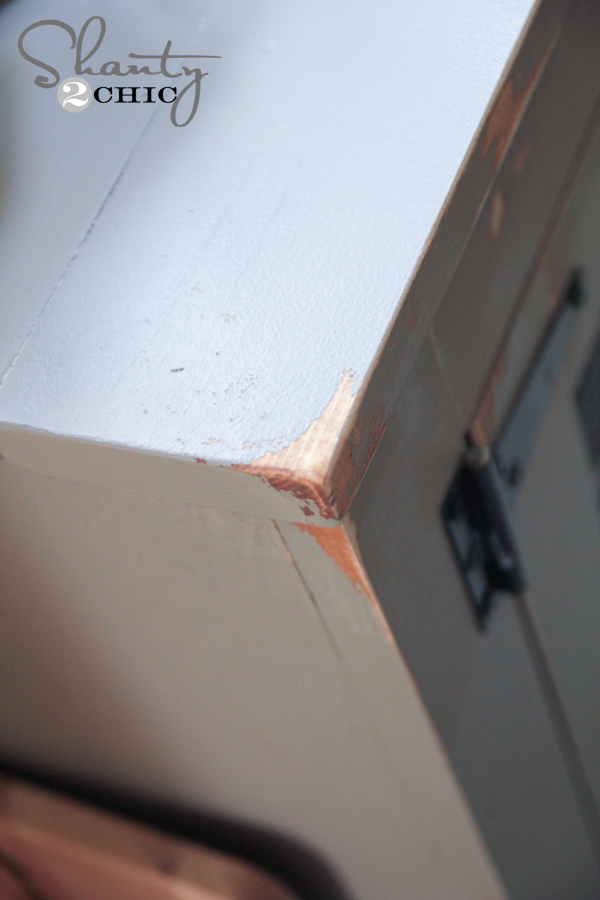
Before adding all the hardware, I got it all painted up. I started by staining most of the piece with a new color that I love…
After that totally dried, I used a bit of Vaseline on my edges and corners. It doesn’t take much, just a thin dab! Next, I applied two coats of paint to the cabinet. I chose to use a Sherwin-Williams color called Anonymous. I LOVE IT! Once that totally dried, I used my corner cat sander to distress the edges a bit. Anywhere that I put the Vaseline just chipped right off… Woohoo!
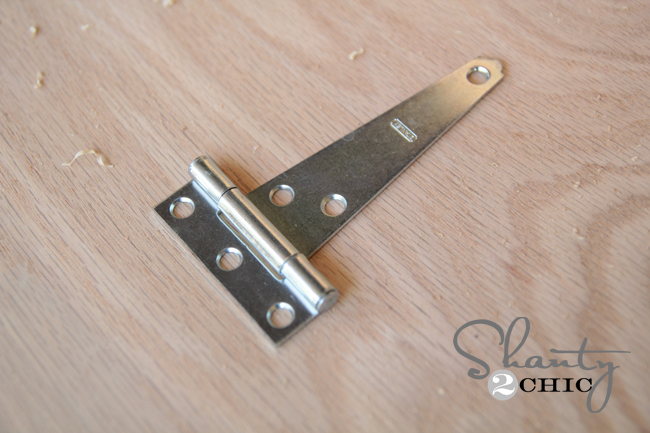
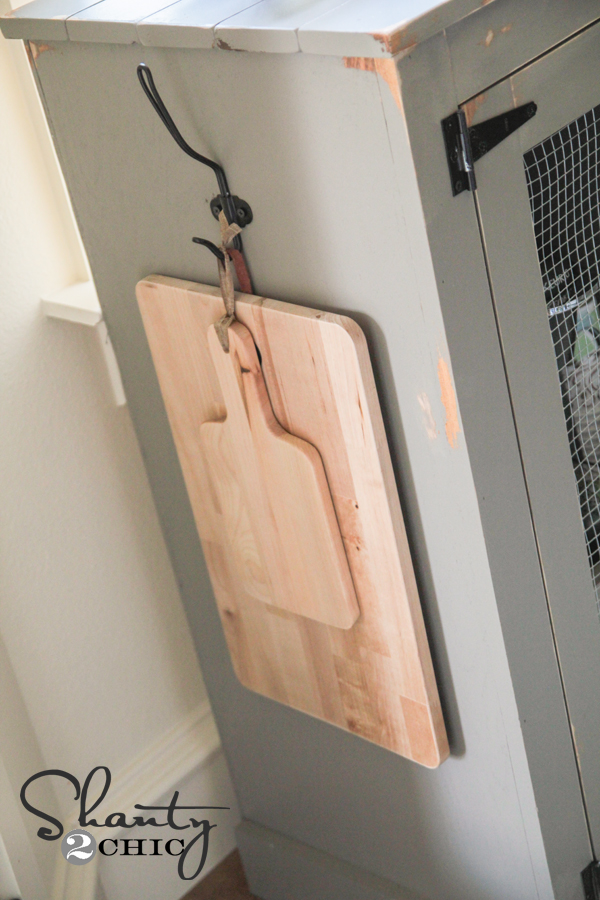
I found all of my hardware at Home Depot. The hinges are actually silver colored and I spray painted them black before attaching.
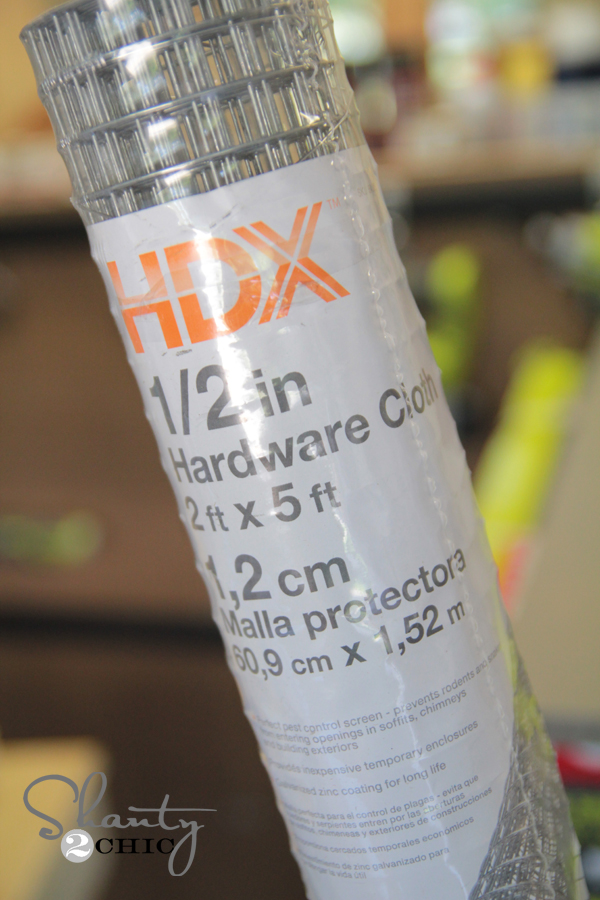
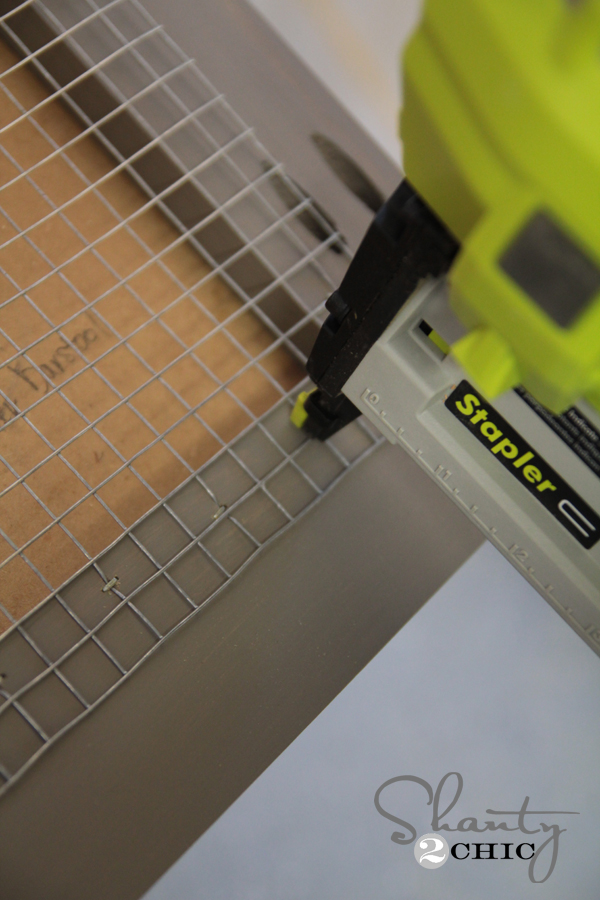
I used a small pair of pliers to cut it to size, and attached it using my Ryobi Airstrike Staple Gun.
Oh, minus a few more shots of this baby!!!
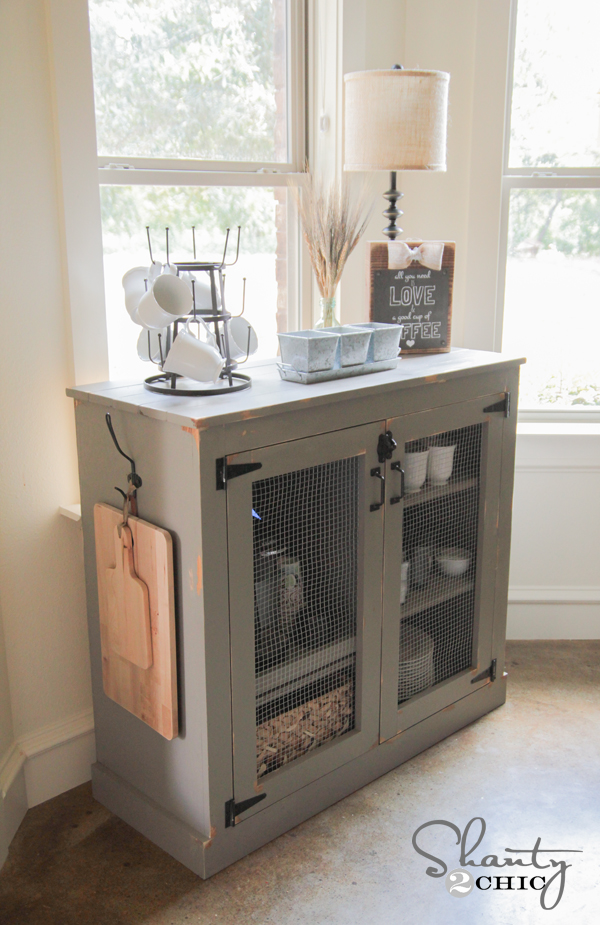
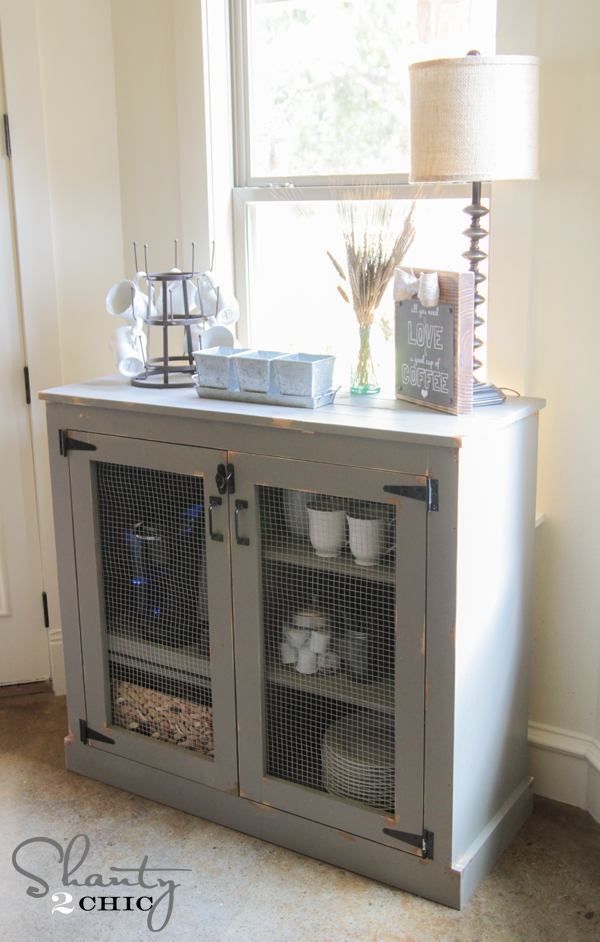
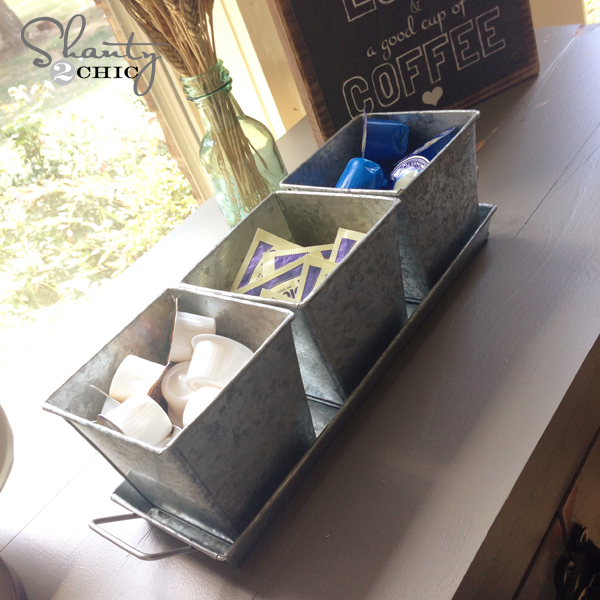
And how cute is this tray I found at one of my FAV sites ever?! It’s called www.save-on-crafts.com ! You guys… This site. They have the cutest decor goodies, and it’s so affordable! HERE is the link to the galvanized tray I filled with creamer and sugar. $8.99 people. And see the cute vintage green bottle in the background?? LOVE. You can find the link to that one HERE!
I would LOVE for you to pin and share this baby with all your friends!!
Thanks so much for stopping by!
Whitney
Sponsored Links
.
ScribolHikers Found This Horse Alone In The Woods. Then They Looked At His Face and Realized…Scribol
DetonateAfter Losing 200lbs Mama June is Actually GorgeousDetonate
Bustle31 Co-Stars That Hated Each OtherBustle
Historian InsightOld Camera Dug Up Near A WWII Battlefield In Europe Shows Us A Different Side of The WarHistorian Insight
History Garage25 Cars That Should Be Destroyed ASAPHistory Garage
Old School New Body eBookThe #1 Worst Exercise for Aging (Stop Doing it Now...)Old School New Body eBook
Sponsored
Rumors Have Been Confirmed, Jolie Comes Clean
Original article and pictures take http://www.shanty-2-chic.com/2014/09/diy-farmhouse-coffee-cabinet.html site
>
Комментариев нет:
Отправить комментарий