The good workman will never use poor tools when he can obtain good ones. The careless workman may, but such choice is an
evidence of inferiority, and brands him at once as a man who takes little pride in his calling. A selfish consideration, if no other, will ordinarily impel the workman to select the best tools, because with them he can perform his labor with much greater ease, and with better effect, than with inferior ones.
Exact work can hardly be expected from the mechanic who uses inexact tools, although sometimes very excellent results are obtained where poor tools are employed. But this is always at the expense of greater labor and greater care. Rapidity of work often depends upon the character and condition of the tools employed. This is frequently illustrated in a vivid manner by the attempt to employ a dull saw or a dull plane. Even a trifling defect sometimes causes no end of trouble. To do the most effective work, tools must be of improved design, made strongly for use, and kept in good order. Then the conditions are ripe for executing work under the most favorable circumstances.
It is only the slipshod workman who will be content to use rusty tools, of antiquated design, and out of order, or verging on a state of dilapidation. As well might one expect to find a really superior musician drumming away on an old and worn-out instrument, whose every note gives forth a discord, as to see a bright, active and expert mechanic employing poor and badly-used tools. The good workman will insist on having good tools, and these he will see are kept in fit condition for work. Any other course would be prima facie evidence of his lack of superiority in his calling.
The Builder and Wood-Worker – December, 1885
—Jeff Burks
Original article and pictures take http://blog.lostartpress.com/2014/02/21/good-workmen-and-good-tools/ site
Good News, Doughnuts Just Got (a Little) Healthier and We've Got the Recipe
The Mediterranean diet is widely accepted as the pinnacle of health, so it should come as no surprise that even their deep-fried desserts somehow manage to be less destructive than our beloved doughnuts. Say yasou (Greek for hello) to the loukoumade, a beignet-like fritter that’s popular in Greece, where they’re served with both sweet and savory complements.
This version of the Hellenic treat, dreamed up by James Beard winner Jody Adams, is topped with either a honey glaze
or Nutella and sprinkled with salty-sweet Baklava crisps at Boston’s newest restaurant Saloniki Greek. While these sizzling bites of heaven are far from health-giving (they’re still bathed in oil), Adams, the chef and co-founder of the eatery, notes that they are relatively more wholesome than their traditional ringed counterparts since they use minimal sugar in the batter (honey is a natural sweetener) and do not include butter.
VIDEO: 25 Thanksgiving Questions with Ina Garten
Read on for the recipe.
Original article and pictures take http://www.instyle.com/recipes/saloniki-greek-loukoumades-recipe site
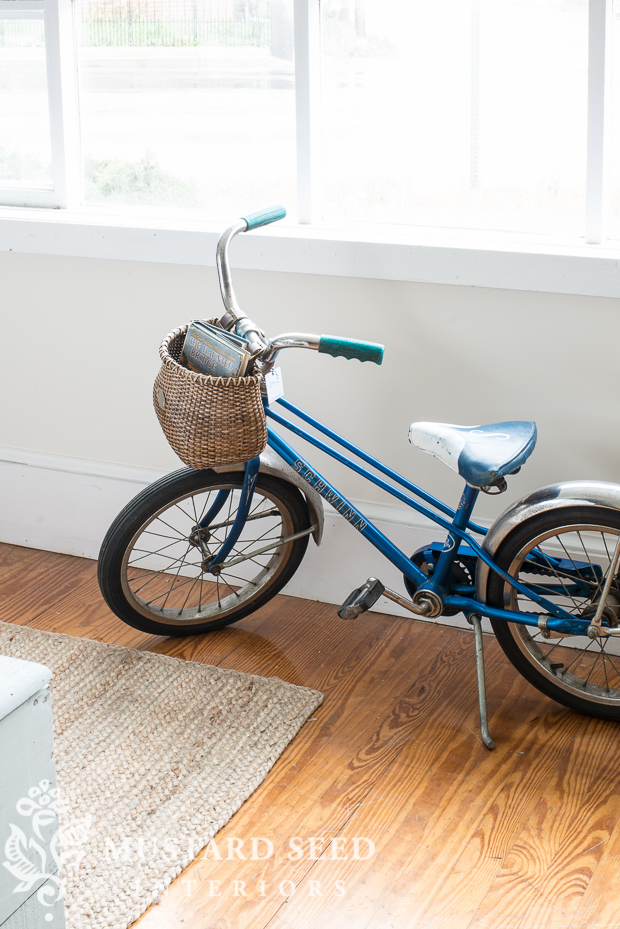
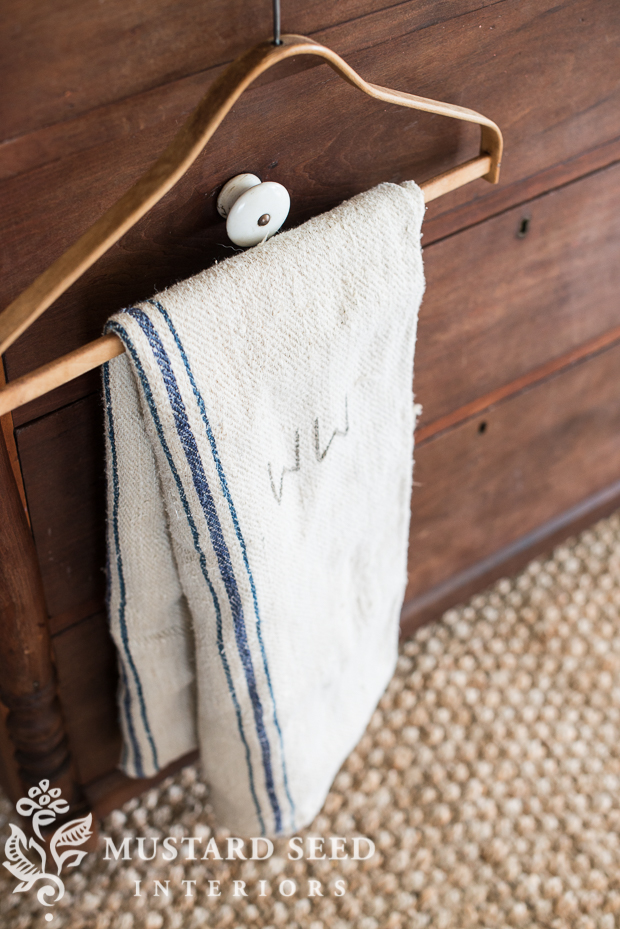
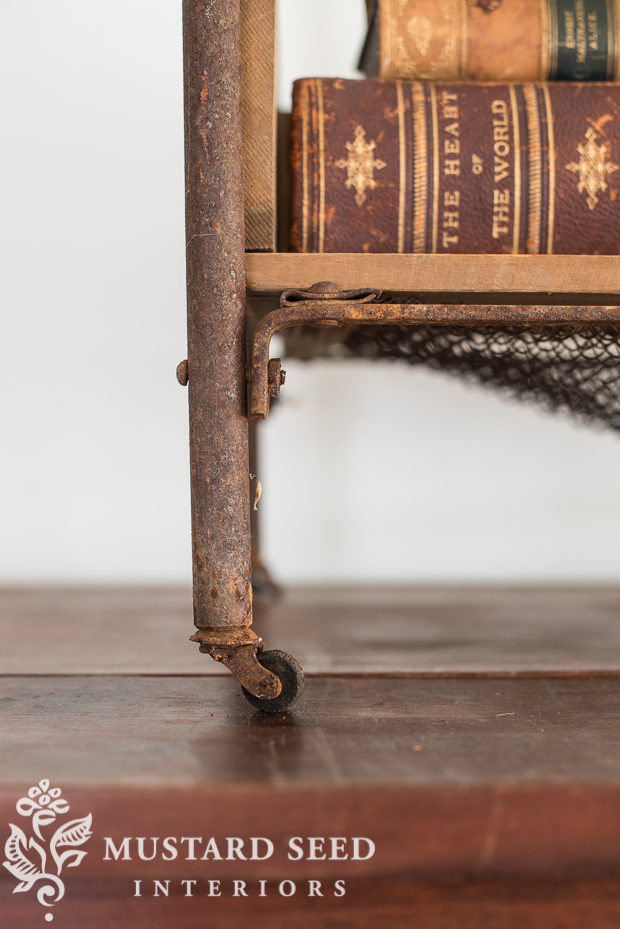
Just like the one I learned to ride on and recently sold at Lucketts… Another was a grain sack with blue stripes and an “MM” monogram. This custom sign with an excerpt of “my” verse on it… And a local reader brought me this rusty metal doll bed that she fetched from the trash…
I sort of loved the fact that she declared she found something in the garbage that I would love. I mean, who tells someone they are giving them a gift that was picked out of the trash?
Well, a kindred spirit, that’s who. She was right that I loved it and we celebrated the fact that someone threw away such a treasure for her to find.
I happened to have a piece of a wooden drawer that fit almost perfectly in it.
I took a minute in the studio to put a few of the gifts together.
I love how individual items are just that…individual items. But, when you put them together, you see a style emerge. Such was the case with all of these gifts. Smaller pieces, curated by strangers, that came together in a way that was totally Marian.
And I’ve received a lot of other beautiful gifts over the years. Everything from cow paintings, candles, bath salts and t-shirts, to jewelry, cookies, books, ironstone, and even furniture!
I know every blogger says it, but I really do have the best readers. Not because you send
gifts, but because of the sentiment behind those gifts. A sentiment of encouragement and friendship that has made this blog a special place in cyberspace.
Thanks for being a part of it.
Original article and pictures take http://missmustardseed.com/2016/06/29429/ site
","pageUrl":"http://www.instructables.com/id/Glow-table/?ALLSTEPS","id":12,"text":"Thank you so much for the inspiration! Here is my take on the table","type":"post"},{"date":"Mon, 19 Sep 2016 00:00:00 GMT","humanLanguage":"en","author":"mikeasaurus","authorUrl":"http://www.instructables.com/member/mikeasaurus","diffbotUri":"post|3|1073215744","html":"
The table came out great, and those large voids look amazing!
Thanks for sharing pictures. You rock!
","pageUrl":"http://www.instructables.com/id/Glow-table/?ALLSTEPS","id":13,"text":"The table came out great, and those large voids look amazing!
Thanks for sharing pictures. You rock!","type":"post","parentId":12},{"date":"Mon, 19 Sep 2016 00:00:00 GMT","humanLanguage":"en","author":"west indies landscaper","authorUrl":"http://www.instructables.com/member/west%20indies%20landscaper","diffbotUri":"post|3|1092559972","html":"
I tried to order the powder but you don"t seem to be delivering where I live... is there a way have it delivered to west indies?
","pageUrl":"http://www.instructables.com/id/Glow-table/?ALLSTEPS","id":14,"text":"I tried to order the powder but you don"t seem to be delivering where I live... is there a way have it delivered to west indies?","type":"post"},{"date":"Mon, 19 Sep 2016 00:00:00 GMT","images":[{"naturalHeight":130,"width":150,"diffbotUri":"image|3|607119712","url":"https://cdn.instructables.com/FPD/Q7K3/ITPSH0ST/FPDQ7K3ITPSH0ST.SQUARE2.jpg","naturalWidth":130,"height":150},{"naturalHeight":130,"width":150,"diffbotUri":"image|3|583292150","url":"https://cdn.instructables.com/FFB/BBS5/ITPSH0UY/FFBBBS5ITPSH0UY.SQUARE2.jpg","naturalWidth":130,"height":150},{"naturalHeight":130,"width":150,"diffbotUri":"image|3|-1323005224","url":"https://cdn.instructables.com/F3X/MVGO/ITPSH0Y5/F3XMVGOITPSH0Y5.SQUARE2.jpg","naturalWidth":130,"height":150},{"naturalHeight":130,"width":150,"diffbotUri":"image|3|-1163888950","url":"https://cdn.instructables.com/FOW/BR86/ITPSH12S/FOWBR86ITPSH12S.SQUARE2.jpg","naturalWidth":130,"height":150}],"humanLanguage":"en","author":"AndrewOttawa","authorUrl":"http://www.instructables.com/member/AndrewOttawa","diffbotUri":"post|3|859471070","html":"
Thanks so much for sharing this project, it really inspired me to do something myself. My daughter needed a small stereo cabinet, and I took the opportunity to make it even better than she expected.
The cabinet is fairly small, 18" x 26" x 15", made largely of maple with a live-end pear-wood top. I asked her to draw a design for me, transposed it to the side, and carved out the picture with a Dremel tool. I filled it with the epoxy/glow powder combo, and sanded it down. I poured it on a little thick, but with the help of a belt sander and time for the resin to harden (about 4 days), I was able to get it nice and smooth. She was really pleased with the result. I included some photos from before the final sanding and varnishing.
","pageUrl":"http://www.instructables.com/id/Glow-table/?ALLSTEPS","id":15,"text":"Thanks so much for sharing this project, it really inspired me to do something myself. My daughter needed a small stereo cabinet, and I took the opportunity to make it even better than she expected.
The cabinet is fairly small, 18" x 26" x 15", made largely of maple with a live-end pear-wood top. I asked her to draw a design for me, transposed it to the side, and carved out the picture with a Dremel tool. I filled it with the epoxy/glow powder combo, and sanded it down. I poured it on a little thick, but with the help of a belt sander and time for the resin to harden (about 4 days), I was able to get it nice and smooth. She was really pleased with the result. I included some photos from before the final sanding and varnishing.","type":"post"},{"date":"Mon, 19 Sep 2016 00:00:00 GMT","humanLanguage":"en","author":"mikeasaurus","authorUrl":"http://www.instructables.com/member/mikeasaurus","diffbotUri":"post|3|-929383044","html":"Wow! The live edge top is great, but the glow design really sets this piece off. I love how you and your daughter collaborated to make this happen, and I know she's going to love it for years to come.
Thanks for sharing the story and pictures!
","pageUrl":"http://www.instructables.com/id/Glow-table/?ALLSTEPS","id":16,"text":"Wow! The live edge top is great, but the glow design really sets this piece off. I love how you and your daughter collaborated to make this happen, and I know she's going to love it for years to come.
Thanks for sharing the story and pictures!","type":"post","parentId":15},{"date":"Mon, 19 Sep 2016 00:00:00 GMT","images":[{"naturalHeight":130,"width":150,"diffbotUri":"image|3|-741229936","url":"https://cdn.instructables.com/FUY/US82/ITM1A41N/FUYUS82ITM1A41N.SQUARE2.jpg","naturalWidth":130,"height":150},{"naturalHeight":130,"width":150,"diffbotUri":"image|3|-1393792796","url":"https://cdn.instructables.com/F7M/Y0AR/ITM1A42G/F7MY0ARITM1A42G.SQUARE2.jpg","naturalWidth":130,"height":150},{"naturalHeight":130,"width":150,"diffbotUri":"image|3|-1286869994","url":"https://cdn.instructables.com/FGW/PNR1/ITM1A42V/FGWPNR1ITM1A42V.SQUARE2.jpg","naturalWidth":130,"height":150},{"naturalHeight":130,"width":150,"diffbotUri":"image|3|-492335184","url":"https://cdn.instructables.com/F9M/8K01/ITM1A43P/F9M8K01ITM1A43P.SQUARE2.jpg","naturalWidth":130,"height":150},{"naturalHeight":130,"width":150,"diffbotUri":"image|3|1694115316","url":"https://cdn.instructables.com/FTH/BSVG/ITM1A43R/FTHBSVGITM1A43R.SQUARE2.jpg","naturalWidth":130,"height":150},{"naturalHeight":130,"width":150,"diffbotUri":"image|3|-1155799546","url":"https://cdn.instructables.com/FVE/HYO3/ITM1A441/FVEHYO3ITM1A441.SQUARE2.jpg","naturalWidth":130,"height":150}],"humanLanguage":"en","author":"Neesixx","authorUrl":"http://www.instructables.com/member/Neesixx","diffbotUri":"post|3|2061574849","html":"
When I first saw your work, I knew I had to make one of my own! The wood wasn't to hard to find. Luckily I work at a lumber mill, so I got two six foot planks for free. Your instructions were really easy to follow! After a few weeks of hard work it was finally finished.Thank you for great ideas and instructions!
","pageUrl":"http://www.instructables.com/id/Glow-table/?ALLSTEPS","id":17,"text":"When I first saw your work, I knew I had to make one of my own! The wood wasn't to hard to find. Luckily I work at a lumber mill, so I got two six foot planks for free. Your instructions were really easy to follow! After a few weeks of hard work it was finally finished.Thank you for great ideas and instructions!","type":"post","parentId":15},{"date":"Mon, 19 Sep 2016 00:00:00 GMT","humanLanguage":"en","author":"mikeasaurus","authorUrl":"http://www.instructables.com/member/mikeasaurus","diffbotUri":"post|3|929697271","html":"
Looks great! I am still amazed by my glow table, so I know you'll be enjoying the effect for a while to come. Also, there's no better feeling than an amazing thing you made yourself.
Thanks for sharing pictures and your story!
","pageUrl":"http://www.instructables.com/id/Glow-table/?ALLSTEPS","id":18,"text":"Looks great! I am still amazed by my glow table, so I know you'll be enjoying the effect for a while to come. Also, there's no better feeling than an amazing thing you made yourself.
Thanks for sharing pictures and your story!","type":"post","parentId":17},{"date":"Mon, 19 Sep 2016 00:00:00 GMT","humanLanguage":"en","author":"Neesixx","authorUrl":"http://www.instructables.com/member/Neesixx","diffbotUri":"post|3|-1663522775","html":"
Thanks Mike! And yes It's a good feeling too accomplish something beautiful with your own two hands! I'm looking forward for my next projects. I'm going to make a bigger table using 7/4 Pecky cypress and a curve ball that my wife gave me.. A round table!
","pageUrl":"http://www.instructables.com/id/Glow-table/?ALLSTEPS","id":19,"text":"Thanks Mike! And yes It's a good feeling too accomplish something beautiful with your own two hands! I'm looking forward for my next projects. I'm going to make a bigger table using 7/4 Pecky cypress and a curve ball that my wife gave me.. A round table!","type":"post","parentId":17},{"date":"Mon, 19 Sep 2016 00:00:00 GMT","humanLanguage":"en","author":"mikeasaurus","authorUrl":"http://www.instructables.com/member/mikeasaurus","diffbotUri":"post|3|-1845093062","html":"
Please post pictures when you're done. Good luck!
","pageUrl":"http://www.instructables.com/id/Glow-table/?ALLSTEPS","id":20,"text":"Please post pictures when you're done. Good luck!","type":"post","parentId":17},{"date":"Mon, 19 Sep 2016 00:00:00 GMT","humanLanguage":"en","author":"Tracy4dj8","authorUrl":"http://www.instructables.com/member/Tracy4dj8","diffbotUri":"post|3|418500419","html":"
Absolutely beautiful and very easy to understand instructable! Thank you so much for sharing! I can't wait to try this!
","pageUrl":"http://www.instructables.com/id/Glow-table/?ALLSTEPS","id":21,"text":"Absolutely beautiful and very easy to understand instructable! Thank you so much for sharing! I can't wait to try this!","type":"post","parentId":15},{"date":"Mon, 19 Sep 2016 00:00:00 GMT","images":[{"naturalHeight":130,"width":150,"diffbotUri":"image|3|543112334","url":"https://cdn.instructables.com/FAX/XXZY/IT5S5VZK/FAXXXZYIT5S5VZK.SQUARE2.jpg","naturalWidth":130,"height":150},{"naturalHeight":130,"width":150,"diffbotUri":"image|3|-1919305366","url":"https://cdn.instructables.com/FA9/YBMF/IT5S5VZH/FA9YBMFIT5S5VZH.SQUARE2.jpg","naturalWidth":130,"height":150},{"naturalHeight":130,"width":150,"diffbotUri":"image|3|-693235272","url":"https://cdn.instructables.com/FNO/2HND/IT5S5VZF/FNO2HNDIT5S5VZF.SQUARE2.jpg","naturalWidth":130,"height":150},{"naturalHeight":130,"width":150,"diffbotUri":"image|3|1255331524","url":"https://cdn.instructables.com/FD8/RKC2/IT5S5VZ9/FD8RKC2IT5S5VZ9.SQUARE2.jpg","naturalWidth":130,"height":150},{"naturalHeight":130,"width":150,"diffbotUri":"image|3|504173344","url":"https://cdn.instructables.com/FO5/XYLE/IT5S5VZ5/FO5XYLEIT5S5VZ5.SQUARE2.jpg","naturalWidth":130,"height":150},{"naturalHeight":130,"width":150,"diffbotUri":"image|3|1929583864","url":"https://cdn.instructables.com/FOX/1KC6/IT5S5VE9/FOX1KC6IT5S5VE9.SQUARE2.jpg","naturalWidth":130,"height":150}],"humanLanguage":"en","author":"Gabriel_S_PL","authorUrl":"http://www.instructables.com/member/Gabriel_S_PL","diffbotUri":"post|3|-1929878455","html":"
I admire your work with this table, looks great and the glow effect is realy awesome.
A while ago I acquired a walnut slab with beautiful natural cracks adn decided to fill it with epoxy resin. I got a little to excited doing that and the resin boiled, but in my opinion it looks pretty good. Of course it was sanded, water polished, and at the end covered with clear lacquer. Hope you like it.
Regards from Poland
Gabriel
","pageUrl":"http://www.instructables.com/id/Glow-table/?ALLSTEPS","id":22,"text":"I admire your work with this table, looks great and the glow effect is realy awesome. A while ago I acquired a walnut slab with beautiful natural cracks adn decided to fill it with epoxy resin. I got a little to excited doing that and the resin boiled, but in my opinion it looks pretty good. Of course it was sanded, water polished, and at the end covered with clear lacquer. Hope you like it.
Regards from Poland Gabriel","type":"post","parentId":15},{"date":"Mon, 19 Sep 2016 00:00:00 GMT","humanLanguage":"en","author":"mikeasaurus","authorUrl":"http://www.instructables.com/member/mikeasaurus","diffbotUri":"post|3|-664338917","html":"
Wow! Thanks for sharing, it looks great.
Epoxy resin can boil if it's poured too thick. Bes tto do 2-3 pours for larger voids to get a clear casting. however, I think it looks really nice the way it is here. Great work!
","pageUrl":"http://www.instructables.com/id/Glow-table/?ALLSTEPS","id":23,"text":"Wow! Thanks for sharing, it looks great.
Epoxy resin can boil if it's poured too thick. Bes tto do 2-3 pours for larger voids to get a clear casting. however, I think it looks really nice the way it is here. Great work!","type":"post","parentId":22},{"date":"Mon, 19 Sep 2016 00:00:00 GMT","humanLanguage":"en","author":"Gabriel_S_PL","authorUrl":"http://www.instructables.com/member/Gabriel_S_PL","diffbotUri":"post|3|-325463438","html":"
I'm happy that you like it. And yes I've learned to pour smaller amout of epoxy. Now, working on another table with about 44mmtthick slab I poured it 8 or 9 times so it should be perfectly clear when finnished. As soon as it's done there will be a nice gallery picturing the progress of creation.
Thanks again!
Regards
G
","pageUrl":"http://www.instructables.com/id/Glow-table/?ALLSTEPS","id":24,"text":"I'm happy that you like it. And yes I've learned to pour smaller amout of epoxy. Now, working on another table with about 44mmtthick slab I poured it 8 or 9 times so it should be perfectly clear when finnished. As soon as it's done there will be a nice gallery picturing the progress of creation. Thanks again! Regards
G","type":"post","parentId":22},{"date":"Fri, 19 Aug 2016 00:00:00 GMT","images":[{"naturalHeight":130,"width":150,"diffbotUri":"image|3|-1319172950","url":"https://cdn.instructables.com/FQC/M4H7/IRXTNRWL/FQCM4H7IRXTNRWL.SQUARE2.jpg","naturalWidth":130,"height":150},{"naturalHeight":130,"width":150,"diffbotUri":"image|3|610005234","url":"https://cdn.instructables.com/FMO/MMJX/IRXTNS0X/FMOMMJXIRXTNS0X.SQUARE2.jpg","naturalWidth":130,"height":150},{"naturalHeight":130,"width":150,"diffbotUri":"image|3|-331563160","url":"https://cdn.instructables.com/FTD/DIQU/IRXTNSAF/FTDDIQUIRXTNSAF.SQUARE2.jpg","naturalWidth":130,"height":150},{"naturalHeight":130,"width":150,"diffbotUri":"image|3|-180215486","url":"https://cdn.instructables.com/FRE/65U5/IRXTNSJY/FRE65U5IRXTNSJY.SQUARE2.jpg","naturalWidth":130,"height":150}],"humanLanguage":"en","author":"Prona","authorUrl":"http://www.instructables.com/member/Prona","diffbotUri":"post|3|-1193049866","html":"
Hi Mike. Thank you so much for your instructions. I have been wanting to make a glow in the dark table since I came across your instructions some time ago. A friends wedding finally gave me the excuse I needed. As a complete amateur with limited woodworking experience I found the instructions easy to follow. A friend helped me by sourcing a large plank of sweet chestnut (no pecky cypress in the UK?!), saw it & join 2 pieces for the table to be the gift so I could make a river for teh resin down the middle. I made 2 - one a prototype to make all my mistakes on first. I had only 2 problems was there was a bit of a delay in getting the resin, as was difficult to get large volume in the UK, so had to order from the US and my damming of the resin wasn't effective on the prototype due to unseen cracks going all the way through the wood which meant I resined the plank to the floor, but all sorted. I finished them with 2-3 coats of teak oil rather than varnish which will hopefully mellow over time. Didn't get a photo of the finished gift table glowing in the dark due to my poor photography skills, but some here of the tables, glowing table tops & finished prototype table in semi daylight.
","pageUrl":"http://www.instructables.com/id/Glow-table/?ALLSTEPS","id":25,"text":"Hi Mike. Thank you so much for your instructions. I have been wanting to make a glow in the dark table since I came across your instructions some time ago. A friends wedding finally gave me the excuse I needed. As a complete amateur with limited woodworking experience I found the instructions easy to follow. A friend helped me by sourcing a large plank of sweet chestnut (no pecky cypress in the UK?!), saw it & join 2 pieces for the table to be the gift so I could make a river for teh resin down the middle. I made 2 - one a prototype to make all my mistakes on first. I had only 2 problems was there was a bit of a delay in getting the resin, as was difficult to get large volume in the UK, so had to order from the US and my damming of the resin wasn't effective on the prototype due to unseen cracks going all the way through the wood which meant I resined the plank to the floor, but all sorted. I finished them with 2-3 coats of teak oil rather than varnish which will hopefully mellow over time. Didn't get a photo of the finished gift table glowing in the dark due to my poor photography skills, but some here of the tables, glowing table tops & finished prototype table in semi daylight.","type":"post"},{"date":"Fri, 19 Aug 2016 00:00:00 GMT","humanLanguage":"en","author":"mikeasaurus","authorUrl":"http://www.instructables.com/member/mikeasaurus","diffbotUri":"post|3|1579399692","html":"
Both tables look amazing! Thanks for sharing your work.
Pecky Cypress is difficult to source, but any wood with voids will work (and can look just as good, as you have shown). Buying resin online is the best way I've found to reliably get the quantity you need, there's loads of types but this is what I used.
Love the pictures, thanks again for sharing them. Enjoy the Pro Membership!
","pageUrl":"http://www.instructables.com/id/Glow-table/?ALLSTEPS","id":26,"text":"Both tables look amazing! Thanks for sharing your work. Pecky Cypress is difficult to source, but any wood with voids will work (and can look just as good, as you have shown). Buying resin online is the best way I've found to reliably get the quantity you need, there's loads of types but this is what I used.
Love the pictures, thanks again for sharing them. Enjoy the Pro Membership
!","type":"post","parentId":25},{"date":"Fri, 19 Aug 2016 00:00:00 GMT","humanLanguage":"en","author":"scottb116","authorUrl":"http://www.instructables.com/member/scottb116","diffbotUri":"post|3|513833140","html":"
I love the idea and had one question. thinking of making a patio table and was wondering what type of finish, outdoor varnish has a UV blocker in it so was wondering your suggestions.
","pageUrl":"http://www.instructables.com/id/Glow-table/?ALLSTEPS","id":27,"text":"I love the idea and had one question. thinking of making a patio table and was wondering what type of finish, outdoor varnish has a UV blocker in it so was wondering your suggestions.","type":"post","parentId":25},{"date":"Fri, 19 Aug 2016 00:00:00 GMT","humanLanguage":"en","author":"kjswanso","authorUrl":"http://www.instructables.com/member/kjswanso","diffbotUri":"post|3|-192264921","html":"
Mike, I love the concept. I would love to do this just for the color and not the glow effect. What powder could I use? I am thinking countertops in a kitchen.
","pageUrl":"http://www.instructables.com/id/Glow-table/?ALLSTEPS","id":28,"text":"Mike, I love the concept. I would love to do this just for the color and not the glow effect. What powder could I use? I am thinking countertops in a kitchen.","type":"post","parentId":25},{"date":"Fri, 19 Aug 2016 00:00:00 GMT","humanLanguage":"en","author":"mikeasaurus","authorUrl":"http://www.instructables.com/member/mikeasaurus","diffbotUri":"post|3|-425095967","html":"
","pageUrl":"http://www.instructables.com/id/Glow-table/?ALLSTEPS","id":30,"text":"Will this type of epoxy work, and do I need to buy a full gallon of this. This is for 16 oz.
Im in the process of doing something similar, do you think it would still glow as well with a thin cout of clear resin poured across the top?
","pageUrl":"http://www.instructables.com/id/Glow-table/?ALLSTEPS","id":31,"text":"Im in the process of doing something similar, do you think it would still glow as well with a thin cout of clear resin poured across the top?","type":"post","parentId":25},{"date":"Tue, 19 Jul 2016 00:00:00 GMT","humanLanguage":"en","author":"mikeasaurus","authorUrl":"http://www.instructables.com/member/mikeasaurus","diffbotUri":"post|3|-324741972","html":"
A thin layer will glow a little, but the depth of the voids is what gives the glow resin the look you see here.
","pageUrl":"http://www.instructables.com/id/Glow-table/?ALLSTEPS","id":32,"text":"A thin layer will glow a little, but the depth of the voids is what gives the glow resin the look you see here.","type":"post","parentId":31},{"date":"Tue, 19 Jul 2016 00:00:00 GMT","humanLanguage":"en","author":"MattS282","authorUrl":"http://www.instructables.com/member/MattS282","diffbotUri":"post|3|1251793045","html":"
Hey Mike, do you mind providing the source of where you buy the Pecky Cypress in a size that's manageable for cutting into the right dimensions? I'm having a tough time finding a local source.
","pageUrl":"http://www.instructables.com/id/Glow-table/?ALLSTEPS","id":33,"text":"Hey Mike, do you mind providing the source of where you buy the Pecky Cypress in a size that's manageable for cutting into the right dimensions? I'm having a tough time finding a local source.","type":"post","parentId":25},{"date":"Tue, 19 Jul 2016 00:00:00 GMT","humanLanguage":"en","author":"mikeasaurus","authorUrl":"http://www.instructables.com/member/mikeasaurus","diffbotUri":"post|3|1251201681","html":"
This type of wood is a regional thing, but can be found at some lumber yards. Luckily, any type of wood that has voids in it will work, so the type of wood isn't as important as the process.
","pageUrl":"http://www.instructables.com/id/Glow-table/?ALLSTEPS","id":34,"text":"This type of wood is a regional thing, but can be found at some lumber yards. Luckily, any type of wood that has voids in it will work, so the type of wood isn't as important as the process.","type":"post","parentId":33},{"date":"Tue, 19 Jul 2016 00:00:00 GMT","humanLanguage":"en","author":"PakeJitts","authorUrl":"http://www.instructables.com/member/PakeJitts","diffbotUri":"post|3|-1870829094","html":"
I plan to build an electric guitar at some point and when I get into inlays this looks like it will come in handy!!! Might even make a similar table at some point :D
","pageUrl":"http://www.instructables.com/id/Glow-table/?ALLSTEPS","id":35,"text":"I plan to build an electric guitar at some point and when I get into inlays this looks like it will come in handy!!! Might even make a similar table at some point :D","type":"post","parentId":25},{"date":"Sun, 19 Jun 2016 00:00:00 GMT","humanLanguage":"en","author":"JoshuaN47","authorUrl":"http://www.instructables.com/member/JoshuaN47","diffbotUri":"post|3|-1178902503","html":"
Very nice table, it looks great. That being said, I mean no offense in anyway from these questions, I'm just curious, but...
Any time in the past that I've applied epoxy resign to wood I'd go over it with a small torch/heat gun/hair dryer to get out as much of the trapped air as possible as to avoid the epoxy looking hazy/milky white. Was there a reason this wasn't done? I didn't know if it was an aspect of this type of epoxy additive (to glow in the dark) that would be ruined by doing this step? Was it this omitted step for the reason why the spots that were epoxied having a milky appearance when not glowing or is it the additive that allows it to glow? Beautiful table regardless I'm just checking because I just wanted to get an idea of what the appearance will be when not glowing. Thanks a lot and again, very nice table.
","pageUrl":"http://www.instructables.com/id/Glow-table/?ALLSTEPS","id":36,"text":"Very nice table, it looks great. That being said, I mean no offense in anyway from these questions, I'm just curious, but...
Any time in the past that I've applied epoxy resign to wood I'd go over it with a small torch/heat gun/hair dryer to get out as much of the trapped air as possible as to avoid the epoxy looking hazy/milky white. Was there a reason this wasn't done? I didn't know if it was an aspect of this type of epoxy additive (to glow in the dark) that would be ruined by doing this step? Was it this omitted step for the reason why the spots that were epoxied having a milky appearance when not glowing or is it the additive that allows it to glow? Beautiful table regardless I'm just checking because I just wanted to get an idea of what the appearance will be when not glowing. Thanks a lot and again, very nice table.","type":"post","parentId":25},{"date":"Sun, 19 Jun 2016 00:00:00 GMT","humanLanguage":"en","author":"mikeasaurus","authorUrl":"http://www.instructables.com/member/mikeasaurus","diffbotUri":"post|3|-2003694731","html":"
Step 10 explains the pour process here. Since there were so many small voids I did several small pours to ensure the coverage needed and stay within the pot life of the mixed resin. The milky appearance is a function of how the glow powder looks in daylight, a bone white color. Even with small air bubbles, the resin is clear but looks hazy from the glow powder. You could easily use a torch to remove any air bubbles, or give it a hot breath from your mouth at close range will also work.
I'd love to see your creation based on this when you're done. Good luck!
","pageUrl":"http://www.instructables.com/id/Glow-table/?ALLSTEPS","id":37,"text":"Step 10 explains the pour process here. Since there were so many small voids I did several small pours to ensure the coverage needed and stay within the pot life of the mixed resin. The milky appearance is a function of how the glow powder looks in daylight, a bone white color. Even with small air bubbles, the resin is clear but looks hazy from the glow powder. You could easily use a torch to remove any air bubbles, or give it a hot breath from your mouth at close range will also work. I used a propane torch to remove bubbles in epoxy, you can see that in Step 10 and 11 of my Lumberjack Table.
I'd love to see your creation based on this when you're done. Good luck!","type":"post","parentId":36},{"date":"Sun, 19 Jun 2016 00:00:00 GMT","humanLanguage":"en","author":"JoshuaN47","authorUrl":"http://www.instructables.com/member/JoshuaN47","diffbotUri":"post|3|230777317","html":"
thanks for the reply and I'll definitely post some pics if i make it with this type of inlay...where I could use anothers opinion is with this- I don't want to take away from the very rustic looking wood I'm using but love the way the turquoise looks when glowing, I'm just nervous that the glow pigments when not glowing would look bad (like a bad epoxy job full of air bubbles). Any thoughts? Thanks a lot for your input!
","pageUrl":"http://www.instructables.com/id/Glow-table/?ALLSTEPS","id":38,"text":"thanks for the reply and I'll definitely post some pics if i make it with this type of inlay...where I could use anothers opinion is with this- I don't want to take away from the very rustic looking wood I'm using but love the way the turquoise looks when glowing, I'm just nervous that the glow pigments when not glowing would look bad (like a bad epoxy job full of air bubbles). Any thoughts? Thanks a lot for your input!","type":"post","parentId":36},{"date":"Sun, 19 Jun 2016 00:00:00 GMT","humanLanguage":"en","author":"mikeasaurus","authorUrl":"http://www.instructables.com/member/mikeasaurus","diffbotUri":"post|3|-1049814481","html":"
The natural color of the glow powder is bone white, an alternative would be to accent the feature and use a glow powder that stays a color in natural light like this:
Really light up your next dinner party with a table that glows in the dark!
Photoluminescent (glow) powder mixed with clear casting resin fills the naturally formed voids in Pecky Cypress hardwood, creating a unique and stunning table. The glow powder charges up in sunlight and emits a cool blue glow when in partial or complete darkness.
Placing this table near a window will allow it to collect rays from the setting sun and then set off a pleasant glow from the transition from twilight to evening. Making your own is fun as you can customize it in any way you want. Instead of using hardwood you can use the technique of adding glow powder to resin to cast in all kinds of fun ways.
Let's make!
Step 1: Materials
The type of wood I used for this table is known as 'pecky cypress', which is regular cypress that has been naturally damaged with a fungal growth inside causing sections to rot - wiki on taxadium distichum (cypress).
These damaged pockets can be easily removed and create cavities in the wood which are perfect for filling with resin and glow powder. The pockets of damaged (rotten) cypress are soft and can easily be removed with compressed air and some light digging with a hand tool.
Aside from Pecky Cypress, we'll need:
Step 2: Mill wood
The wood comes from the mill to the store in rough shape, it's up to you as the consume to decide how you want the product to look. In North America most board lumber is sold in board feet.
Knowing I was going to make a table top by joining a few boards, I grabbed a few lengths of the Pecky Cypress and used a jointer to square the edges of both sides of the board. These clean edges will make a great surface to bond the planks together.
Step 3: Cut planks to size
Step 4: Join planks to make a board
Step 5: Dig out fungus rot
The damaged pockets of wood in Pecky Cypress can be easily removed by gently digging with small tools to clean out the cavities.
Starting with a vacuum I gently pushed a flat-headed screwdriver into each rotted cavity to dislodge the rot and remove it. After, I used compressed air to blast out any remaining debris and ensure the cavity was clear of detritus.
This can get very messy and dusty, so wear proper safety equipment.
Step 6: Sand surface
After the glue has dried I sanded down the surface with a course 80 grit sandpaper on a random orbital sander. This cleaned up the transition between the glued boards. After, I brushed the surface clean to remove any dust. We'll need a super clean surface before we can move on to casting with resin.
Step 7: Mask and prepare board for resin
Before casting resin we need to ensure the table will be able to retain the medium. Since some of the cavities in the boards go all the through the entire underside was taped off, that way any resin that goes to the bottom will pool and not leak out.
To keep the resin from oozing out the ends I put scrap strips of thick acrylic along both ends. I didn't worry about the sides, as these boards didn't have any open cavities along the sides. The acrylic scraps were clamped into place and a short border of masking tape was put along the sides, just in case any resin migrated.
Step 8: Resin and glow powder
I used clear casting resin, which is a 1:1 ratio type - meaning you don't need to measure out specific amount of catalyst, just equal parts resin and catalyst. I prefer this method as I'm not very careful and have mixed up the mix ratio before. This resin is super easy to use and begins to set in about 7 minutes.
There's plenty of glow in the dark powder colours available, I chose blue glow in the dark powder which I got online. I'd recommend using more glow powder than less, as the effect is much more striking.
For my 41"x22" table I used 64 oz (2 liters) of casting resin and about 3.5 ounces (100 g) of glow powder. Yours measurements will probably vary.
Step 9: Prepare resin
To mix my resin I used large unwaxed paper cups. Pour equal portions of resin and catalyst into separate cups, ensuring to fill cups less than halfway full. Pour a portion of glow powder into either cup and mix thoroughly.
Know that when you combine the two liquids of the resin the chemical reaction will start, allowing you only about 5-7 minutes of working time before the resin sets.
When you're ready add the catalyst to the resin and briskly stir until the two liquids are one homogeneous mixture. Ensure to scrape the stir stick, and the sides and bottom of the cup. Pour the stirred mixture into the catalyst cup and continue stirring. The entire mixing process should take less than 2 minutes to ensure you have enough time to pour the resin without it setting.
Step 10: Pour resin
With your resin mixed it can be poured into the cavities of the Pecky Cypress. Since the resin is not viscous enough to suspend the glow in the powder I had to take quick breaks from pouring to stir the mixture to ensure even glow powder distribution.
Gently pour the glow resin into all wood cavities. You may find that the resin gets absorbed into the wood, or that some cavities are slower to fill, this is normal. You can apply another layer of resin over previously poured sections.
I poured in smaller measures, about 10 pours in all. This process took about an hour to complete. I let the resin cure completely overnight.
Step 11: Let resin cure, then reveal
Step 12: Preliminary glow test
Eager to test out the results I took the cast resin table top outside and let it soak in some sunshine for about 5 minutes, then quickly took it inside an enclosed area and turn off the lights. The effect was incredible!
Picture 1 shows the table with the additional resin spill over in complete darkness. There is no photo trickery here, this picture is exactly as it appeared when the lights were off. If anything, the effect in person was more vibrant.
Picture 2 shows the same table top with the door slightly ajar, allowing some natural light to enter into the room. Here you can see the resin spill over next to the vibrant blue and grain of the wood.
Step 13: Clean up edges
Along the edges where the resin touched the acrylic or masking tape were small sections of raised resin due to capillary action. Even though the edges are going to be routed smooth, removing these raised edges now makes the sanding process easier. I used a sharp knife to cut away the raised edges.
Step 14: Rough sanding
Step 15: After a few passes
Step 16: Finish sanding
Step 17: Fence for routing
After the surface was sanded I could turn my attention to the edges. Though my router bit had an end bearing to keep distance from the table edge, the holey nature of Pecky Cypress made uniform distance on the edge impossible with an end bearing, meaning the blade of the router would occasional dig into the table more where there was a cavity on the table edge. To solve this I made a fence for the router.
With the rounderover bit installed in the router I measured the distance from the edge of the end bearing to the edge of the router base, this distance would be the setback for the fence. I clamped a straight edge fence at this setback perpendicular to the edge of the table sides.
Step 18: Routing edges
With the fence installed I could run the router over the table edges to make a nice rounded edge.
Step 19: Polyurethane finish
Step 20: Wet sand
Step 21: Paint leg anchor plate
Step 22: Transfer anchor openings
Step 23: Add anchor nuts + plate
The anchor nuts were installed in the openings, then the anchor plate was installed over the anchor nuts. Since the Pecky Cypress had irregular cavities some minor tweaks were needed to ensure the bolts and anchor plates had sufficient coverage on the underside of the table.