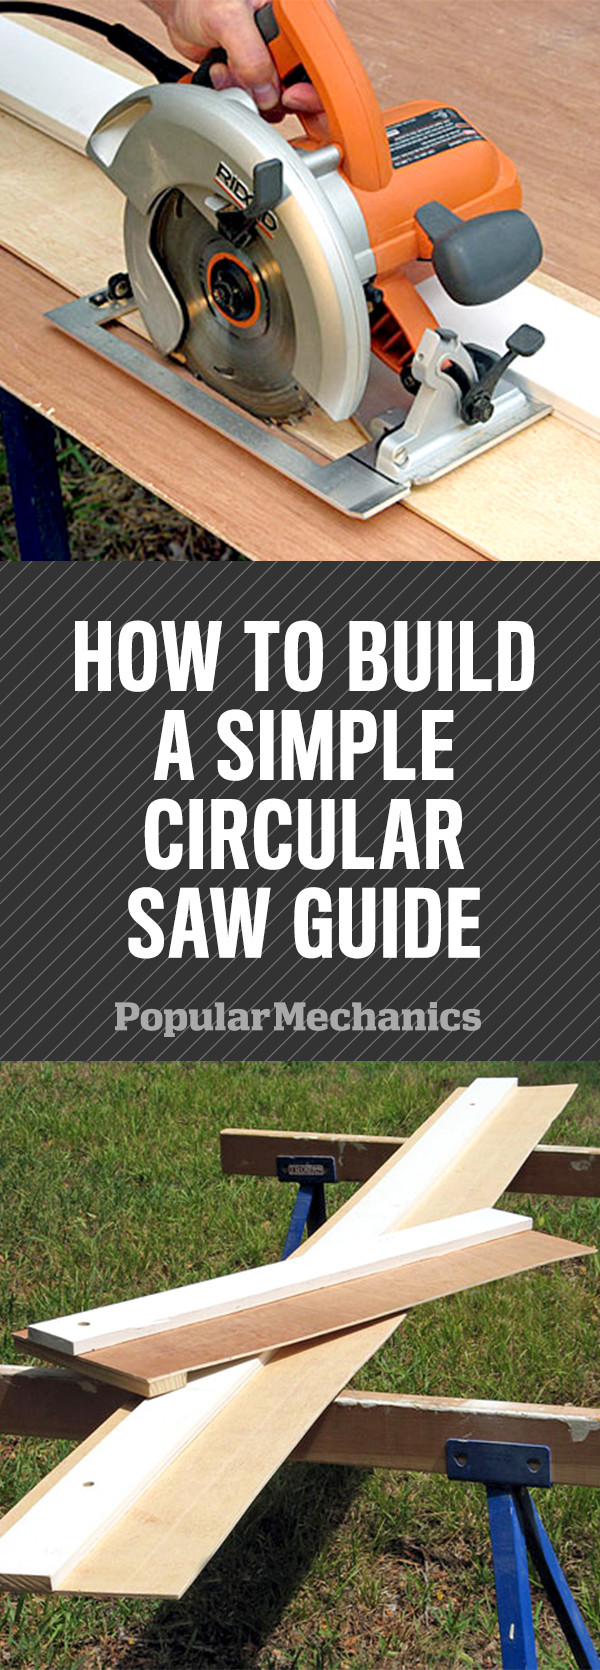
When I moved a few years ago, I parted ways with my 15-year-old table saw. I planned to replace it once I settled into my new house, but when the time came to build a room divider/bookshelf unit, I decided to build a couple of my own makeshift circular saw guides instead. The guides are compact and store easily. More important, they can also help you work more accurately and safely in the shop.
I made two guides--one for ripping long pieces of the medium-density fiberboard that I was using on the project, plus a shorter one for crosscutting boards. I spent nothing for materials, using plywood and boards that were collecting dust in my garage.
Here"s how to make the long guide:
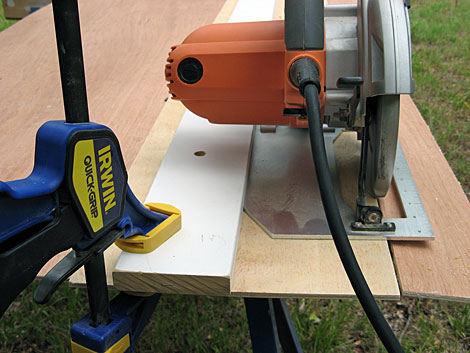
1. You"ll need a straight 8-ft.-long 1 x 4 and an 8-ft.-long strip of plywood at least 12 in. wide. Position the 1 x 4 about 1 1/2 in. away from one edge of the plywood, making sure the edges of the 1 x 4 and the plywood are parallel. Fasten the plywood to the 1 x 4 using wood glue and 3/4-in. box nails, driven every 8 to 10 in. Drive through the plywood first--you generally want to nail through the thinner piece into the thicker piece.
2. Rest the wide side of the saw"s shoe against the 1 x 4. Cut the excess plywood along 8 ft. of the 1 x 4"s length, trimming the larger side of the plywood.

That"s it! Now, when you need to cut a long board or sheet, just align your cut marks with the edge of the guide, clamp the guide on each end, and cut. The blade will travel right along the plywood edge, with the shoe riding against the 1 x 4. It"s quick, safe and especially useful when you need to cut a sheet of plywood down to size or to rip a long straight edge on a wide piece of lumber to prepare it for further ripping on a table saw.
I made a short guide the same way, using 3-ft.-long pieces. The only

The only thing I would change is the plywood thickness--for these, I used a 3/8-in. scrap I had on hand. Next time, I"ll use 1/2-in. plywood to create a more rigid guide. When I"m not using them, I hang both guides on the wall.
Save this article for later by pinning it. For more ideas, follow Popular Mechanics on Pinterest.
Original article and pictures take http://www.popularmechanics.com/home/tools/reviews/a3602/4283497/ site
>
Комментариев нет:
Отправить комментарий