Every guy wants a place to hang out with friends. And the ultimate feature for any man cave is a bar. We talked with dozens of bar builders—DIYers and pros—and collected their best ideas for the perfect home bar.
Most of our bar builders just wanted a convenient spot to get together with the guys—a watering hole without crowds or noise, where you can flip on the game or music you want or switch it all off. But several also mentioned saving on entertainment. A night out on the town is expensive. But if your guests chip in for drinks and snacks, an evening in your home bar is dirt-cheap. So if your wife isn"t too thrilled with your bar plan, present it as a smart investment strategy.
A. Standard bar height is 42 in. Bar stools will be easier to find if you stick with that height.
B. The overhang should be at least 8 in., but when it comes to knee room, more is better.
C. Most bar stools are 30 in. tall—perfect for standard bar height. But watch out: Some stools are several inches taller or shorter.
D. The bar top should be 16 to 20 in. wide, including the molding; more than that is a waste of space.
E. Bar molding serves three critical purposes:
- It keeps spilled drinks from dribbling off the bar and onto your lap.
- It provides a comfy armrest and lets you properly slouch over your beer.
- Most important, it makes your home bar look more official.
F. The drink rail is where drinks get poured on a traditional bar. It"s a nice feature, but not a necessity for a home bar.
G. A drip lip—simply a thin strip of protruding wood—keeps spills from running off the bar top.
H. A lower counter is the perfect place to slice lemons, set bottles or install a bar sink. But it adds complexity to the project and eats up a lot of space, so home bar builders often skip it.
J. The minimum stool spacing is 2 ft. of bar per seat. That will feel crowded to big guys, so go to 30 in. if you can.
K. The foot rail should be 7 to 9 in. off the floor. Metal railing (usually brass) is expensive ($200 for an 8-ft. run), so many home bars have a simple ledge instead.


“It strokes my ego when friends say: "You did this yourself? Amazing!"”
Mike Kinross faced his basement bar with stone (manufactured stone instead of natural, but even Fred Flintstone couldn"t tell the difference). Though it was his first stone project, Mike tells us it was easy—fussy and time-consuming, but not difficult. For installation tips, see these articles on installing stone.

Beer drip trays catch spills, keep them off the finish and clean up easily. Just cut a recess out of the upper bar top layer to create a perfect pocket for the tray.

Most bar moldings fit over a bar top made from two layers of 3/4-in.-thick material. The lower layer is usually plywood. The top layer can be plywood, solid wood, hardwood flooring, or even tile or stone. You won"t find bar molding at home centers or lumberyards, but there are dozens of suppliers online. Costs range from $10 to $40 per linear ft., depending on wood species and width. It pays to shop around. Most suppliers carry lengths up to 8 ft., but a few offer 12-ft. lengths.
Bar moldings range in width from 4-1/4 in. to almost 7 in. If you have a sliding miter saw, you can cut even the

Here are some tips for working with the stuff.

“A mock-up is the best way to plan. And a lot cheaper than making changes after the bar is built.” Jason built a bar a few years ago and now plans to upgrade by replacing the wood bar top with a concrete top.
Every bar builder we talked with told us that planning is tough. With so many dimensions and space considerations, using pencil and paper just doesn"t provide a clear preview of the final results. So take an hour or two to build a model. Scavenge some cardboard or pick up some foam insulation at a home center (less than $10 for a 4 x 8-ft. sheet).

“If I had it to do over again, I might do a few things differently. But I would definitely use steel again.”
Galvanized steel roofing has become a fashionable material indoors. But aside from style, John Solis found that steel has a ton of practical benefits.
- Inexpensive: John paid less than $1 per sq. ft.
- Fast and easy to install: no painting or finishing needed.
- Durable and maintenance-free.
- Easy access: Need to run new beer lines to the taps? New speaker or TV wiring? Just unscrew the steel to open up stud cavities.

“The friends who helped build my bar love to stop in for a glass of my excellent home brew.”
Dean Peacock wanted to top off his bar with something tougher than wood. He first thought about kitchen countertop materials like solid surfacing, granite and quartz. But those options are expensive and pro-installed—and Dean likes to do everything himself. Then he came across these Italian granite slabs at a tile store. Framed in oak, they made the perfect bar top. If you"d like to follow Dean"s lead, contact a granite countertop fabricator. They often sell smaller leftover slabs at a bargain price.

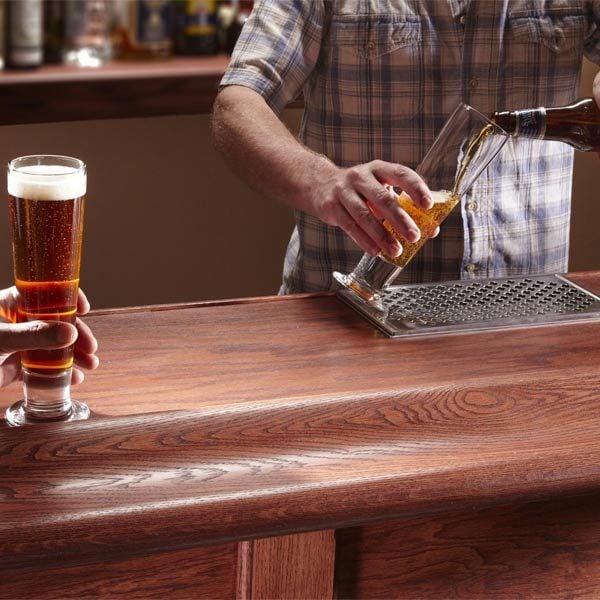
“A tap system sounds complicated, but it"s simple—mostly just running and connecting plastic tubing.”
At Roger Dunning"s bar, beer flows from kegs kept cold by a fridge in the next room and propelled by CO2 pressure. Aside from the fridge, the system came as a kit that cost about $300. After using (and loving) his system for a few years, Roger has this advice:
Original article and pictures take http://www.familyhandyman.com/video/device/mobile/t/61462566/how-to-build-a-bar.htm?m_n="true#.Uxxltj29LCQ" site
>
Комментариев нет:
Отправить комментарий