Build it yourself and save $151,900!
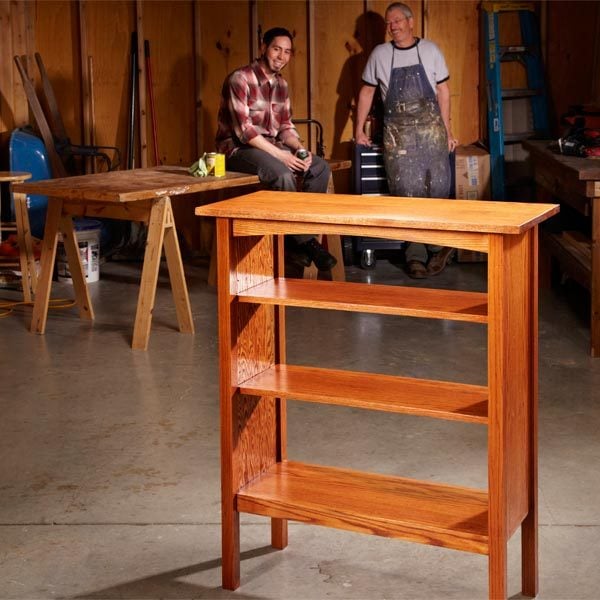
My neighbor, CT, asked me to help him build a bookcase he found in an old Stickley furniture catalog. I love Craftsman furniture and CT is a great neighbor. How could I refuse?
This bookcase is inspired by a Gustav Stickley model that sold for $12 in 1910. One of the original Stickley models recently sold for $152,000, but you can build ours for about $100.
Using the picture in the catalog as a start, we sat down to do a little research and figure out the details. CT wanted a slightly larger bookcase, so we stretched the width from 22 in. to 36.
I told CT we could build it in his garage with nothing more than a table saw, a drill and a pocket hole jig. If you don’t own a pocket hole jig, you owe it to yourself to buy one. Pocket screws aren’t as strong as most other types of joinery, but they are plenty strong for this bookcase, and you can’t beat their speed and simplicity. CT agreed, especially when he found out that for $40 he could buy a complete pocket hole system. (For tips on using pocket screws, see “How to Use Pocket Screws.” ) You’ll also need at least four pipe clamps for this project, which will cost about $60 altogether.

At the home center, we took our time picking through the oak boards. We wanted straight, flat boards, of course, but we also looked closely at grain pattern. Novice woodworkers usually skip this tedious process, but they shouldn’t when building a bookcase. It has a big impact on the final look of the project


After cutting the plywood box parts to size (see the Materials and Cutting List in Additional Information), we added the 3/8-in.-thick edging (J) to protect the bottom of the cabinet sides (A; Photo 1). We applied the same edging (H) to the plywood shelves (C). Then we drilled the pocket holes in the box top and bottom (B; Photo 2). After that, we drilled holes for adjustable shelf supports in the plywood sides and—finally—we assembled the box (Photo 3).
With the box assembled, we turned our attention to building two identical face frames. (Since the bookcase has no back, it needed two face frames.) Unlike a standard face frame, which has vertical stiles, our face frame has legs (E) made from two layers of 3/4-in.-thick boards. We glued up the leg blanks (Photo 4), ripped both blanks into two legs and sanded out the saw marks. Like many other beginning woodworkers, CT figured that curves were complicated, so he was a little intimidated by the arched upper rails (F). But I showed him a neat trick for marking out a shallow arch (Photo 5). His curved cut (Photo 6) wasn’t perfect, but a little sanding smoothed it out (Photo 7).
Original article and pictures take http://www.familyhandyman.com/woodworking/bookcase/how-to-build-a-bookcase/view-all site
>
Комментариев нет:
Отправить комментарий