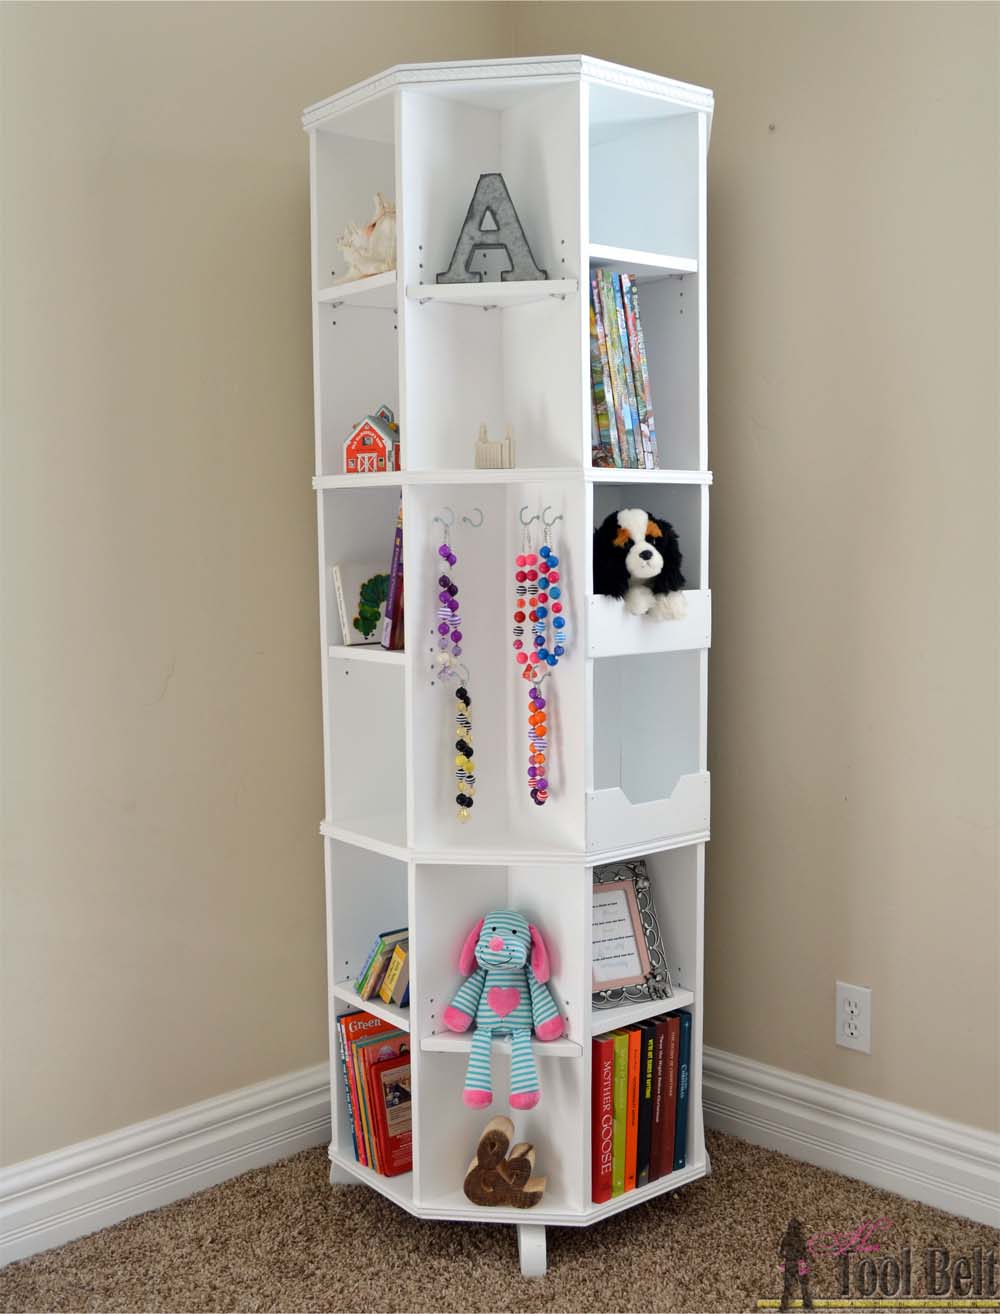
I wanted to add plenty of space to display knick-knacks and store items that are important to my 2 year old, so I added hooks and ‘bin’ fronts to a few places. The bins are a perfect place for her to store her favorite stuffed friends. The whole octagon bookshelf spins really easy on a 12″ lazy susan bearing.
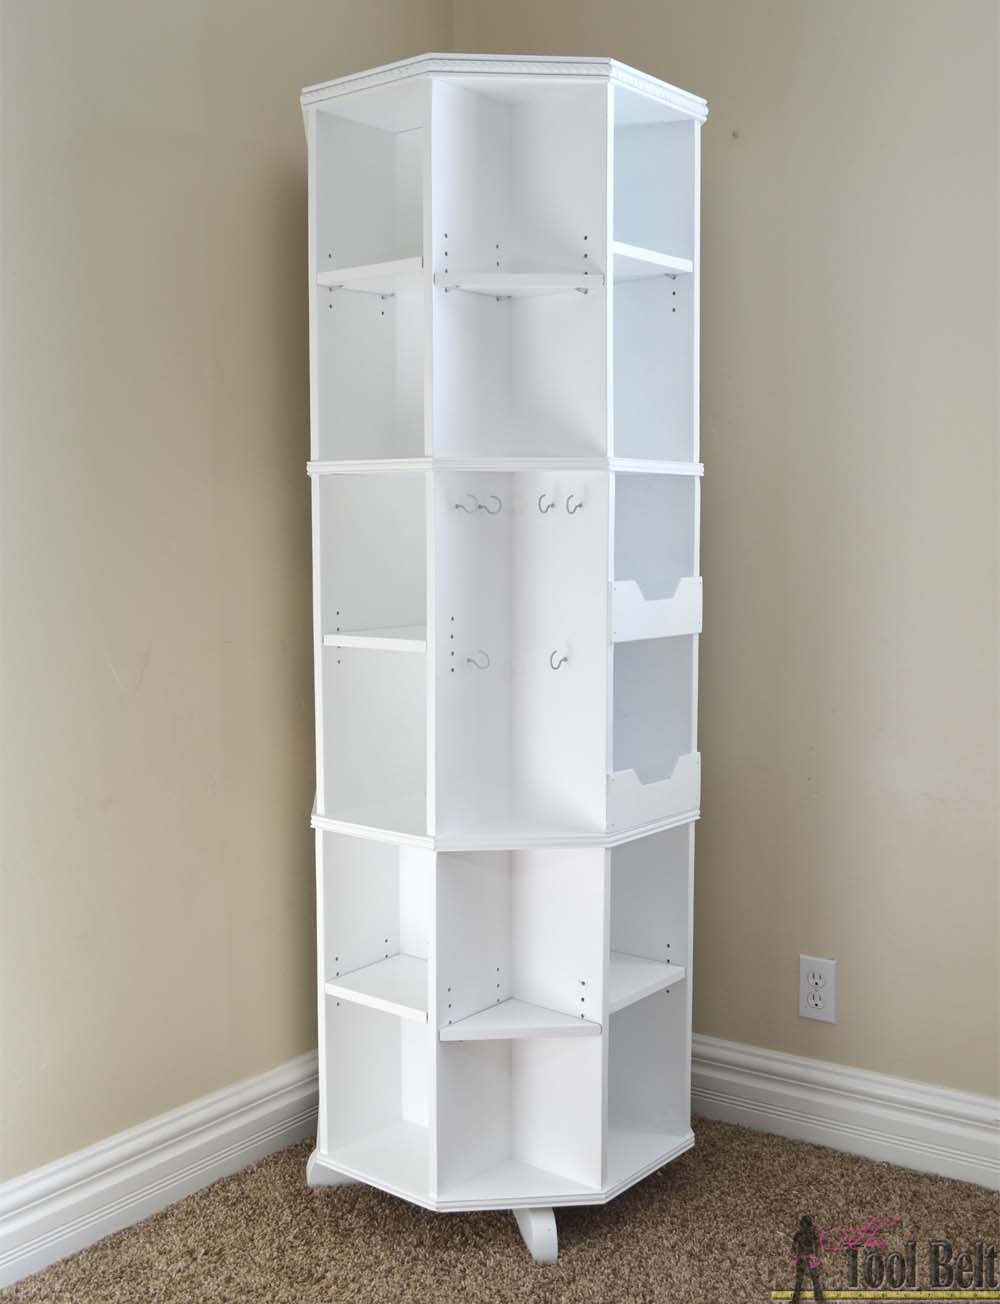
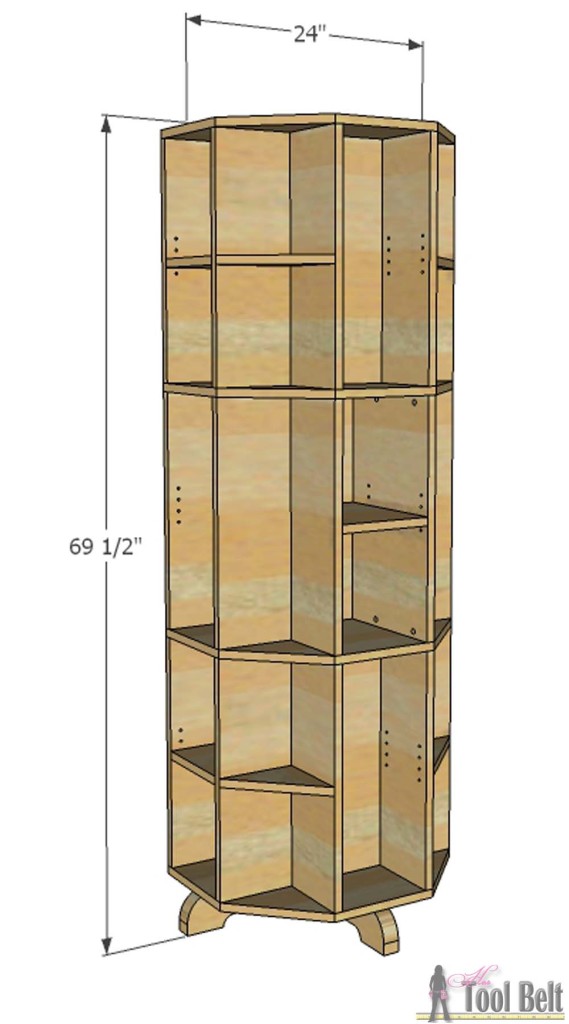
The octagon rotating bookshelf is constructed from 2 sheets of plywood, some molding and a 2 x 4 for the feet.
How to Build a Octagon Rotating Bookshelf
Materials
- 2 sheets of ¾” plywood
- 1 – 2″ x 4″ x 8′ stud
- 30’ molding
- (affiliate)
- 1 1/4″
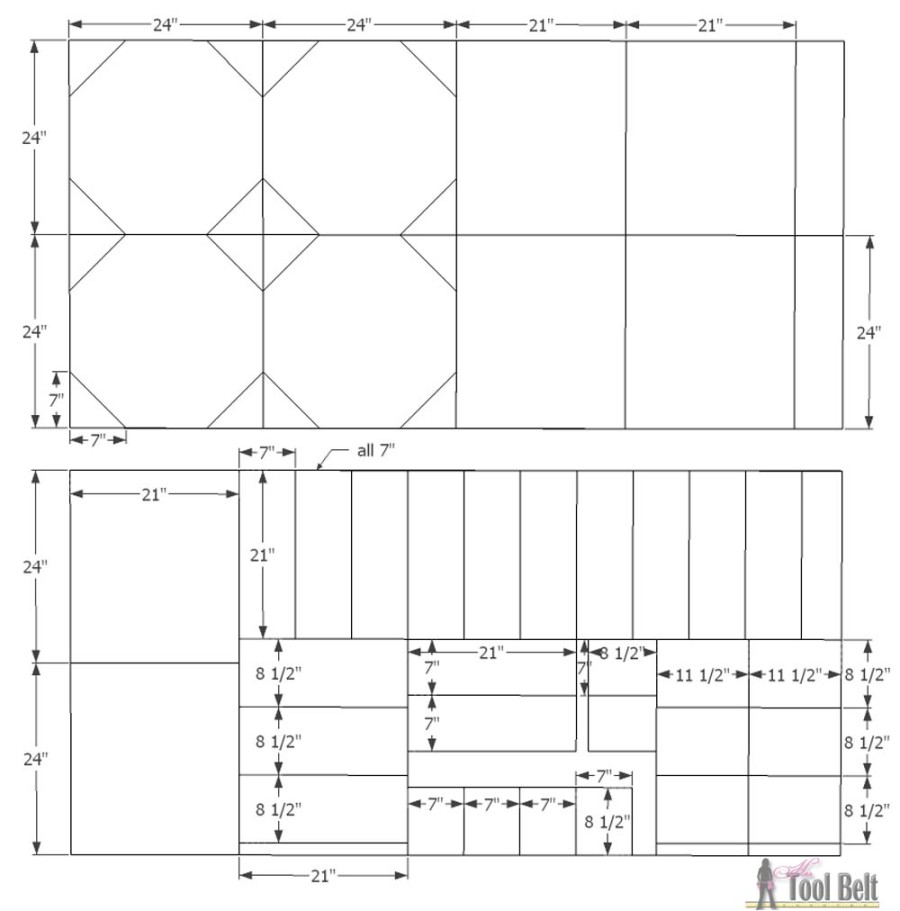
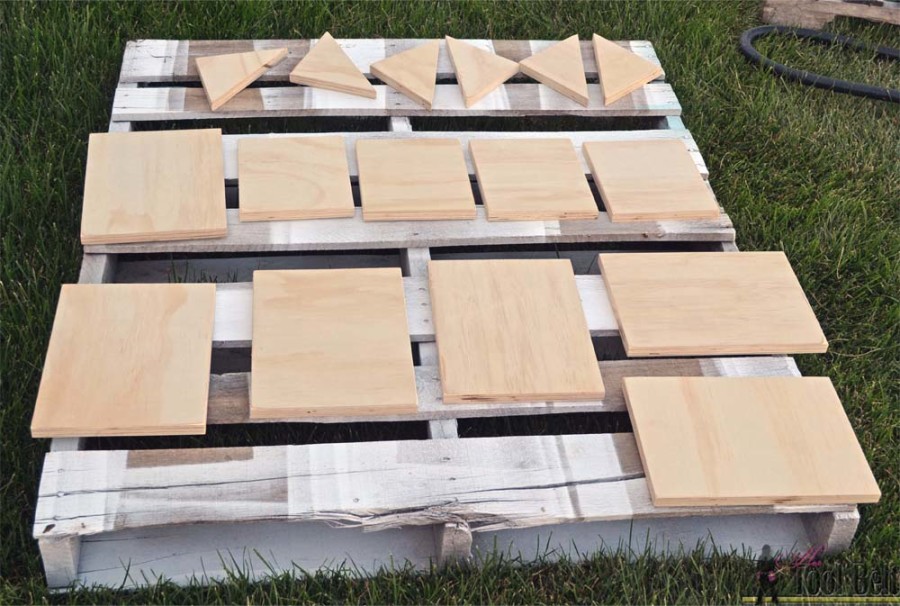
Cut the 4 – 24” x 24” squares into octagons. Mark 7” from each corner and draw a connecting line. Cut along the line, and save the triangles for shelves later.

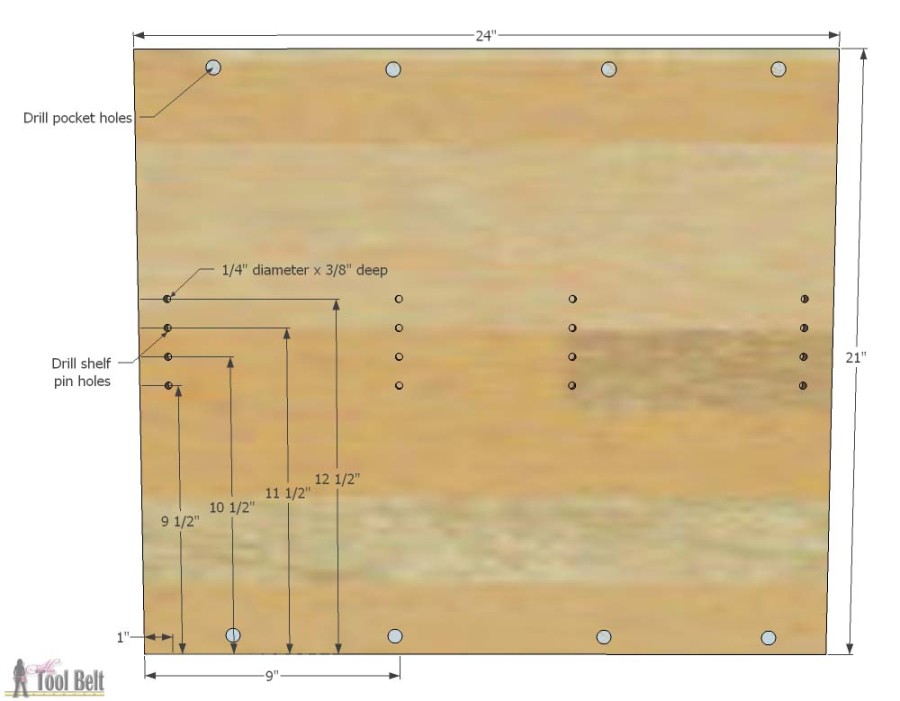
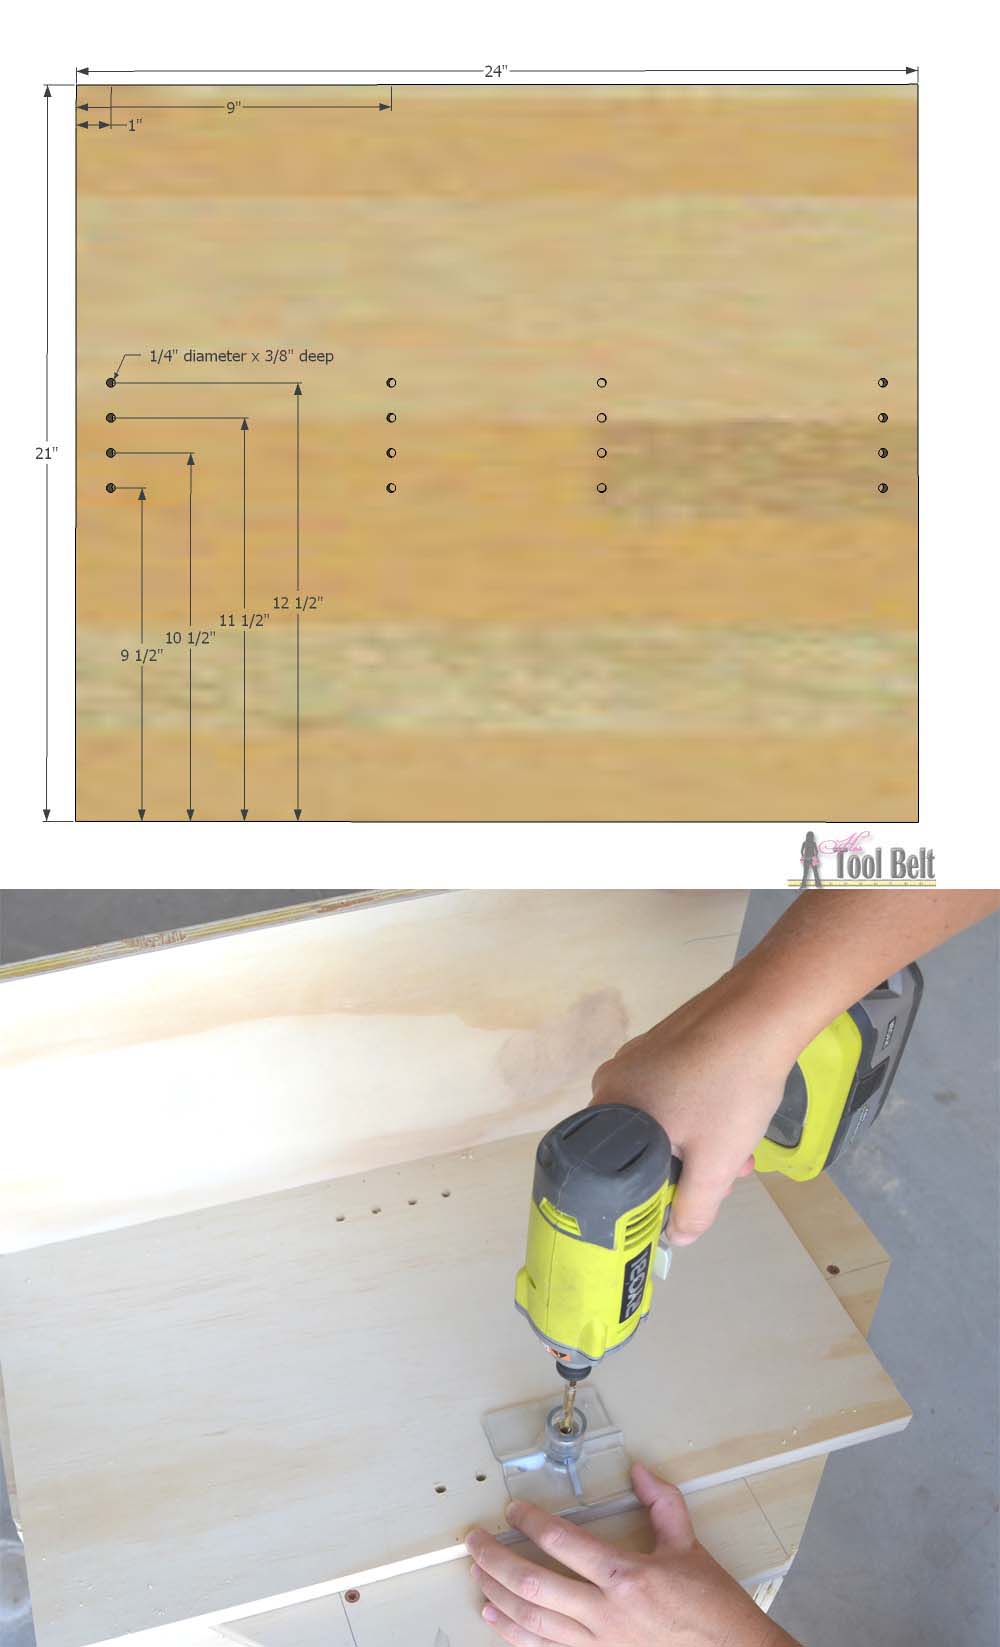
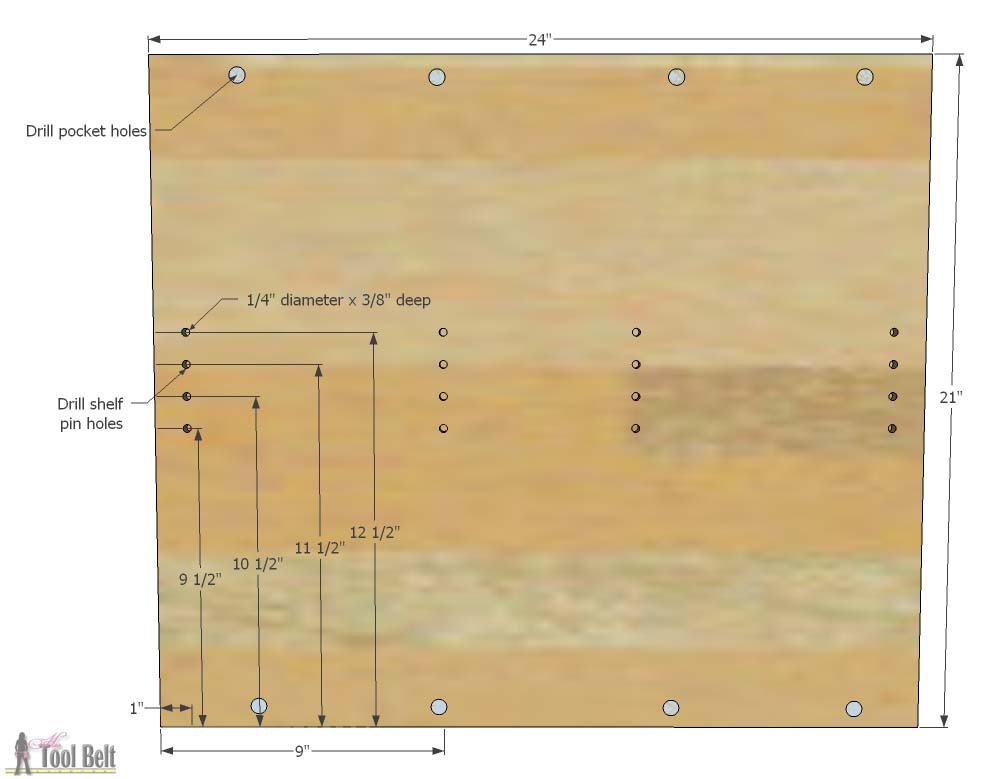
I want shelves that can adjust for different book sizes, so I drilled shelf pin holes at 9 ½”, 10 ½”, 11 ½” and 12 ½” from the bottom. You can change these dimensions depending on your need. In the 24” x 21” boards, drill shelf pin holes ¼” diameter and 3/8” deep, but if the same hole locations can be used on the other side of the board then drill all of the way through.

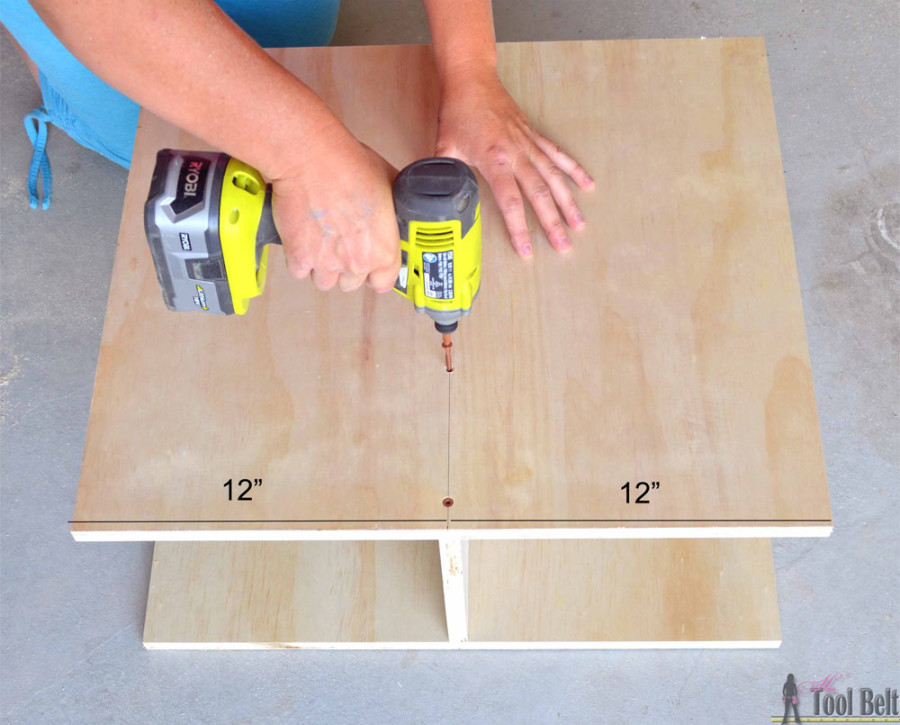
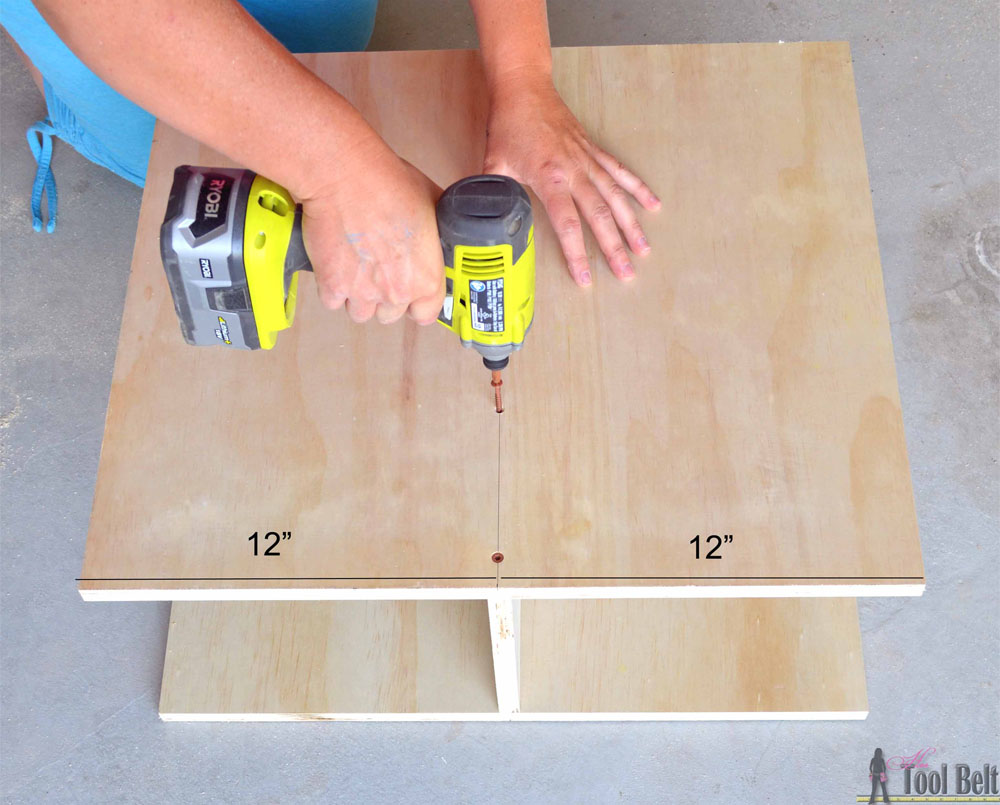
Join 2 of the 24” x 21” with a 8 ½” x 21” boards (the shelf pin holes go on the inside). Predrill countersink holes down the center of the 24” x 21”. Use wood glue and 1 ½” screws to join the boards together.
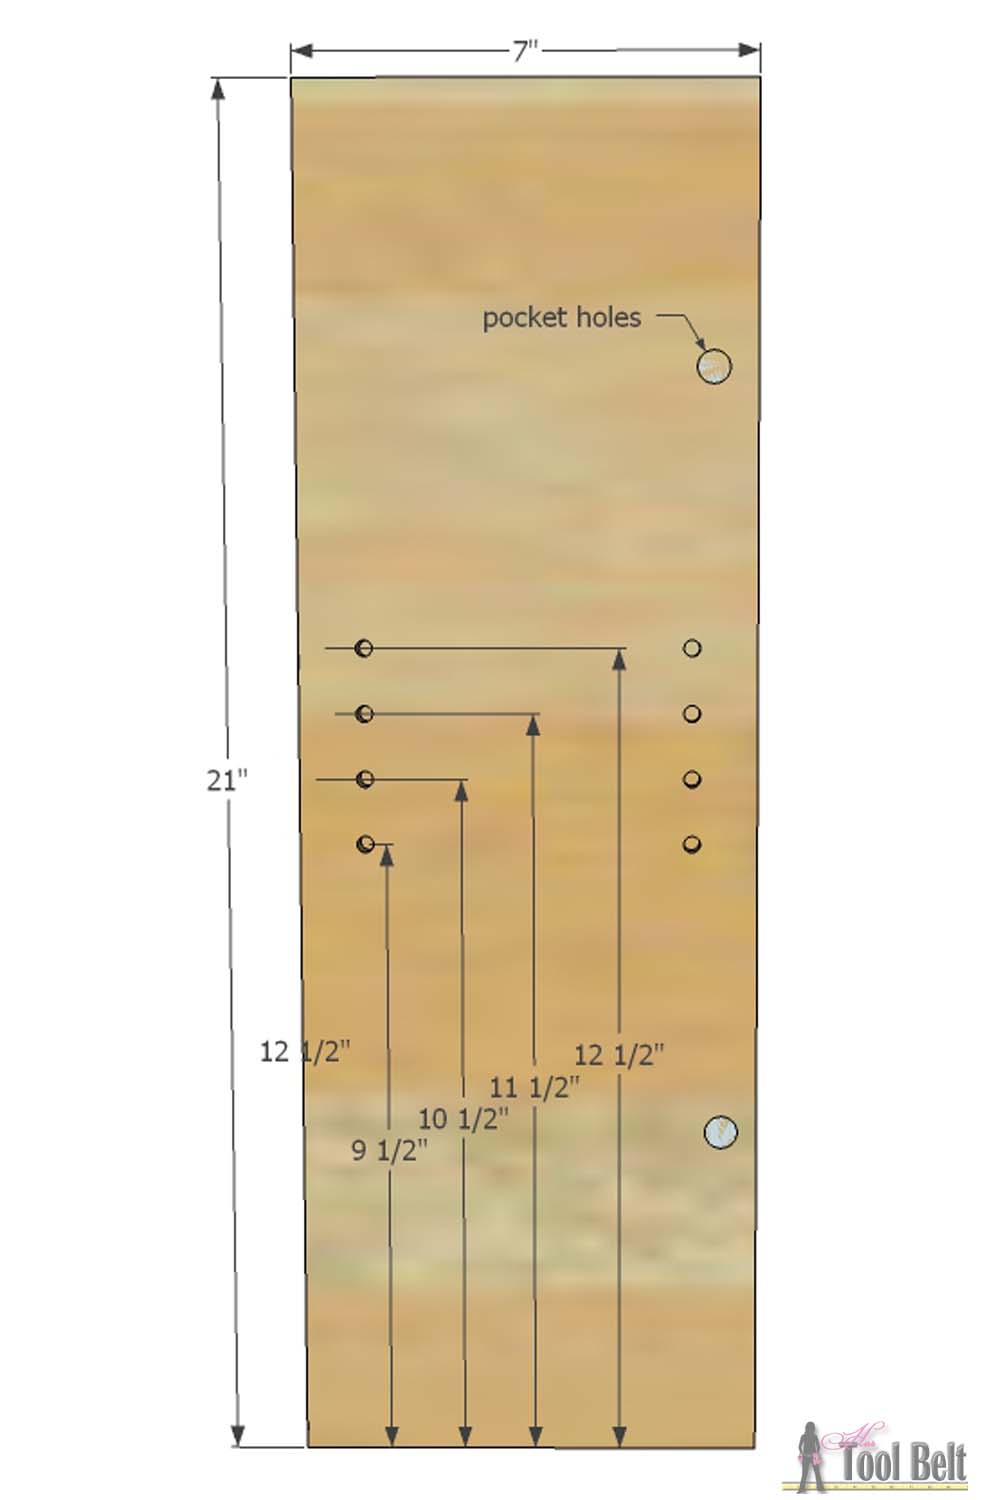
On 4 of the 7” x 21” boards drill shelf pin holes and drill pocket holes.

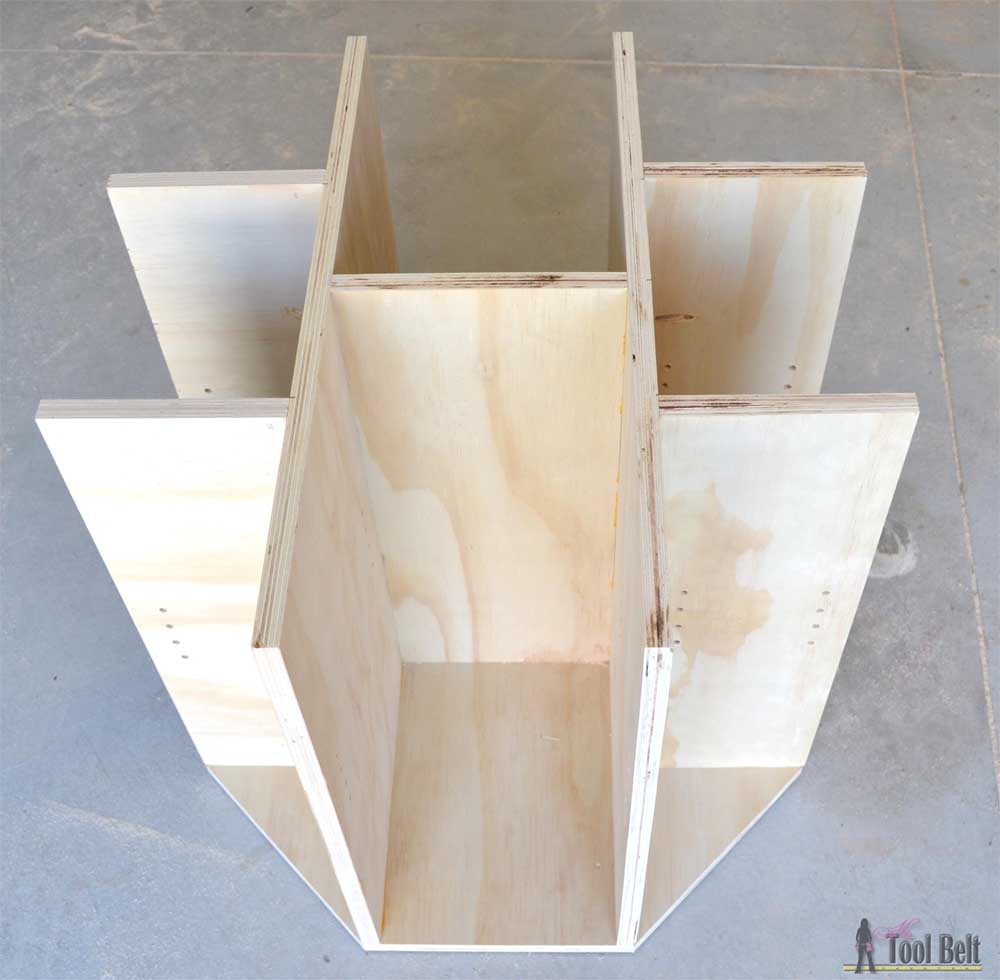
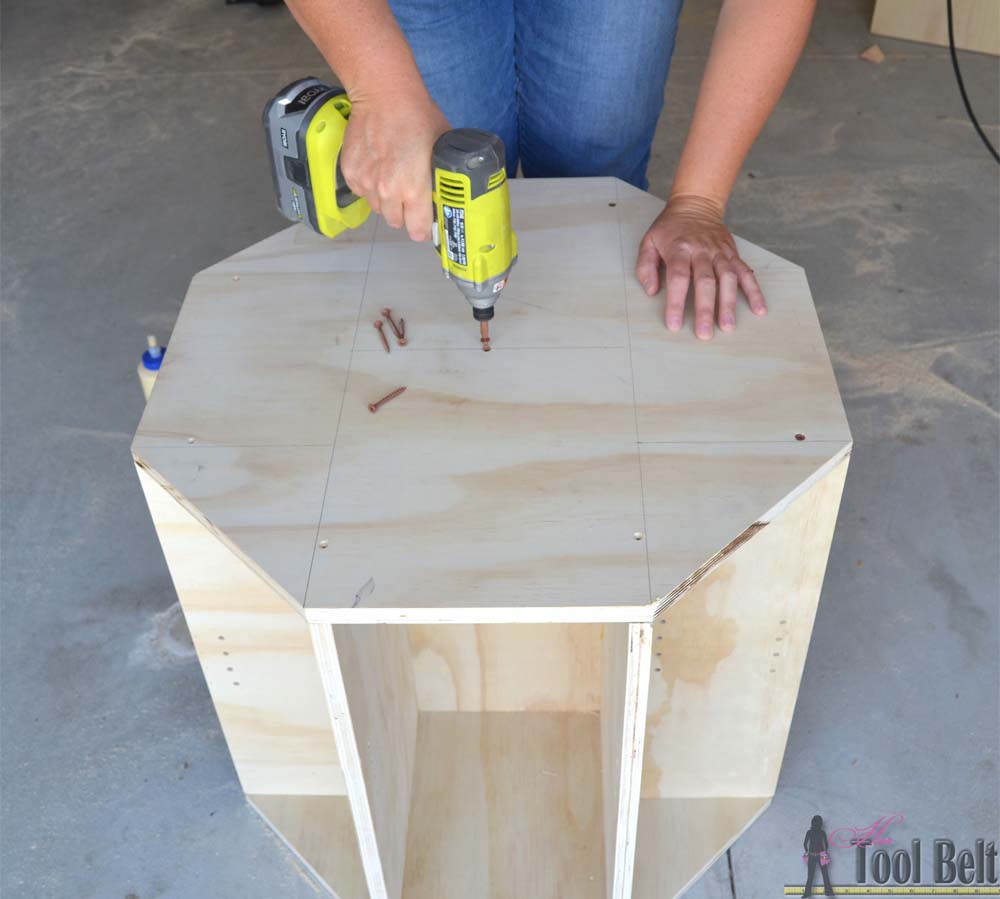
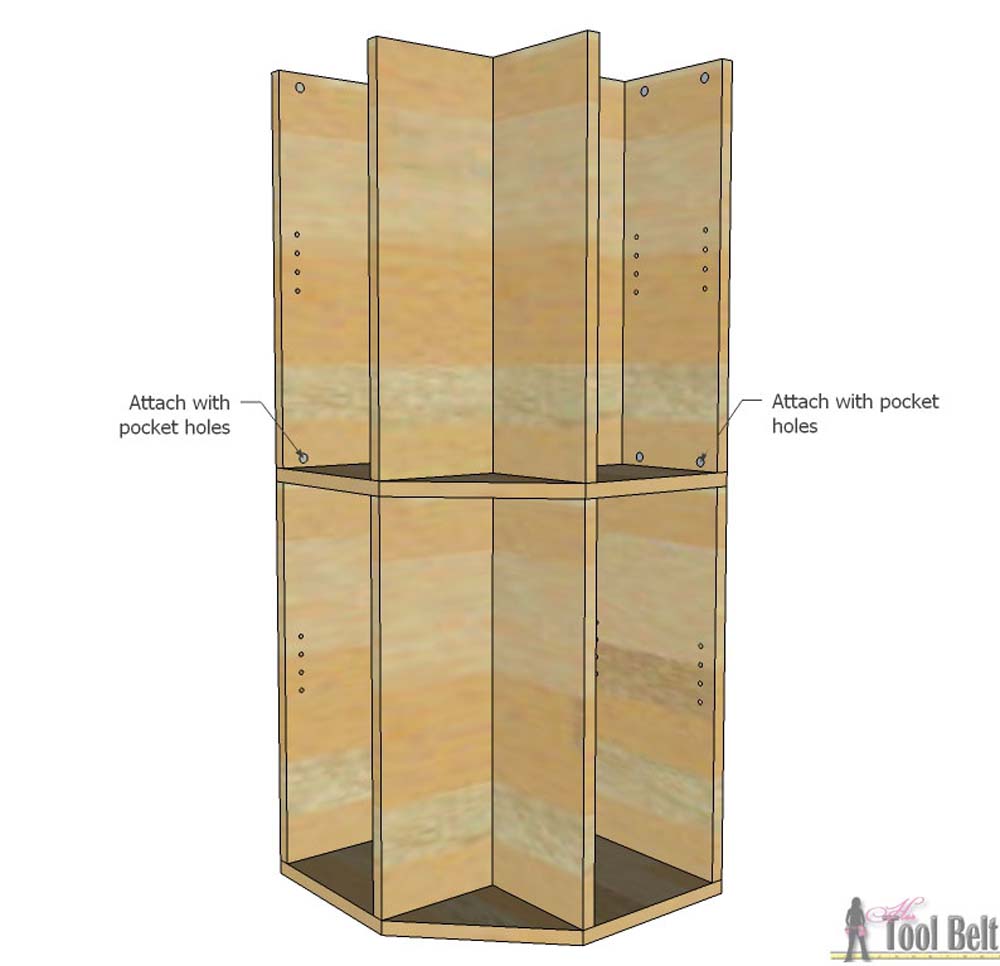
Place the H piece made in step 4 on an octagon piece and the 7” x 21” pieces, predrill countersink holes where the boards will be mounted. Use wood glue and 1 ½” screws to attach the boards to the octagon. Also secure the 7” pieces to the H piece with 1 ¼” pocket hole screws.


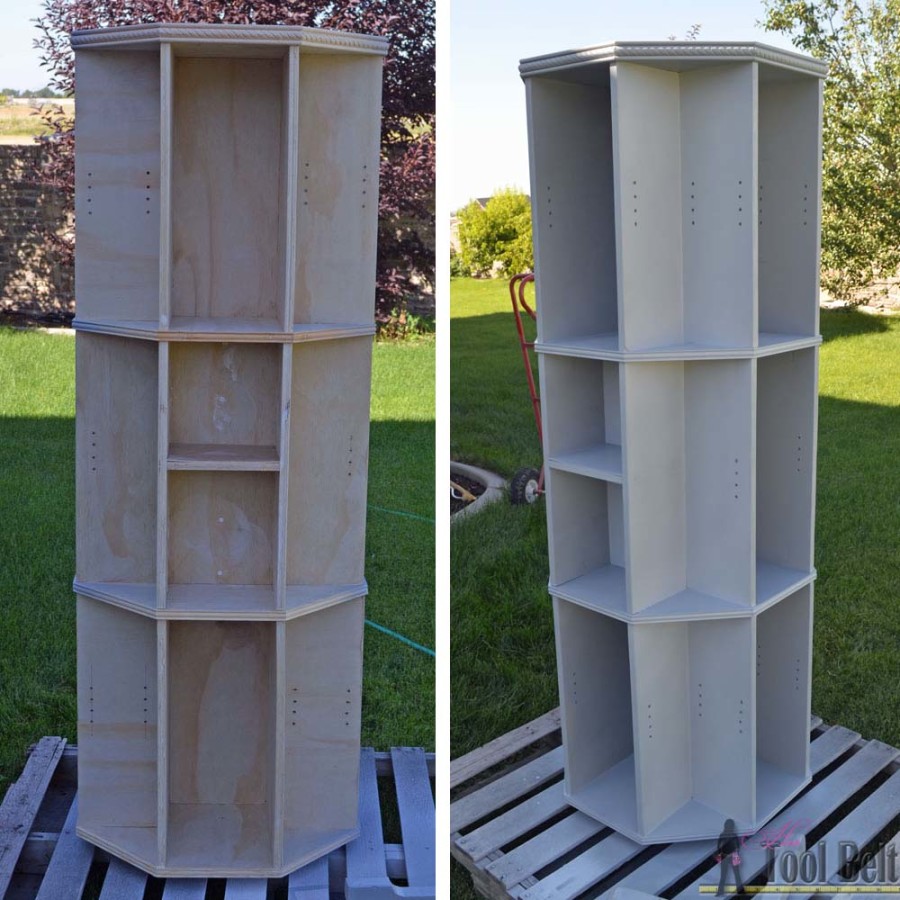
Attach an octagon piece to the top with wood glue and 1 ½” screws, countersink the screws. Repeat steps 3 thru 7.

In the 2 remaining 24” x 21” boards, drill shelf pin holes ¼” diameter and 3/8” deep, but if the same hole locations can be used on the other side of the board then drill all of the way through. Drill pocket holes along the bottom and top edges.
Join the 24” x 21” boards with a 8 ½” x 21” board (the shelf pin holes go on the inside). Predrill countersink holes down the center of the 24” x 21”. Use wood glue and 1 ½” screws to join the boards together. Use wood glue and 1 ¼” pocket hole screws to attach it to the top of one of the octagon pieces. I rotated it 90 degrees to how the other H piece attaches on the octagon (for aesthetics only).

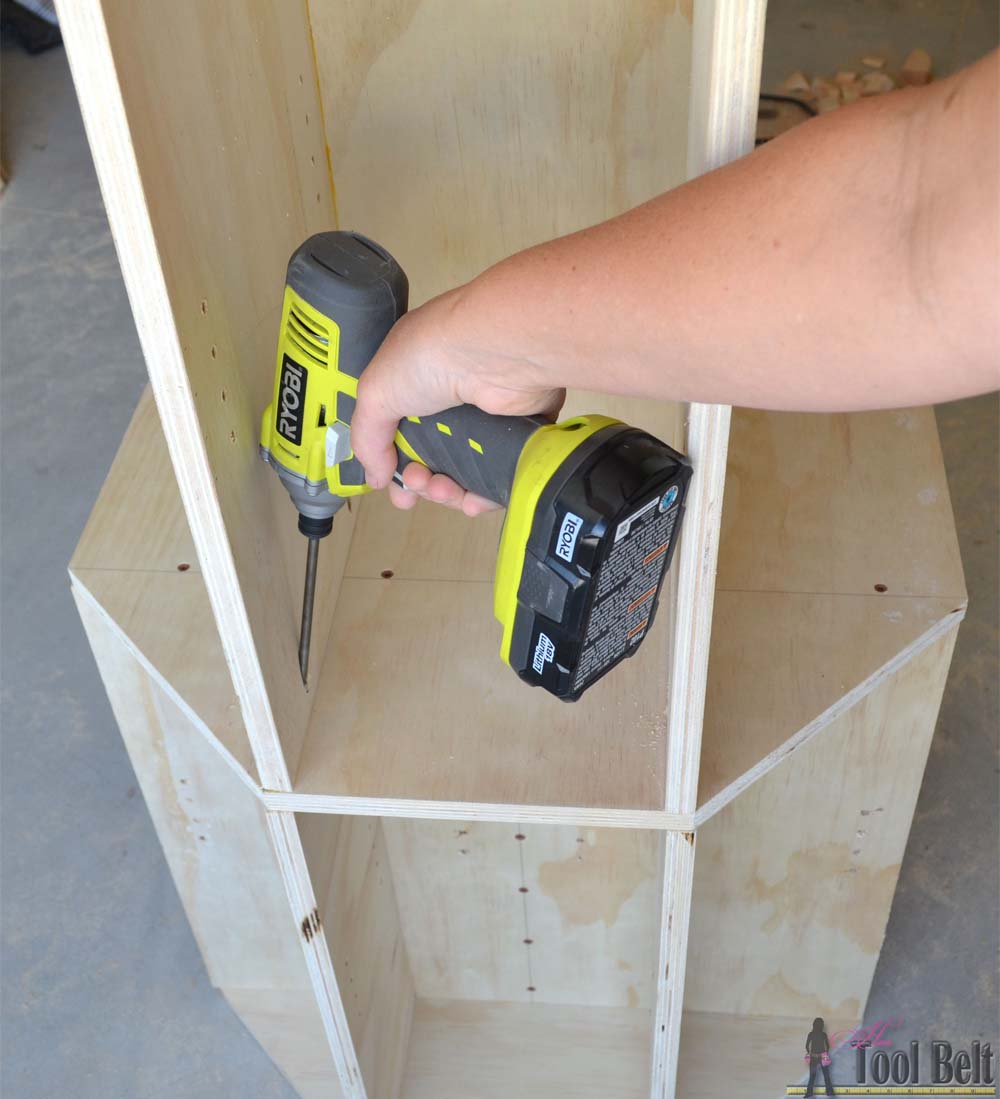
On 4 of the 7” x 21” boards drill shelf pin holes and drill pocket holes to attach to the top, bottom and H piece. Use wood glue and 1 ¼” pocket hole screws to attach the boards to the octagon.

Place the other octagon unit on top and attach with wood glue and 1 ¼” pocket hole screws. Drill additional shelf pin holes as desired.

Cut out shelves for the bookshelf. Dryfit the shelves with the shelf pins, and trim as needed.
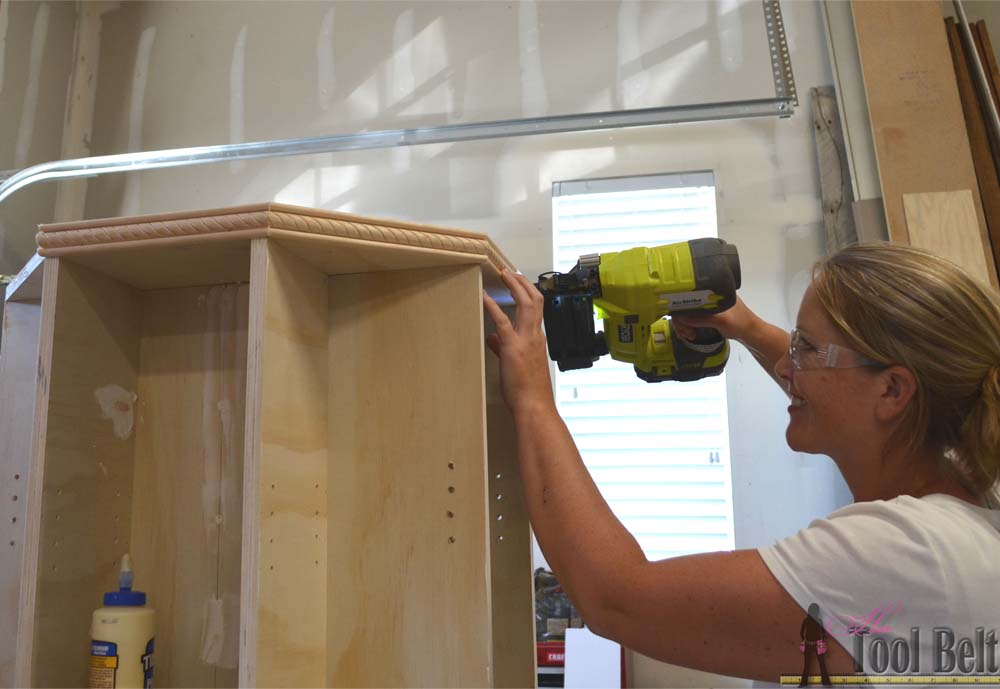
If you want to dress up the bookshelf a little, add molding around the edge of the octagon. The cut angle is 22 ½” degrees, cut to fit. Use wood glue and 1” brad nails to secure in place.

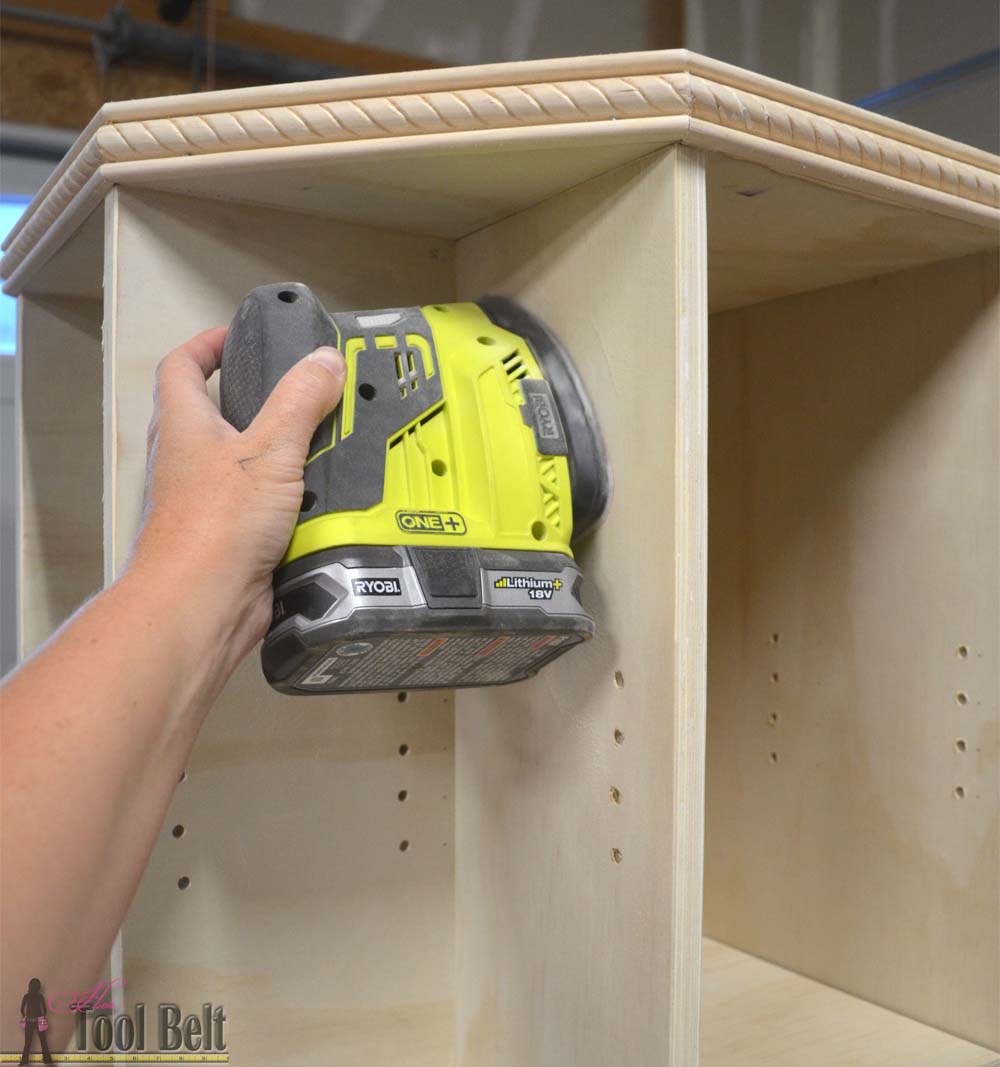
Fill any blemishes with filler or putty and allow to dry. Sand, sand and sand!

For the base you can go simple with another octagon of ¾” plywood or you can add feet.
To make my feet, cut a 2×4 into 1 – 26” long and 2 – 12 ¼” long pieces. Draw a pattern onto the ends of the 2×4 pieces and cut out. Drill pocket holes in the mating ends of the 12 ¼” pieces and attach to the center of the 26”, making sure all of the feet sit level.
Note: After the bookshelf was finished, I realized you can’t see the bottom cut out. Save yourself a couple cuts and leave the bottom flat.
Finish the bookshelf however you desire. I primed the bookshelf and painted it white. Allow the finish to dry.
Attach the lazy susan bearing to the feet, making sure it is centered. Attach the lazy susan bearing to the bottom of the bookshelf according to the manufacturers directions.
Original article and pictures take http://www.hertoolbelt.com/octagon-rotating-bookshelf/ site
">


Комментариев нет:
Отправить комментарий