
Would you look at this!? We actually built something!! This might be our first building project of 2015! Yes, I realize the year is

Anyways, this DIY wall shelf with hooks was fun to build, though some of the logistics threw us for a few loops (more on that in the step-by-step directions below), and the results are pretty fantastic. I did most of the build work on this myself (huzzah!) so that means if I can do it, you can, too!
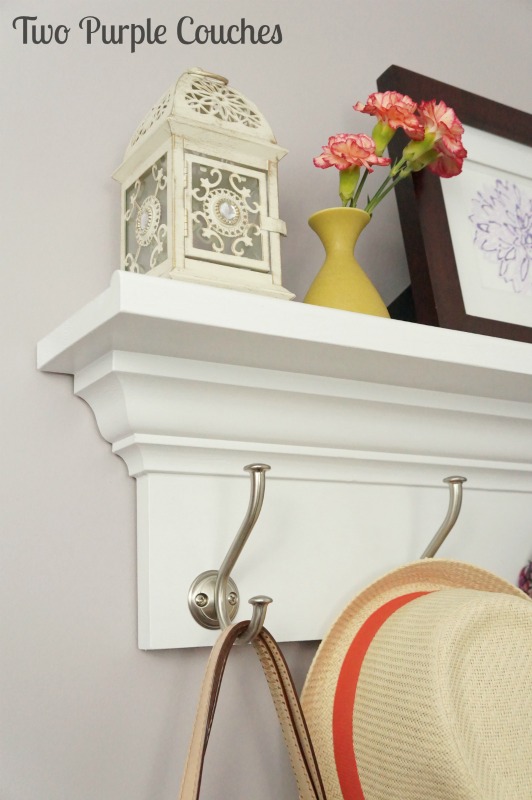
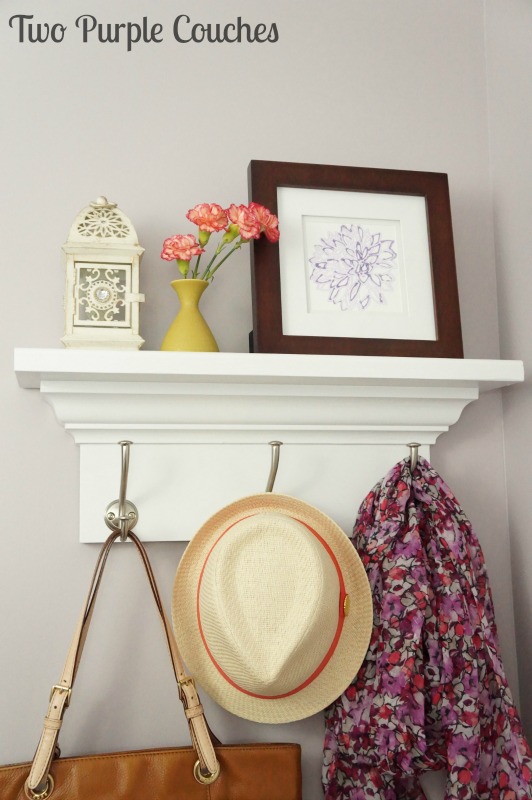
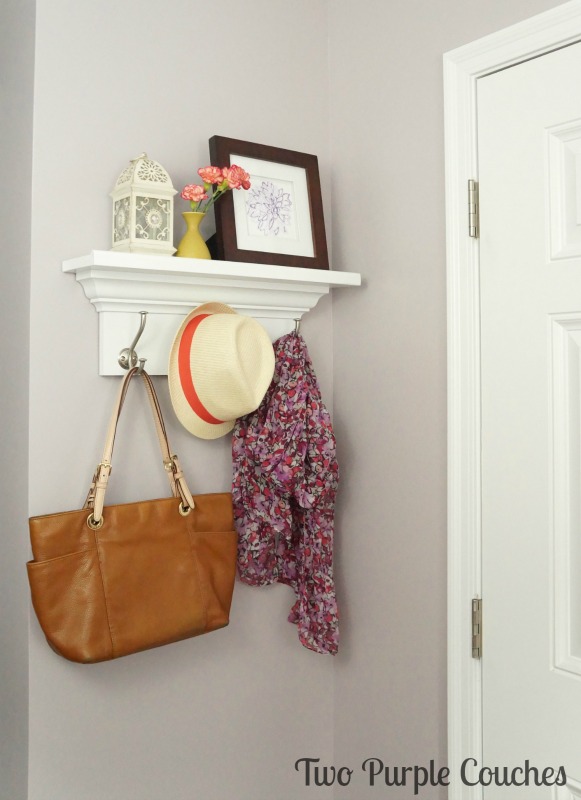
The little wall behind the door to our garage has looked lonely for some time. And instead of finding or creating some sort of art to hang there, I thought something with a bit more function would be nice. Enter the idea of a set of hooks/shelf. I found a few different tutorials via Pinterest (in particular, here and here), and Tom and I modified them for our space and the materials we had on hand. One of my big objectives was to use up some of our scrap wood and leftover moulding, and I’m pleased to say we only needed to purchase a board for the top shelf and the hooks.
Here’s what we used:
Want the full tutorial? Here’s how we built it:
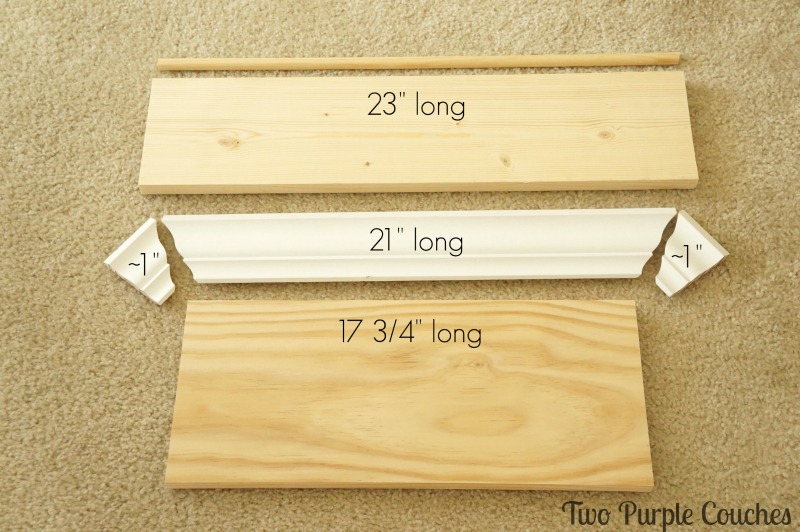
Step 1: Start by measuring your wall space and cutting the 1″x6″ board to size. We cut ours to 23″. This will be the top of the shelf.
Step 2: We decide to get a little fancy and “indent” the bottom board, so for the next cuts we created a 1″ inset, cutting the long crown piece to 21″ long and at a 31.6-degree angle. If you have a Kreg Crown Jig, you could use it for cutting the angles.
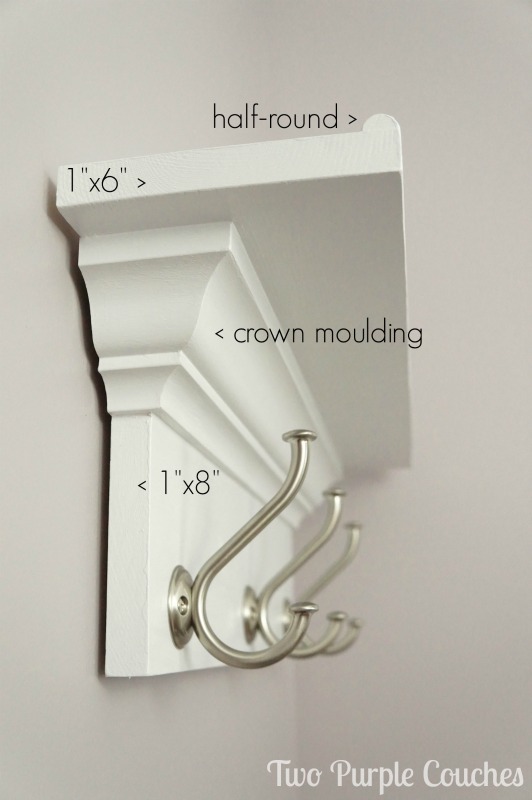
Step 3: Cut two crown pieces for the sides of the shelf, measuring the thickness of the back board. In our case, this was about 1″ for our 1″x8″ board. Sand the edges.
Step 4: Cut the 1″x8″ board to the length of the bottom section of crown. For us, this was 17 and 3/4″. This will be the back of the shelf and the board that you’ll attach your hooks to.
Step 5: Cut half-round to the length of the top shelf (23″). This provides a nice edge so frames and such won’t slide off the front of your shelf once it’s hung.
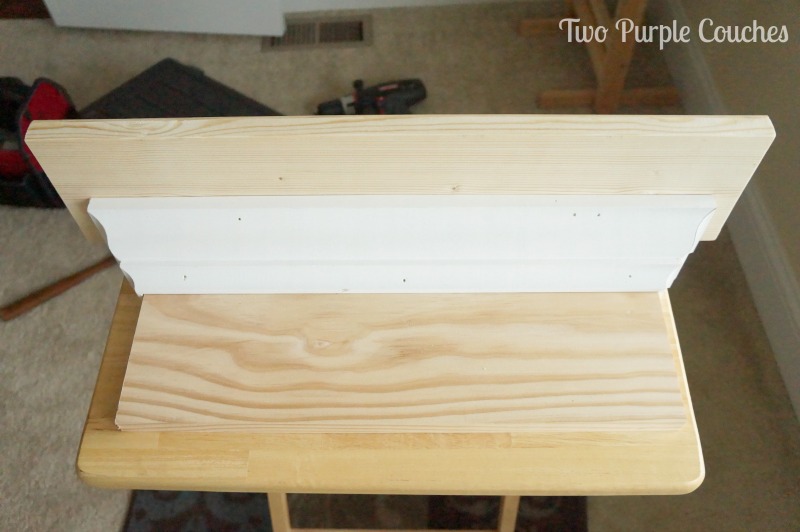
Step 6: Glue all of the crown pieces together and let dry several hours or even overnight. This was a trick we tried with our window trim project and it worked really well. Secure with painter’s tape so you get a nice, snug seam.
Step 7: Glue half-round to the edge of the top board and let dry.
Step 8: Now you’re ready to attach all of shelf’s pieces together! First, measure the insets to be sure the crown and back board will be centered underneath the top board. Pre-drill holes for screws, then screw the top board to the back board. Then nail in the crown.

Step 9: Go over all the pieces with a piece of sandpaper to smooth out any uneven spots. Then fill in the nail holes with wood filler and caulk the seams where the crown meets the top and back boards.
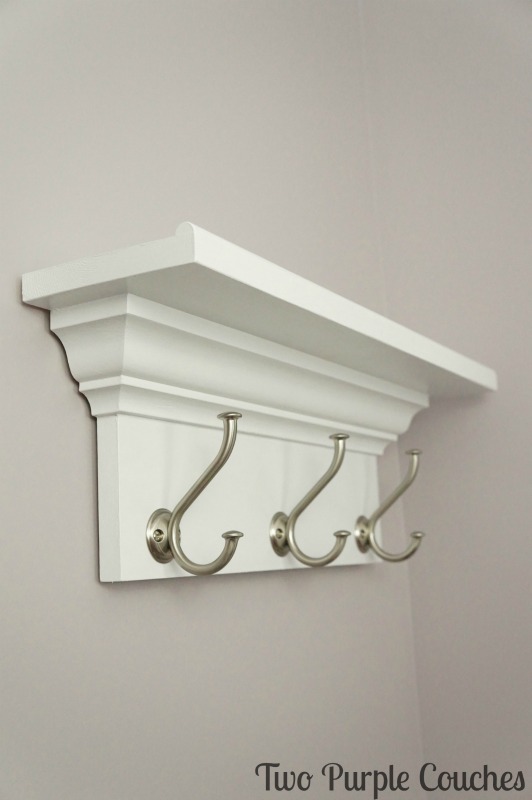
Step 10: Paint the shelf any color you desire. We chose the same white that our trimwork is painted in. Or you could stain it, but then you’d need un-primed moulding.
Step 11: Attach hooks. We originally bought four, but only needed three. We played with placement, then traced the screw holes before actually screwing them in.*
*Where we got thrown for a loop: The screws that came with the hooks are deeper than the 1″x8″ board. We thought about trying to saw off the ends of the screws or adding a buffer to the back of the board so we wouldn’t wind up with 6 punctures in our wall. But we ultimately decided that a few punctures were less of a hassle than MacGyver-ing a solution (much to Tom’s chagrin; he loves to MacGyver things). If and when we ever take this shelf down, we’ll probably be patching and repainting the wall anyway.
Step 12: The shelf is ready to be hung! Huzzah!*
*Where we got thrown for a loop the second time: The issue of how to attach this sucker to the wall. We should have figured this out as part of Step 1, because we probably would have pre-drilled some holes in the back. The tutorials I’d read glossed over the whole how-to-hang issue, which is actually pretty darn important. We used relatively lightweight materials compared to some of the other tutorials I found, so you’ll want to determine whether or not your shelf should be screwed into studs, etc. Our solution: two D-Ring hangers screwed to the back of our shelf and hung from two screws anchored into the wall.
I’m pretty pleased with how our shelf turned out. And it’ll be the perfect spot to stash Molly’s leash or hang our guests’ jackets.
The building process also reminded us that it’s a good idea to think through all of the project steps before diving in. Though what’s a good DIY project without a few extra trips to the hardware store??
Love this? You may also like:
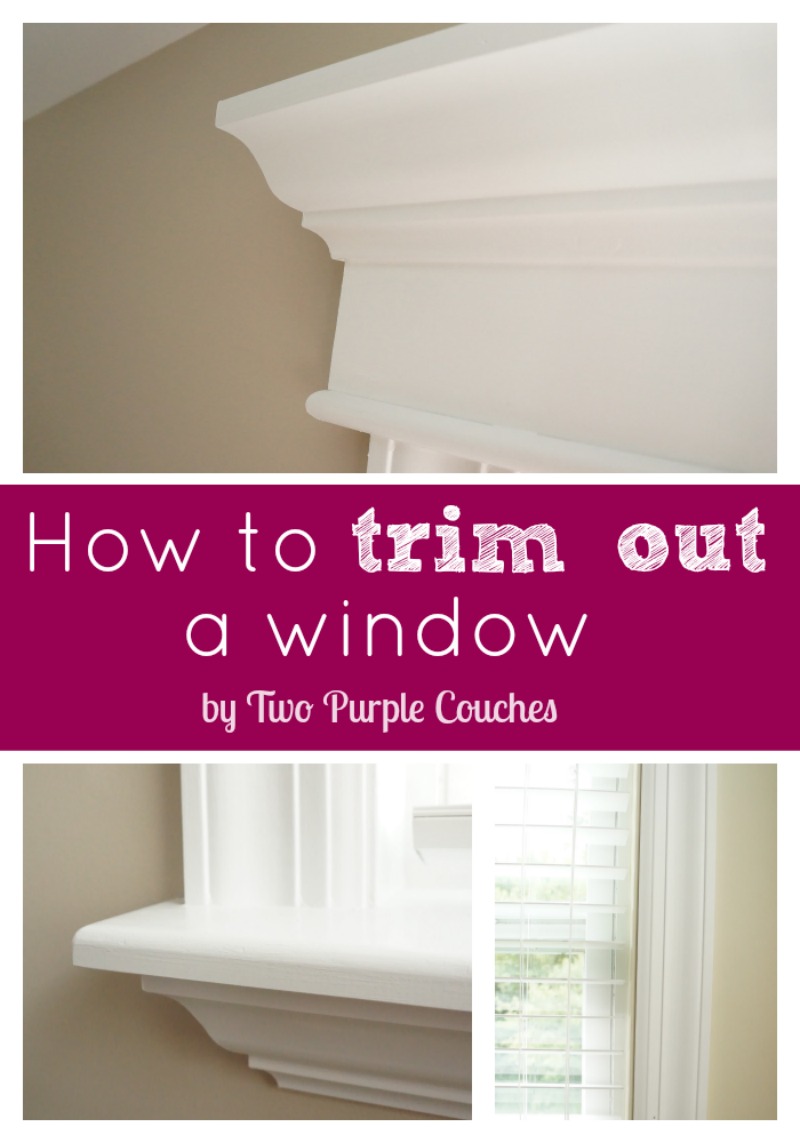
How to trim out a window for a custom look
Original article and pictures take http://twopurplecouches.com/2015/07/diy-wall-shelf-with-hooks/ site
>
Комментариев нет:
Отправить комментарий