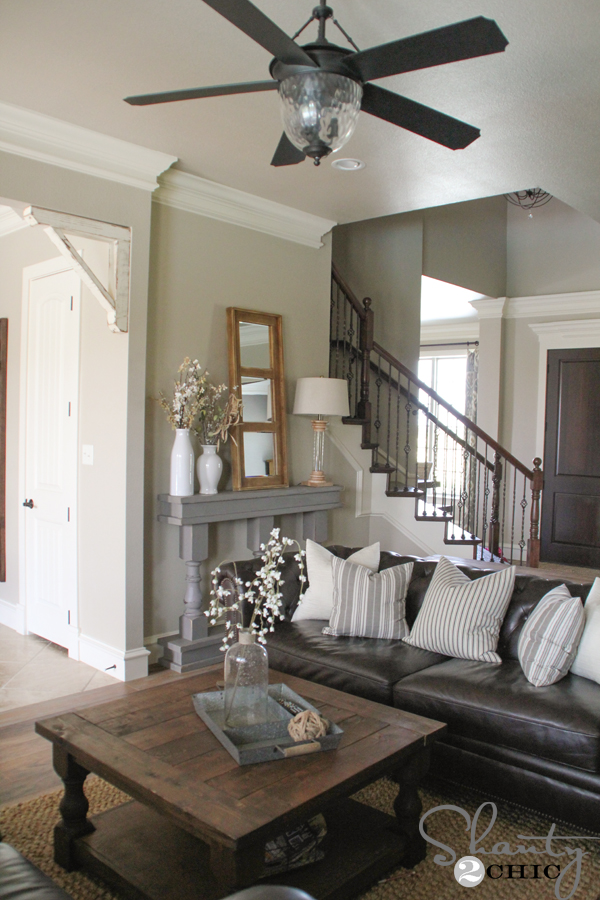
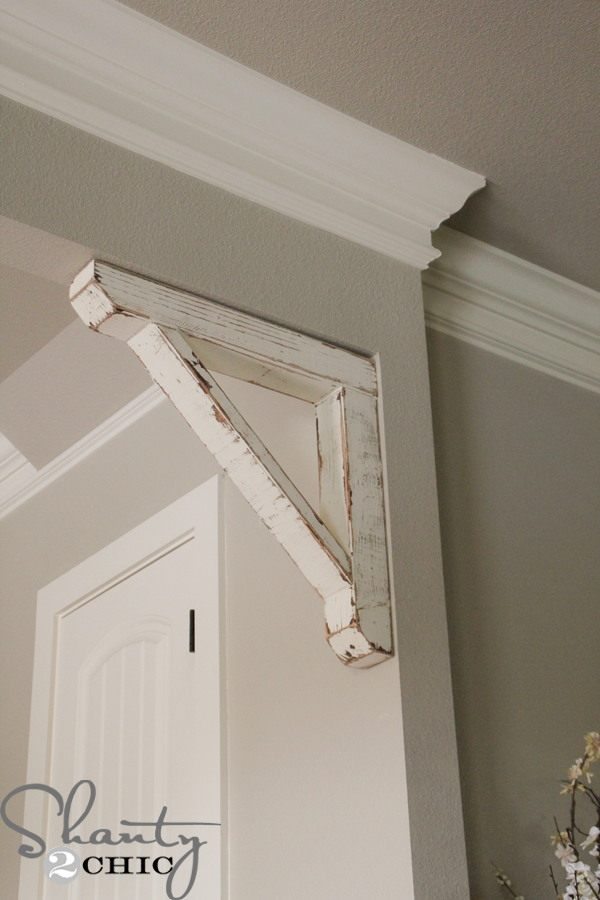
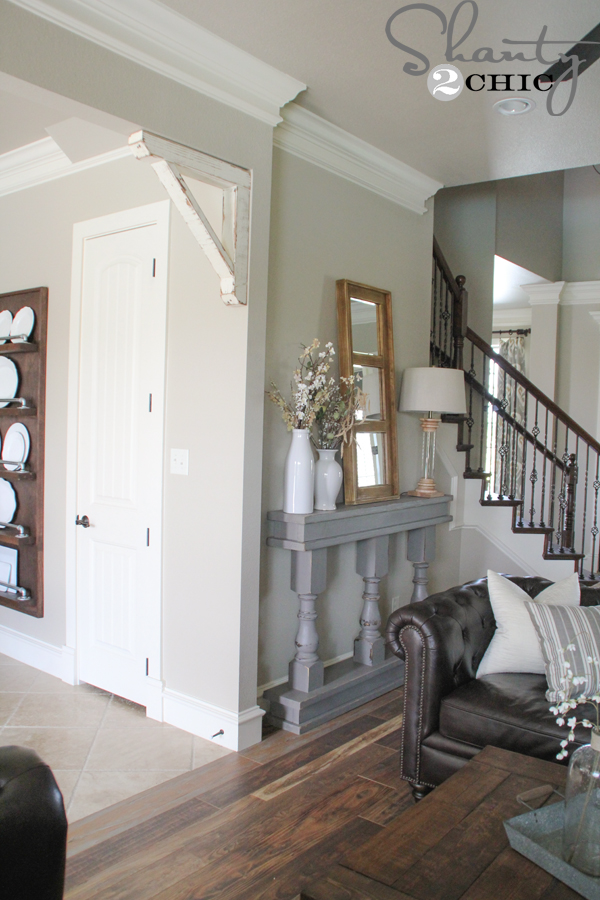
Hey there! I have been trying to come up with a cool accent piece to go in the corner of the walkway between my living room and kitchen and I came up with this easy and FREE Rustic Corbel!
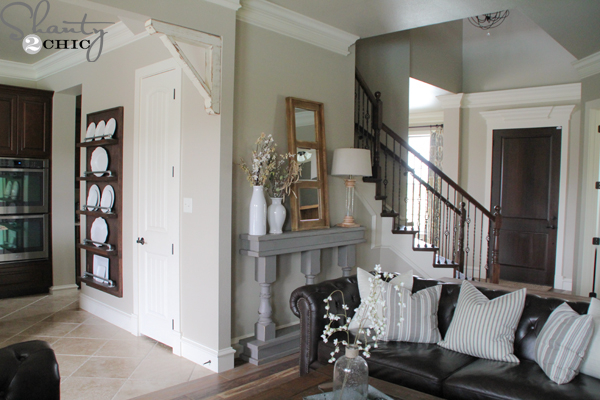
Whitney and I were driving through Dallas, looking at old homes that had been restored. I kept noticing these pretty wooden corbels on the front of the homes, right under the roof. I’ve seen them salvaged and resold at flea markets for a pretty penny but of course, my mind goes directly to my scrap pile in my shop!
I went home and built my own with scraps – for FREE! Here’s how!

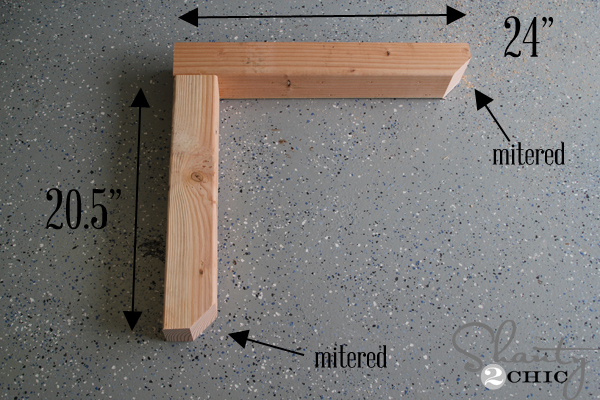
I decided to make mine with 4×4’s because my space was so big. If you have a smaller space or you don’t have any 4×4 scraps, you could make this with 2×4’s! I cut one 4×4 @ 24″ and one at 20.5″. Then I used my saw to cut a 45 degree angle on one half of the end of each 4×4. So, you will start the mitered cut at 1.75″.
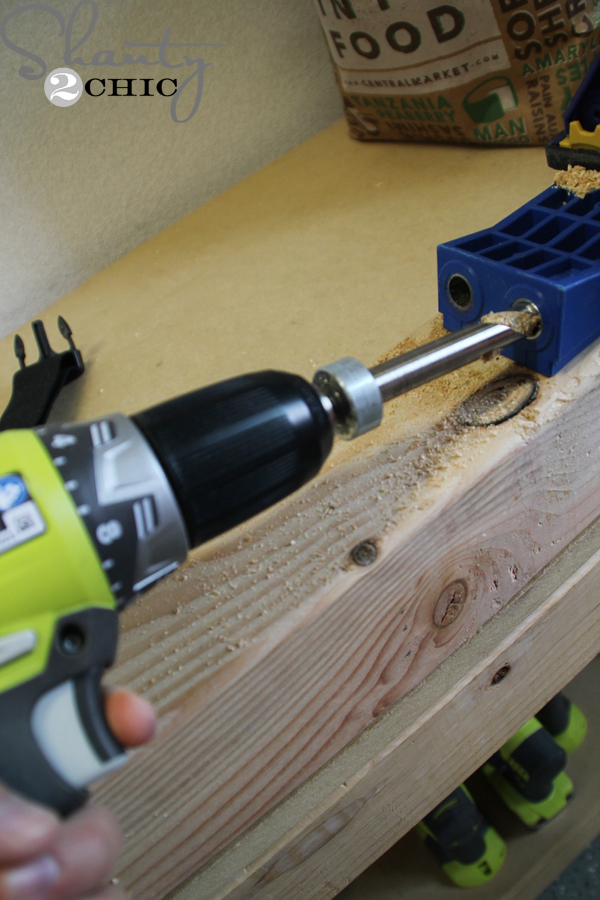
I used my Kreg HD to drill 2 pocket holes in the flat end of the 20.5″ piece.

Then, I attached the two pieces using HD pocket hole screws. If you don’t have a Kreg HD or a Kreg Jig, you could just make this with 2×4’s and attach with wood screws.


I attached the 2×4 with wood glue and my Ryobi Airstrike 16 gauge nailer and 2 1/2″ nails. If you don’t have a nailer, you can use wood screws or finishing nails.

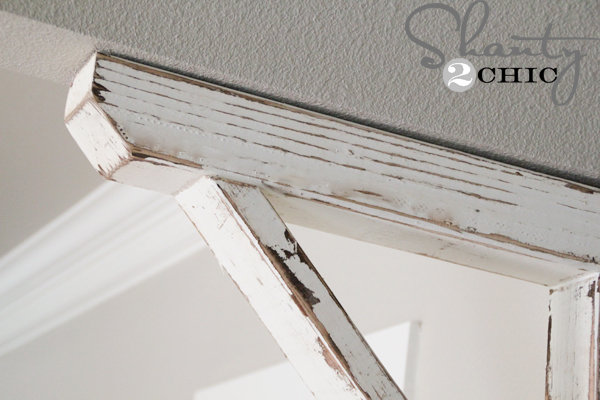
To finish it, I wanted to go with a distressed, chippy paint finish to resemble a salvaged corbel. So, I applied one coat of Varathane Early American stain. Let it sit for 5 minutes and then wiped it with a clean cloth.
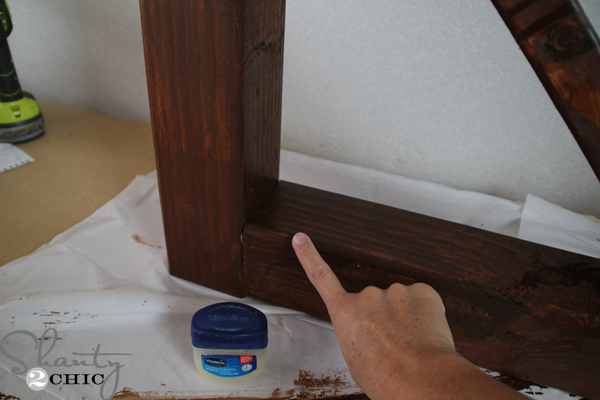

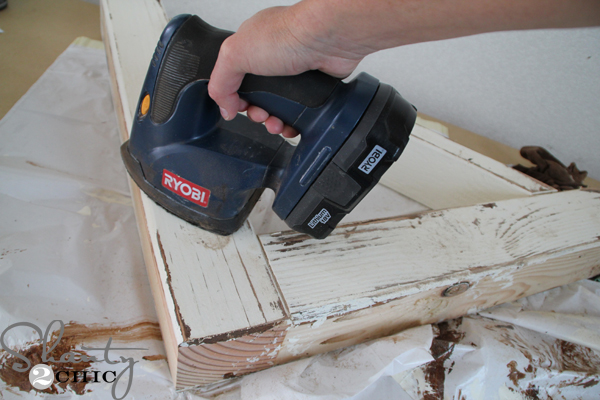
Once the paint was dry, I used my Ryobi Corner Cat sander and an 80-grit sanding pad to distress the entire corbel. You’ll see the paint flake off where the vaseline was applied. That will give you the chippy look!
To hang it, I used 3 1/2″ spax screws and drilled them into both mitered ends, at a diagonal, into the studs behind the wall. I used two screws on each end. Then, cover the screw holes with wood putty and paint.
That was it!
Thanks so much for stopping by!
~Ashley
Questions about the other things you see in these rooms? Check them out!
Also, make sure to grab this awesome $20 Ryobi coupon!!!!
Original article

>
Комментариев нет:
Отправить комментарий