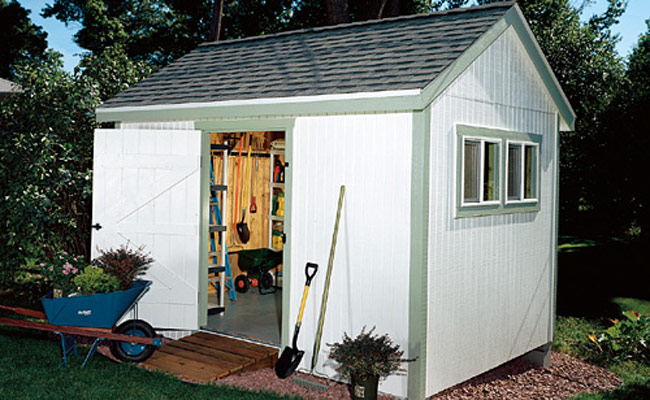
If you"re like most homeowners, you know that there"s no such thing as enough storage space. There"s a limit, after all, to the things you can squirrel away in your basement and garage. What you really need is a garden shed--one large enough to house an arsenal of outdoor power tools while providing organized space for everything from rakes and shovels to fertilizer and fuel.
There are two choices when it comes to building a wooden garden shed: You can buy a kit--and put up with the manufacturer"s choice of materials and layout--or you can design a structure to suit your own particular needs and tastes. This approach may cost more and take longer, but it"s the best way to get what you want. We had in mind a basic 9 x 13-ft. shed built with decent materials and conventional framing methods. Material costs for our project came to around $2400.
Click on link for high-resolution version of the plans. (Illustration by Eugene Thompson)
Step 1: Shed Foundation

Most wooden sheds are set on concrete blocks or treated-lumber skids. That"s all they need, even in deep-frost situations, because the soil moves uniformly as the ground freezes and thaws. To accommodate our sloped site, we built on solid concrete blocks set on compacted crushed limestone.
Start by laying out and staking the four corners of the shed. Dig 6-in.-deep depressions at each corner and at the center of each long wall. Use a torpedo level to check that the bottom of each hole is level.
Pour about 4 in. of crushed rock into each depression, level it and compact the rock with a hand tamper. If your site is sloped, set and level the blocks on the uphill side first, leaving 4 to 6 in. above grade, then use a 2-ft. level taped to a straight 2 x 4 to determine the height of the downhill blocks.
Step 2: Shed Foundation

When stacking blocks for the downhill supports, glue them together with construction adhesive. Then, cover the area within the blocks with landscape fabric and 2 in. of crushed rock.

Cut pressure-treated 2 x 6 sill lumber to lie flush with the outer edges of the blocks, and then cut the band joists that rest on top of the sill. Stagger the sill and band-joist lumber at the corners and nail each sill piece to the bottom of a band joist. Fit the offset corners together and secure them with 16d galvanized nails.
To lay out the floor framing, mark the first joist location 15-1/4 in. from the outside edge of the

Original article and pictures take http://www.popularmechanics.com/home/how-to-plans/sheds/1276536 site
>
Комментариев нет:
Отправить комментарий