Over the past few months, I have been inundated with emails about my potting shed. Most people want to know where they could purchase the same kit. When I explain that the shed is Joe’s original design, they want specifics.
So with a lot of help from Joe, here is a post that has been a long time coming. Additional photos and information can be found in “The Potting Shed” tab above.
Before there was a potting shed, there was me — on a mission to start seeds in advance of the planting season, and Joe — on a mission to reclaim the kitchen and dining room from trays and flats of new sprouts. Surveying my long and leggy seedlings, I said, “If I had a potting shed, I’d be dangerous.”
Little did I know that that sentence, a seed traveling on waves of sound, would eventually settle into one of the folds of Joe’s brain, taking root and springing into action.

With a strong sense of style and design, plus an uncanny ability to think and analyze and see in 3-D, multiplied by math skills, Joe began to fill pages and pages of a legal pad with his ideas. If it were up to me, I probably would have purchased one of those greenhouses sold in catalogs. Joe, on the other hand, envisioned a shed that would not only blend with the style of the house, but one that would be beautiful by itself.
One thing that we learned early on is that when designing a potting shed, it’s very easy to get carried away with wants overtaking needs. There are toys and gadgets for every aspect of greenhouse gardening, but our primary need was to have a place that allowed me to start seeds, as well as a place that could hold yard tools and pool supplies. Once we figured out other necessities, it was time to build.
The Location:
Using the parameters set out by our local municipality, we placed the shed in a corner of the backyard, a corner that had full access to southern exposure — an essential element during the winter months when young seedlings need light.


The Floor Plan:
The shed roughly measures 10’ x 10’. As you open the door, you are standing in the shed area, where there is room for the lawn mower and an assortment of


On the left side is the potting area. This area is partly under a covered roof (the north side) and glass (the south side). In this area, you will find my potting bench and shelves filled with plastic pots and trays for seed starting.

This area is also where the front of the shed bumps out, an area that is completely under glass. A piece of white lattice acts as a low table for holding flats of seedlings. Beneath this lattice is a bed of rocks, which helps with drainage after watering the new plants.

The Foundation:
The foundation has a poured concrete footing and two courses of 8” x 16” cement blocks. The floor is simple cement patio blocks, which were recycled from our old patio. The bumped out area in the front is four courses high of cement blocks, which were then covered with decorative fieldstone.


The Construction:
The structure is all-wood construction, using 2” x 4”, 2” x 6”, and 2” x 8” lumber. The exterior walls, roof, and loft floor are constructed of plywood sheets. The roof is covered with decorative shingles and then topped with a cupola.
There are many materials for the actual greenhouse area, such as Plexiglass and Lexan, both of which can help diffuse sunlight. We chose shatterproof glass, purchased from a local glazier, for aesthetic reasons. The tracks that hold the glass were purchased through a greenhouse supply catalog.
The interior was painted white to help reflect sunlight.
Electricity:
This was essential since there are so many items in the shed that require power. The heat mats (since seeds require bottom heat before they require sunlight), the space heater (necessary for cold winter nights), lighting (for evening visits to check on the little ones), and the radio (for music). While we wired the shed, we also had some outlets added to the shed’s exterior for electric yard tools.
Water:
We chose not to have running water in the shed, mostly because it required having a pipe travel a distance from the house to the shed — and in an area where the ground freezes, it just didn’t make sense. Besides, carrying jugs of water is a nice workout.
Humidity:
Humidity has always been the biggest issue for me. Although there are electric humidifiers available, I decided to make good use of what I had. I have found that a tray of water on the heat mats, as well as spilled water on the cement block floor, can create enough humidity — maybe not optimal, but enough.
Ventilation:
There are electric vents that can open automatically, but I chose the manual kind. There are two vents, a thin rope tied to each of the levers. The ropes then hang down so I can pull them to open the vents, tie them to mounted cleats to keep the vents open, or untie to close.
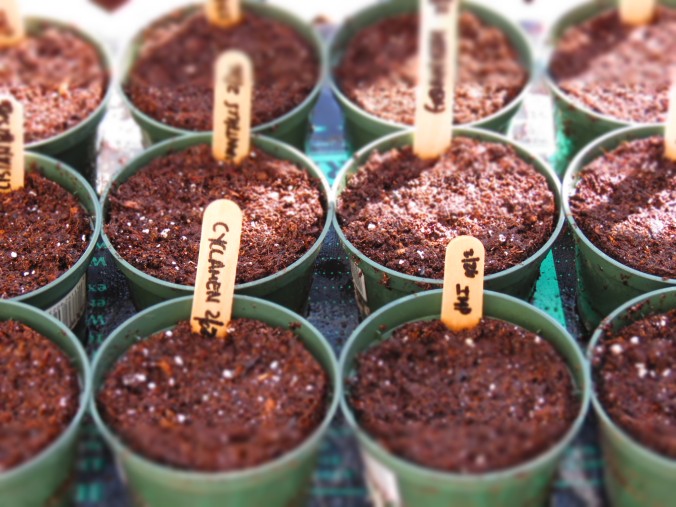
Preparing For Planting:
I usually start seeds in February, which is based on the last frost date in my Zone (6). Before I start any seeds, I have to help the shed retain heat. To do this, I hang plastic sheets to separate the shed side from the potting side. In addition, a plastic sheet is hung to create a false ceiling so that heat does not escape through the loft area.
Essential Tools:
Some items, I have learned, are essential for successful seed starting in the shed.
- A thermometer to help measure both maximum and minimum temperatures, as well as humidity.
- Heat mats to provide heat for newly planted seeds.
- A thermostat/timer for the heat mats to help regulate the bottom heat.
- A timer for the space heater to help regulate heat.
Additional Resources:
Greenhouses for Homeowners and Gardeners by John W. Bartok. Jr.
For additional photos, please see the tab, “The Potting Shed,” above.
Original article and pictures take http://nittygrittydirtman.wordpress.com/2013/08/07/the-house-that-joe-built/ site
>
Комментариев нет:
Отправить комментарий