Similar Projects

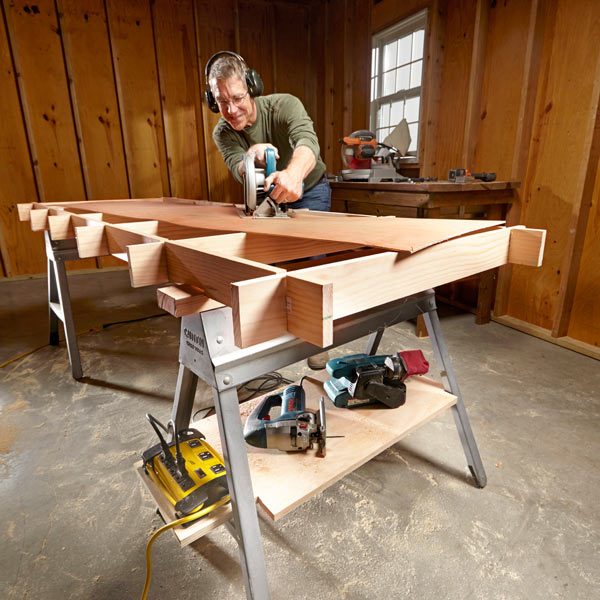
For normal use, keep a “sacrificial” 2x4 in the slot. When it gets too “kerfed up,” flip it over and use the opposite edge until it’s time to replace the whole thing. Drop a longer 2x4 into the channel to support bigger projects. Change working heights by simply slipping a different-size board—a 2x4, 2x6, 2x8, 2x10 or 2x12—into the channel.
You gotta screw lumber to the top of a folding metal sawhorse anyway, so why not build a simple channel and turn your horse into a multi-trick pony?
I’ve been making sawdust for almost 40 years. During those


You can lay a few 2x4s across a pair of horses, but that’s not as good as a grid, especially if you’re cutting flimsy or small stuff.
For this version, you’ll need five knot-free oak or pine 1x4s, 8 ft. long. The secret to building it: Clamp the crosspieces together and “gang-cut” the notches. Do the same for the stretchers. Don’t fasten the grid parts with glue or screws. Slip them together so they can be disassembled for easy storage.


Tired of stooping, searching, plugging and unplugging when using power tools with your sawhorse? Build this simple platform and slide it over the cross braces. It provides a more “back friendly” place to stash your tools. And a power strip allows you to keep several tools plugged in at the same time. The platform also provides a place to throw a sandbag for ballast if you’re using the horse for some task that might push it around or tip it over.

A pair of sawhorses make the perfect platform for painting or staining long stuff. But where do you lay 25 pieces of wet trim while they’re drying? How about right in front of your nose. Make simple racks from scrap 3/4-in. plywood—custom-cut the slots based on your needs. Screw them to the sides of your horse and then go to work.

Folding metal horses are solid, easy to stow and often cost less than $20. My only gripe is that the super-flimsy ones—the ones that often look like they’re made of aluminum roof flashing—aren’t stable. There are also a few impostors out there that use a strand of cable, instead of metal hinges, as cross braces: If you see them, run. If you use your horses inside and want to protect a finished floor, you can buy protective plastic feet for a few bucks (ebcoproducts.com) and install them in minutes. And watch those fingers when you fold up metal horses; the sharp edges can inflict a painful pinch.
There are dozens of styles at home centers and online. Most carpenters I know prefer the folding metal type, but some prefer other breeds. So here’s a roundup:
Original article and pictures take http://www.familyhandyman.com/carpentry/maximize-your-sawhorses/view-all#myCarousel10 site
>
Комментариев нет:
Отправить комментарий