In the summer, good attic ventilation reduces heat buildup. That cuts cooling costs and prolongs shingle life. In the winter, warm, moist air seeps into the attic from the living space below. Good ventilation allows the heat and moisture to escape. That keeps your attic dry and reduces ice dams. Here are four signs of an unventilated or under ventilated attic:
- Look at your eaves

- Touch your ceiling on a warm, sunny day. A hot ceiling tells you that the attic is acting like a solar oven, raising your cooling bills and cooking the shingles.
- Thick ridges of ice on your eaves in winter are a sign of poor attic ventilation. Warm air that escapes rooms below gets trapped in the attic. Snow melts and the water refreezes on the cold eaves, creating ice dams.
- Warm air that escapes living space also carries moisture that will condense on rafters or roof sheathing. Grab a flashlight and inspect your attic during the winter. If you see dampness or frost, you need better ventilation.
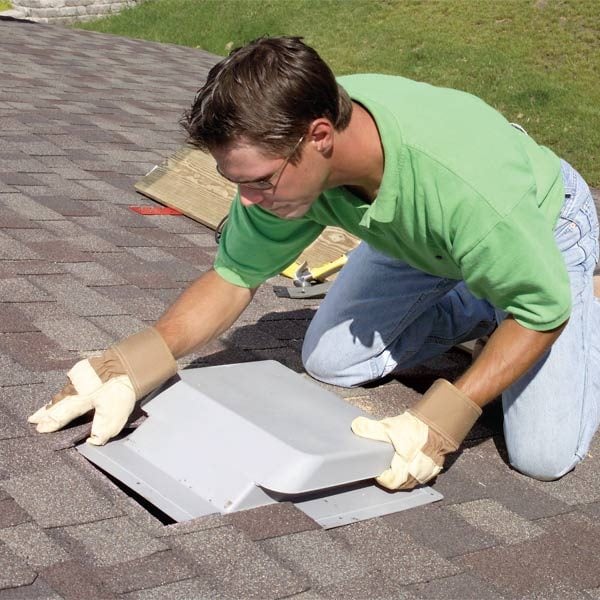
For the best results, place roof vents near the roof"s peak and soffit vents in the eaves. Air flows in through the soffit vents and out through the roof vents. Vents come in various styles. We chose rectangular, hooded roof vents and rectangular soffit vents because they"re easy to install. Everything you need is available at home centers. Aside from vents, you"ll need a handful of 1-1/4 in. roofing nails, 1/2-in. galvanized screws for the soffit vents, utility knife blades, a dust mask and one tube of roofing cement for every three vents. You"ll cut holes for the vents with a jigsaw or reciprocating saw. Expect to spend a full day on this project. A cool day is best. On a warm day, attics can get dangerously hot. Heat also makes shingles easy to damage.
How many vents do you need? First determine your attic area by multiplying the length by the width. A 30 x 40-ft. attic, for example, has an area of 1,200 sq. ft. Then aim for about 1 sq. ft. (144 sq. in.) of vent opening per 150 sq. ft. of attic. The building code lets you reduce that by half under some conditions, but more ventilation is usually better. The open area of a vent is sometimes listed on the vent as NFVA (net free vent area). If not, measure the size yourself. Roof vents will provide about half of the vent area and soffit vents the other half.
Adding roof vents is a simple matter of cutting holes and installing vents. Photos 1 – 6 show how it"s done. But before you cut any holes, plan the locations of the vents.
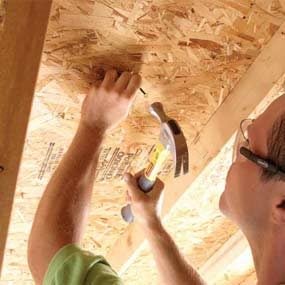
Mark the roof vent locations from the attic, where you can see the rafters and avoid placing vents over them. Place all the vents on the same side of the roof. If your roof peak runs parallel to the street, put them on the backside, where they"ll be less prominent. Space vents evenly and mark the locations by driving nails up through the shingles (Photo 1). Wear a dust mask while working in the attic and lay planks or plywood across rafters so you don"t step though the drywall ceiling below.
Follow photos 1 - 6 for the simple how-to.
Original article and pictures take http://www.familyhandyman.com/attic/how-to-improve-attic-ventilation/view-all site
">
Комментариев нет:
Отправить комментарий