

circular saw and a miter saw
finish nailer and a framing nailer with galvanized nails
level and tape measure
safety glasses
shims
four 10-foot pressure-treated 4x6 beams
ten 5/4” x 6” decking boards
20 boards of pressure-treated 2x4x8
15 boards of pressure-treated 1x4x8
five sheets T1-11 siding
two sheets of 1/2” CDX plywood
one bundle shingles (preferably to match your house)
one roll roofing paper
one 36” pre-hung exterior door and lockset
four cement foundation blocks
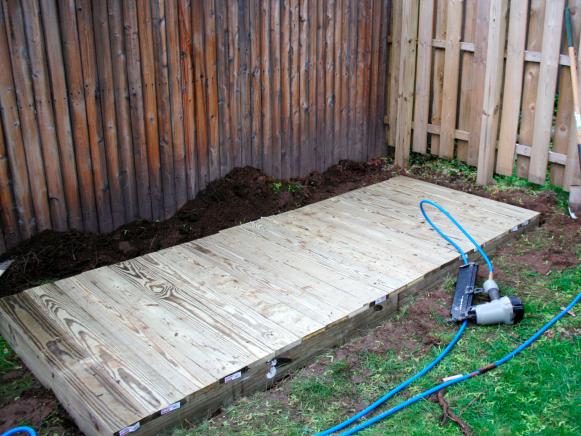

1. Create the foundation for the shed by leveling the ground. Bury a foundation block at each corner. Miter cut the 4x6 boards to make the perimeter frame for floor base. Make sure the frame is level all the way around. Lay another beam inside the foundation lengthwise. Fasten it to the perimeter with framing nails.
2. Cover platform with decking boards to make

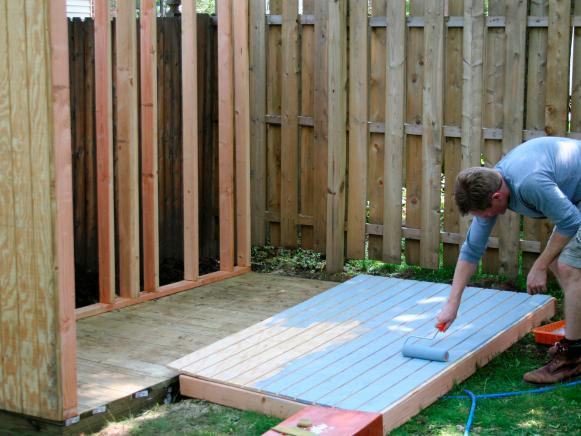
3. Frame the walls 16 inches on center using 2x4s and a framing nailer. Assemble the framing on the ground then attach to the foundation.
You can also nail the siding onto the framing while the walls are lying flat and then fasten the framing to the foundation (we did it both ways). Our shed has a pitched roof (higher on one end). To accommodate the pitch, we extended the two side walls and front wall with extra framing. Make sure to leave adequate space for the door and jamb.
4. Cut six 2x4s to size for the ceiling joists (we cut ours long to extend over the front of the shed.). To accommodate the pitched roof, the 2x4s need to be lower on the back wall, and higher on the front wall. The back ends of all six joists will need to be notched to fit flush with the back wall header. To determine the depth and angle of the notch, hold a rafter up at the end of the building and align the bottom of the rafter with the top of the front wall. On the back wall, drop the rafter about 3/4" below the top of the wall and trace the top plate of the back wall onto the rafter. Cut out the notch ("bird’s mouth") with a jig saw.
5. Use the first joist to trace the notch pattern onto remaining joists. The notched rafters provide a flat area to lay the roof upon. Set the rafters on top of the back and front walls and fasten with a framing nailer.
6. Cut the 1/2-inch plywood to size to cover the roof and fasten. Lay roofing paper over the plywood and secure. Starting at the roof’s lowest point, nail the roofing material on top of the paper.

7. Install the door, shim and level as necessary. Screw to the studs. Use the 1x4 lumber to trim the door, roofline and the four corners of the shed.
Original article and pictures take http://www.hgtv.com/home-improvement/how-to-build-a-storage-shed-for-garden-tools/index.html site
>
Комментариев нет:
Отправить комментарий