
Don"t rout the sides before the ends
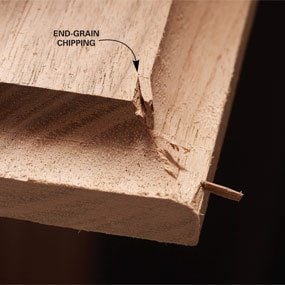
If you"re planning to rout the ends as well as one or both sides of a board, rout the two ends first. Here"s why. End grain has a tendency to split out as the bit exits the end of the cut.
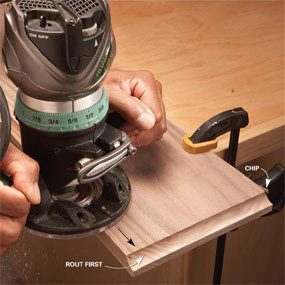
If you rout the sides first, the split-out will occur on the previously shaped edge (see "Don"t rout the sides before the ends"). But if you rout the ends first, you"ll cut off any damaged areas when you rout the sides.
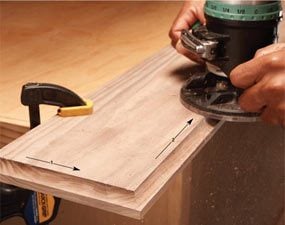
Router bits spin clockwise as you look down on the router, so moving the router counterclockwise tends to pull the pilot bearing tight against the wood and allows easy control of the router. When you"re routing the outside perimeter of a board, move the router counterclockwise. However, when you"re routing the inside of something like a picture frame, move the router in a clockwise direction.
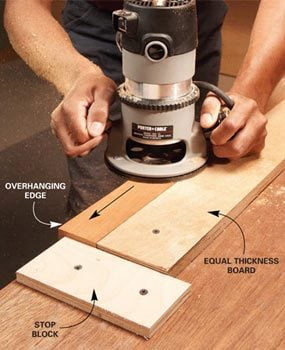
Narrow strips are difficult to rout because clamps get in the way. The solution is to screw blocks to your workbench to corral the strip of wood. If you"re routing a thin piece of wood, the bearing on the router bit will most likely extend below the piece of wood you"re routing. In this case, hang the piece of wood over the edge of the bench at least 1/4 in. so the bit doesn"t hit the workbench. Screw a strip of equal thickness behind the long edge of the narrow strip you’re routing. Then screw a thinner stop block at


Here"s a nifty trick for securing small pieces while you rout them. Start by screwing a scrap of wood to the workbench to elevate your project and provide clearance for the bearing. The scrap should be smaller than the piece you"re routing. Then apply 1/2 teaspoon of hot-melt glue to the scrap and stick your workpiece to it. Allow it to cool a few minutes before you rout the edge. When you’re done, just twist the routed piece to break it free. Then scrape off the hot-melt glue with a chisel or putty knife.
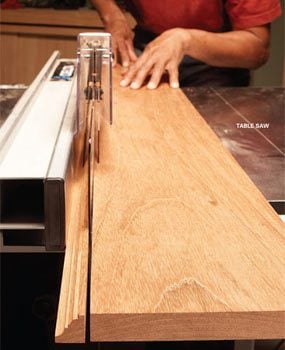
One way to make narrow moldings with your router is to use a router table and featherboards. But if you don"t have a setup like this, try this other method. Start by routing the desired profile on a wide board. Then make the molding by cutting the shaped edge from the wide board with a table saw. Repeat the process until the board is too narrow to work with.
Original article and pictures take http://www.familyhandyman.com/DIY-Tools---Tips/DIY-Skills/Tool-Skills/how-to-get-perfect-routed-edges site
">
Комментариев нет:
Отправить комментарий