Hey guys! We are so excited to kick-off the first day of the 12 Days of Christmas! To keep up with our latest projects follow us on Instagram!
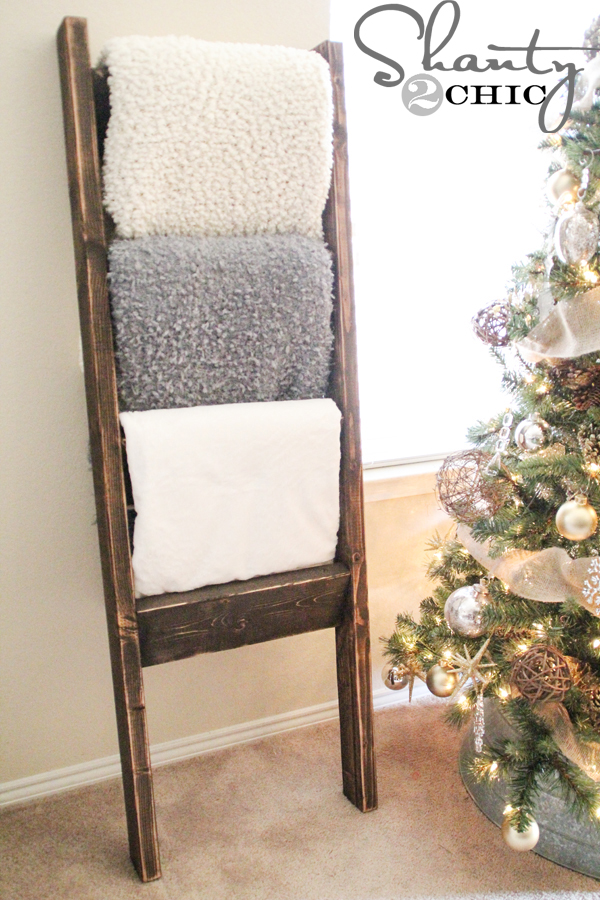
Our first post is a super easy and inexpensive Blanket Ladder. I love making my home feel comfortable but chic for the holidays, whether it be for my own family or our guests! I’ve seen a lot of ladders for blankets in the past but, I wanted a specific “shanty” look! My favorite part of this ladder is the 2×6’s! They give it a solid, chunky look!
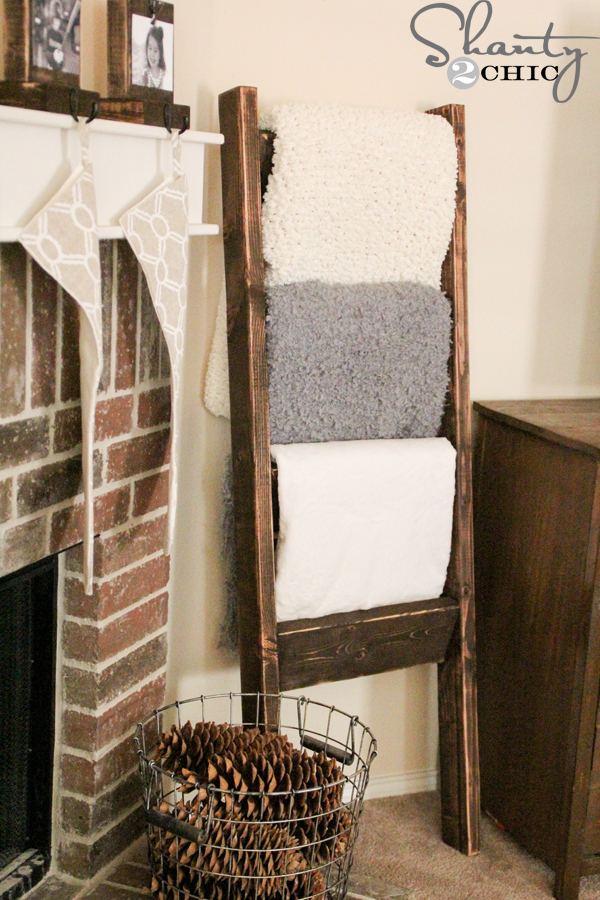
I’m totally in love with it It was so easy to build and only cost me about $10!!!
I will give you guys a full tutorial here, and you can also download and print the FREE PLANS by clicking HERE or the button below!

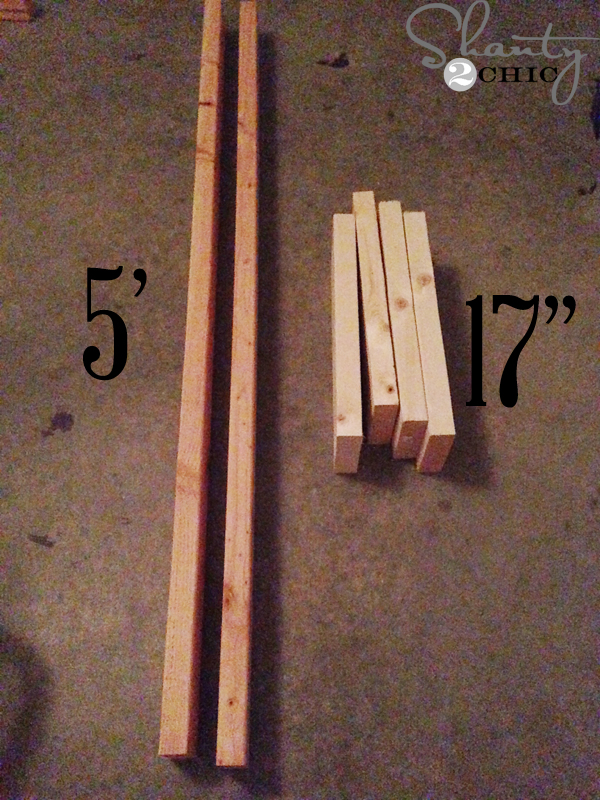
Here’s how I did it!

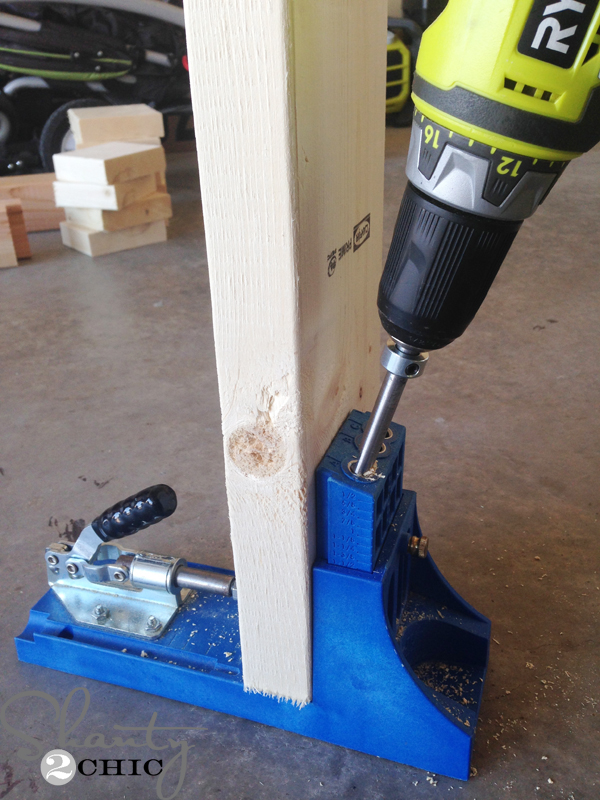
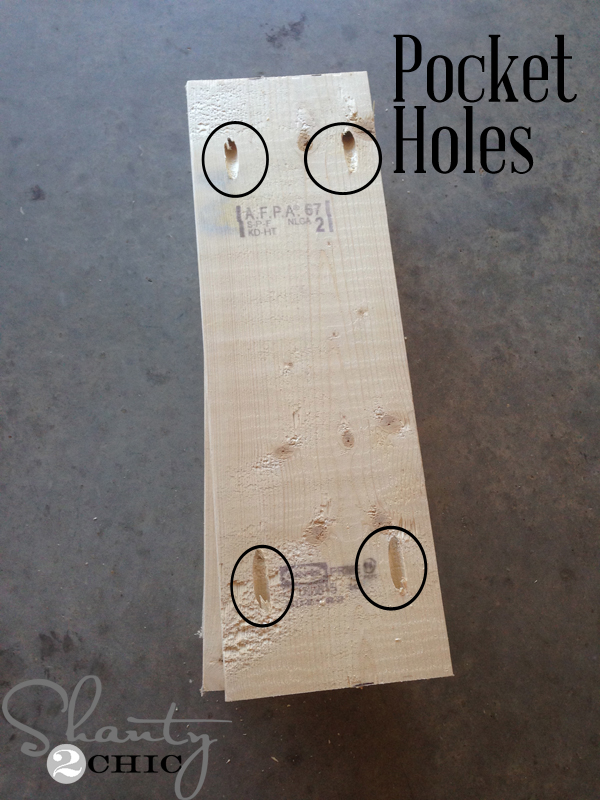
Next, I used my Kreg Jig to drill 1 1/2″ pocket holes into the ends of each 2×6. (You can find the Kreg Jig HERE on Amazon). If you do not own a Kreg Jig, you can pre drill from the sides of the 2×4’s into the 2×6’s and follow up with 2 1/2″ wood screws.

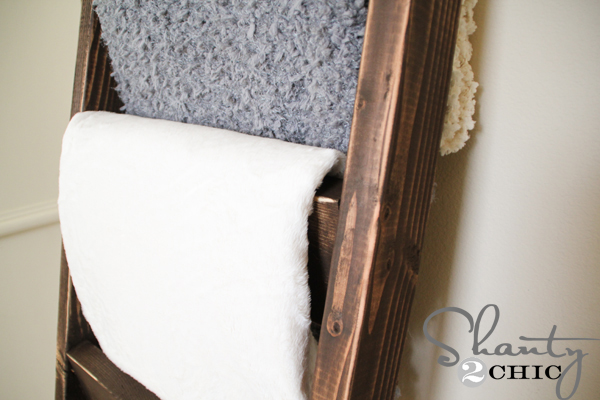
I set the 2×6 boards so that the front corner touched the front of the 2×4 and the back corner of the 2×6 touched the back of the 2×4. I placed the top 3″ from the top of the 2×4 and spaced the others 12″ apart from each other. I measured from the front corner of each 2×6.
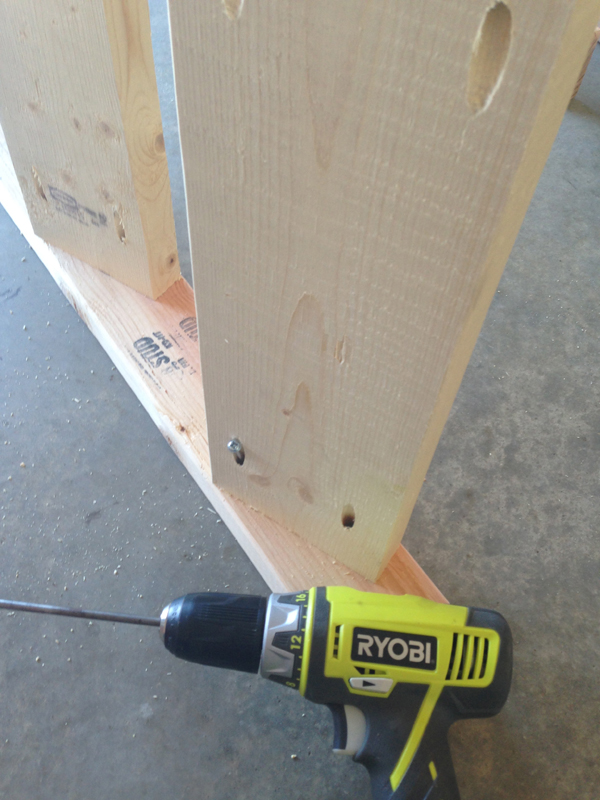
Next, just attach the other 2×4 to the other side of the 2×6’s the same way.
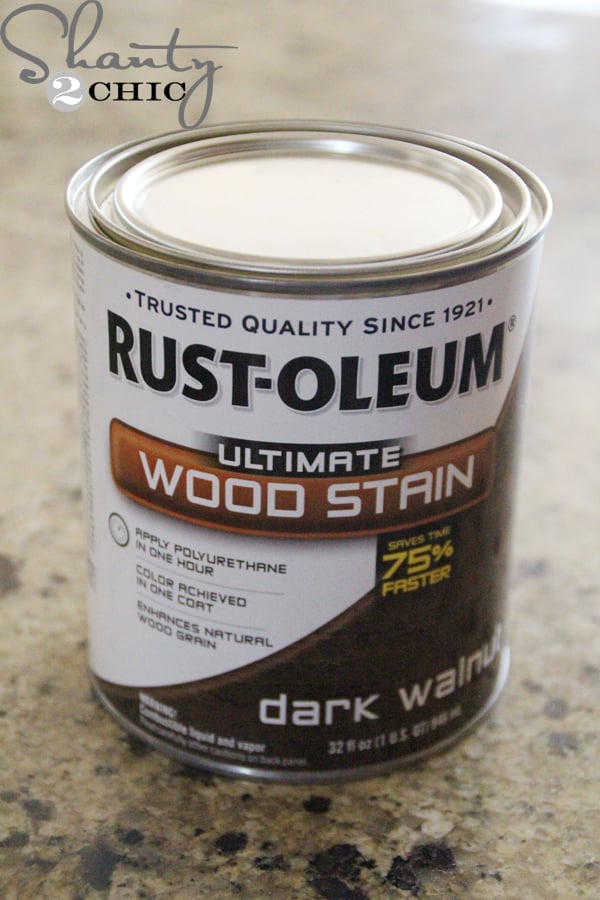
To finish this cutie off, I used applied one-coat of Rust-Oleum Dark Walnut with a foam brush. (You can find the Dark Walnut stain HERE on Amazon). Wait about 5 minutes and then blend the stain with a clean cloth.
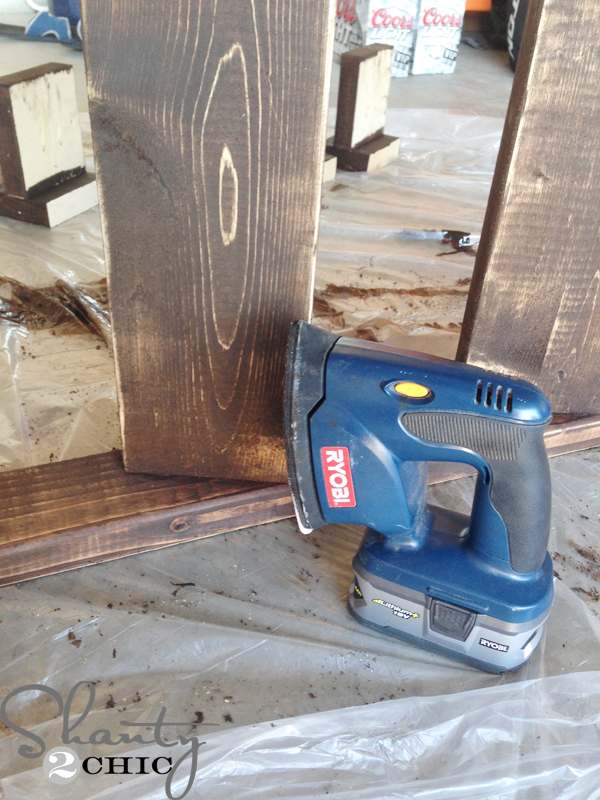
To give it the worn look that we love so much, I used my Ryobi Corner Cat Sander to distress the wood all over. This sander is perfect for sanding this piece because of all of the angles.
Once it was dry, I added a few cute and soft blankets!
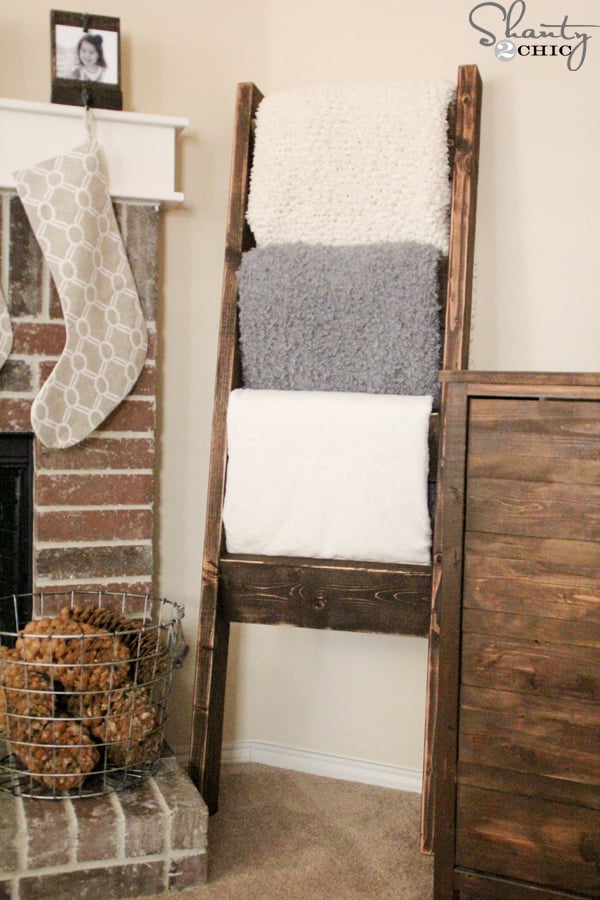
I can’t decide where to put it in my house I love it everywhere!
I just love getting my home ready for Christmas! We have so much more to come over the next 11 days! This is just the beginning! We always appreciate your pins and shares
Remember you can check out the full set of FREE printable plans by clicking HERE!!!
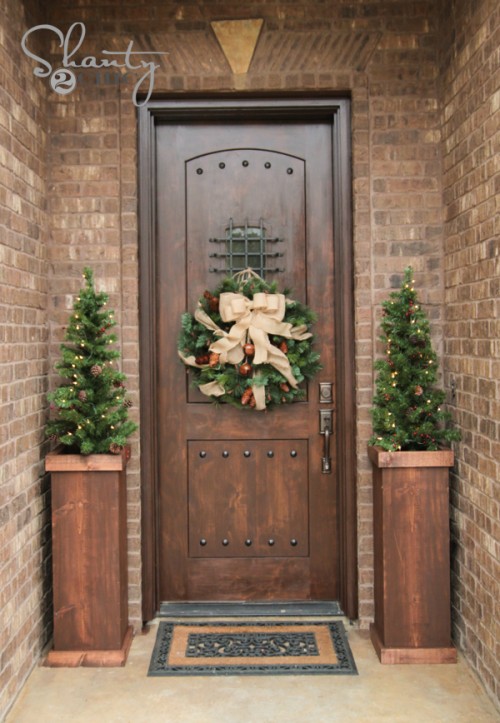
Here are a few projects that we have recently done to help you get your home holiday ready!

Thanks so much for stopping by!!!
~Ashley
Original article and pictures take http://www.shanty-2-chic.com/2013/12/10-wooden-blanket-ladder.html?utm_content="bufferbfaaa&utm_medium=social&utm_source=pinterest.com&utm_campaign=buffer" site
>
Комментариев нет:
Отправить комментарий