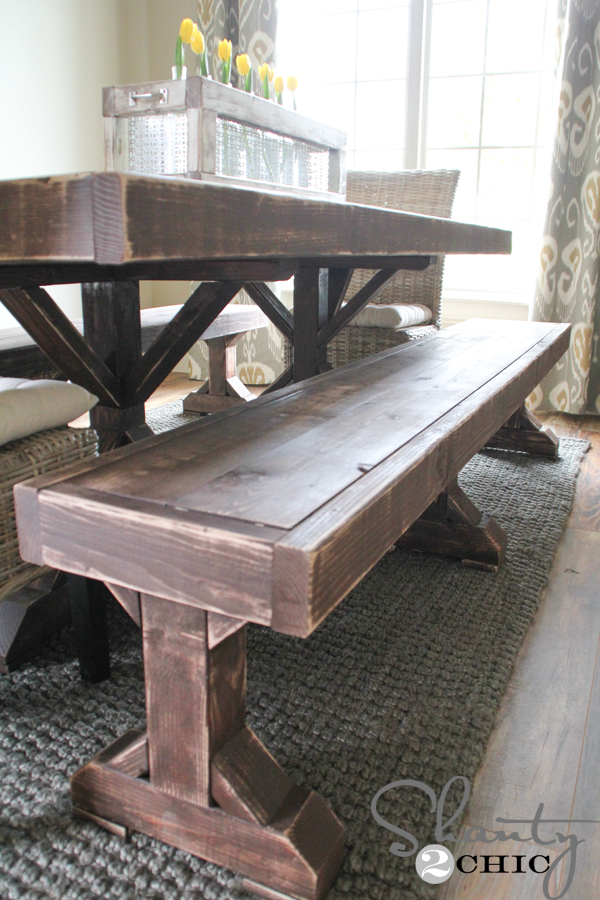
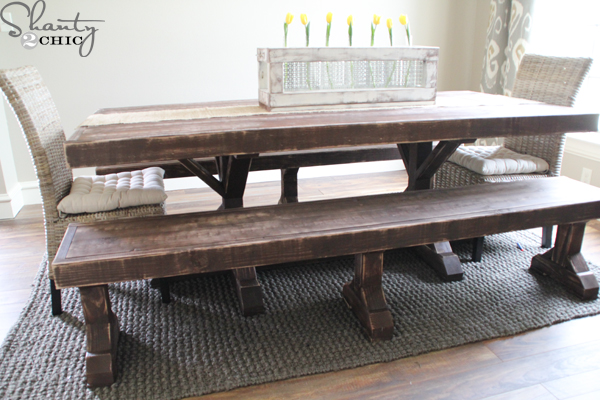
Hey guys!! I’m back to share the new benches that I built for my new dining table!
HERE!
The benches are just a small piece of the massive amount of furniture that I’m building for our new home but each room is starting to fill up They are very easy and I was able to build 2 for about $70 making my entire dining set about $180!!
As always, we have the FREE Printable Plans available for you HERE or you can click the image below

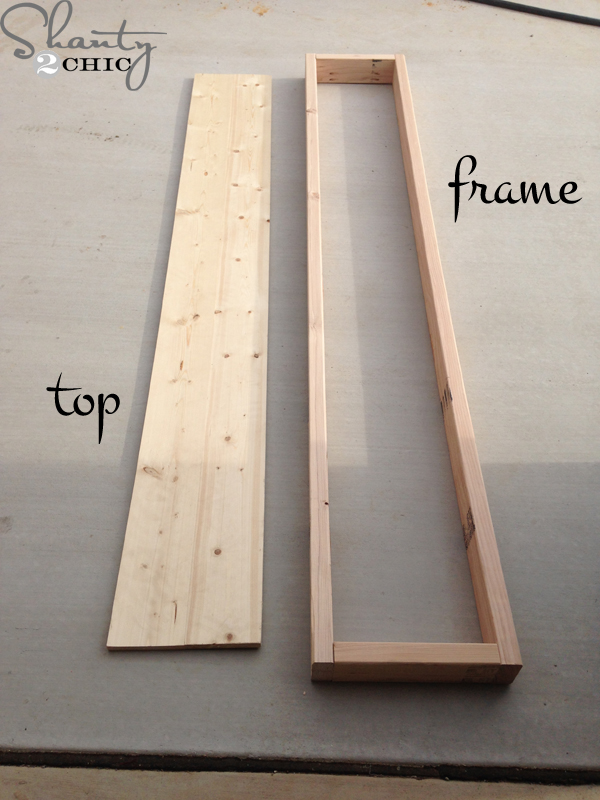

Bench tops – done Now time for the legs.
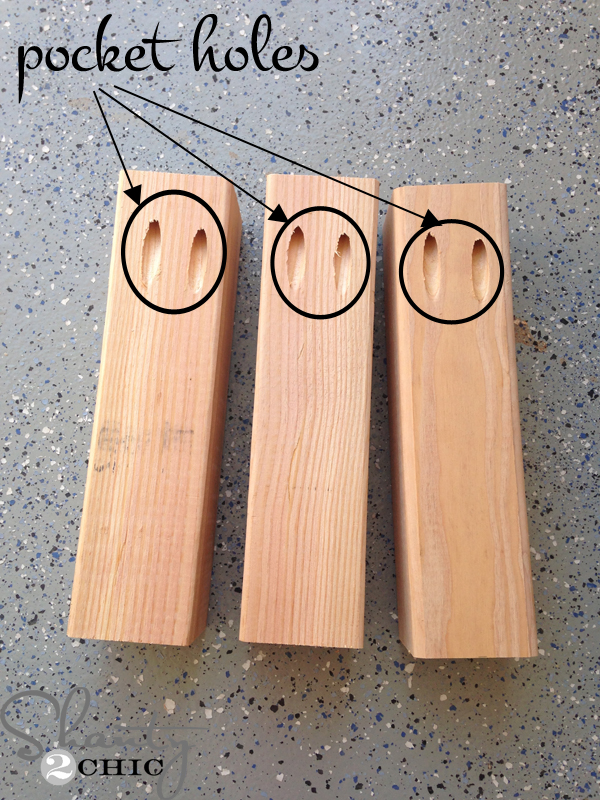
I cut the legs and drilled pocket holes in to them.
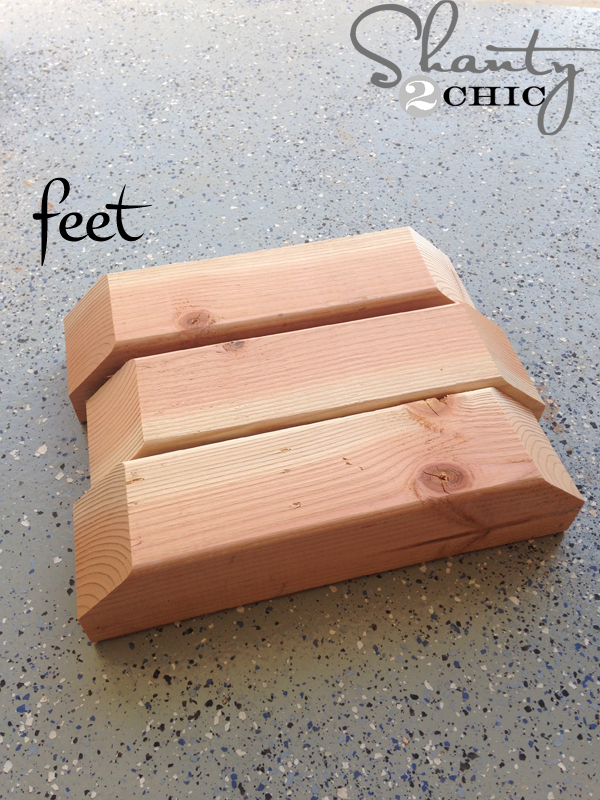
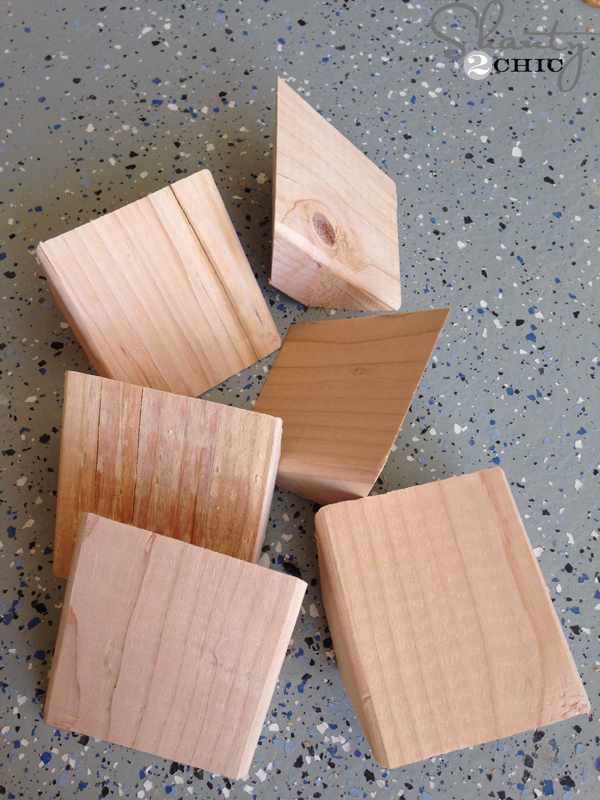
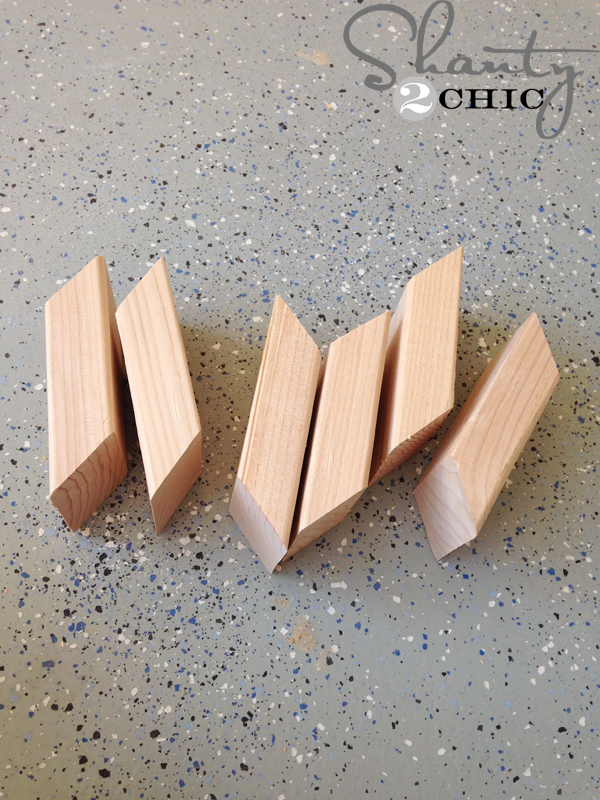
Then, I cut the feet. Don’t let the angles scare you. If you haven’t cut angles, these are easy You just cut a 45 degree angle on half of each end.
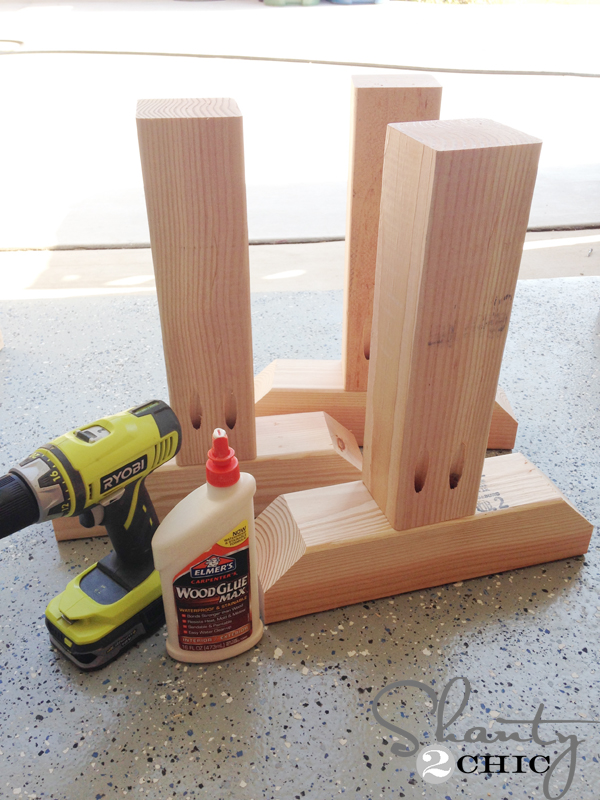
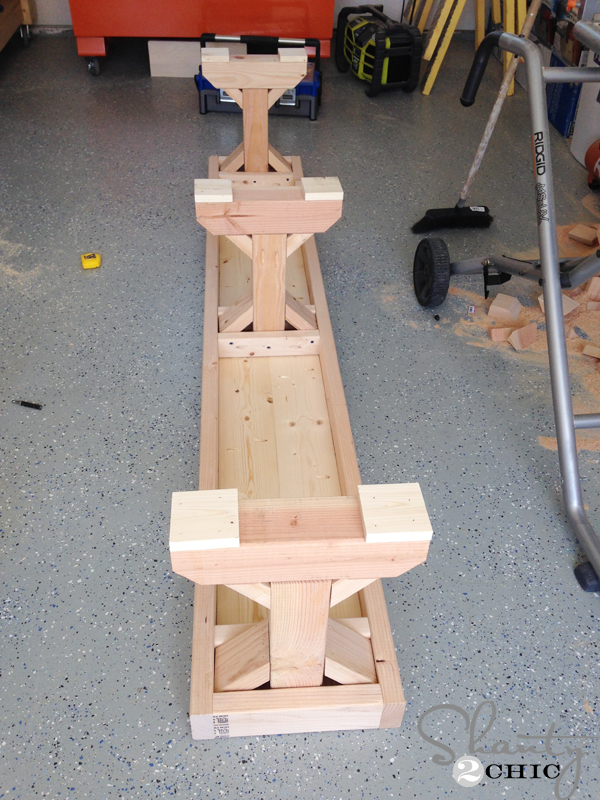
I attached the legs to the feet with wood glue and Kreg pocket screws.

I attached the small angle pieces first with wood glue and my Ryobi Airstrike Nailer. If you don’t have a nailer, you can use finishing nails or drill pilot holes for wood screws.
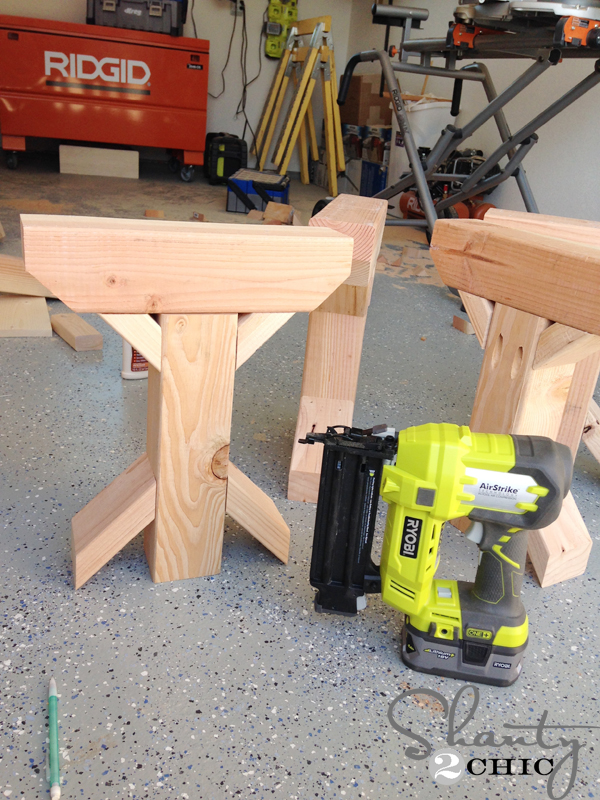

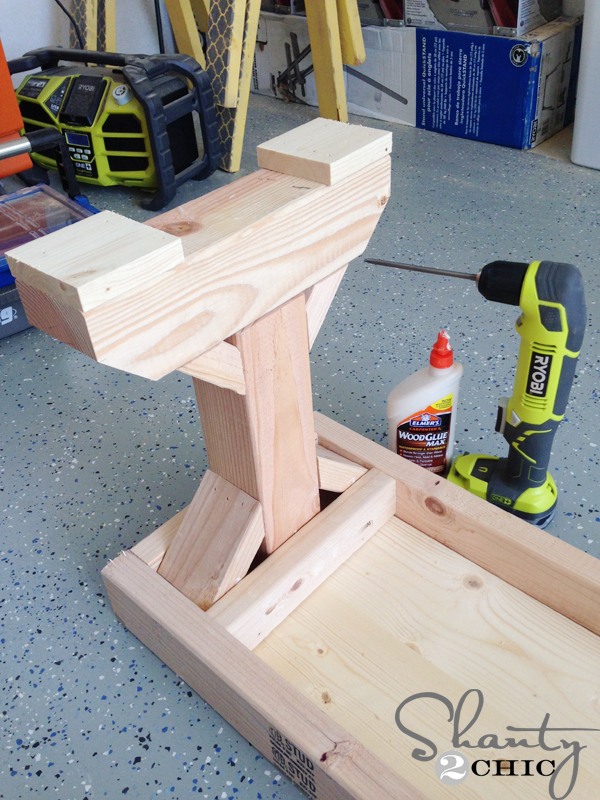
After all of the legs were assembled, I attached them to the bottom of the bench tops with wood glue and pocket hole screws. I used my Ryobi Right Angle Drill to attach the braces to the frame.

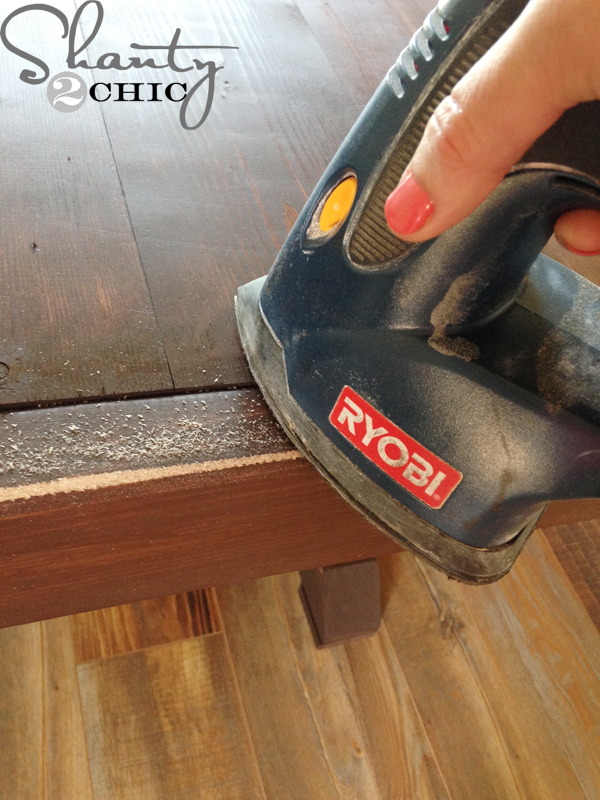
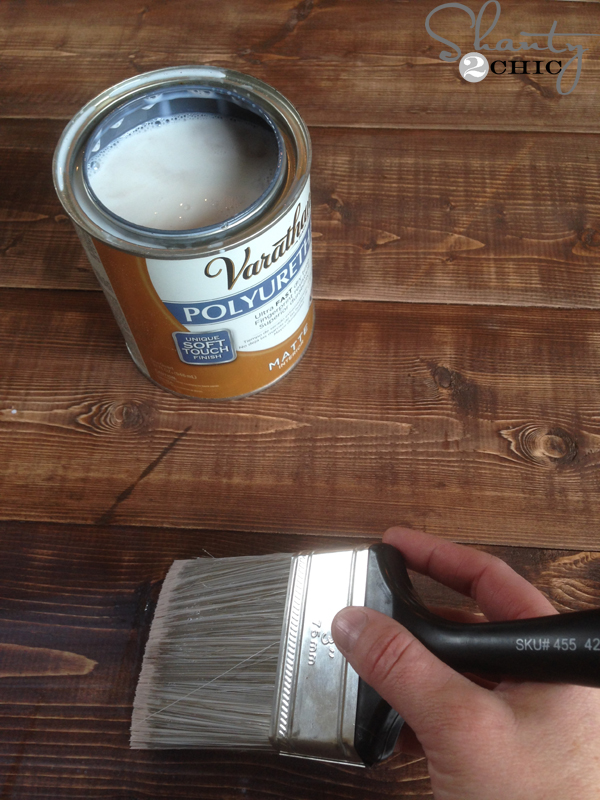
I stained both benches with one coat of Carrington stain to match my table. Rust-Oleum and Varathane are by far our favorite stains They are very rich in color and they dry in 1 hour! Perfect for busy (and impatient) moms … and dads

That was it One

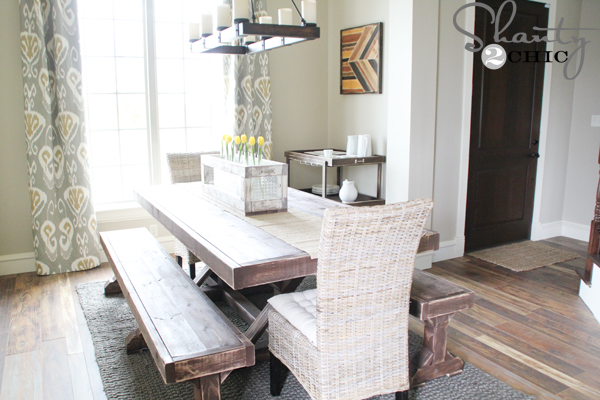
Loving how my dining room is coming along! I still have several more projects planned for this room but I am going to step away and move to another room for now I’ll be back soon too share!
Thanks so much for stopping by!
~Ashley
Like anything else you see in this room? You can click the links below to get the info
Original article and pictures take http://www.shanty-2-chic.com/2014/06/diy-benches-for-my-dining-table.html site
>
Комментариев нет:
Отправить комментарий